Dinner · Part 2 of 3: Instructions
Sticky Crockpot Char Siu Ribs for Easy Weeknight Dinners Step-by-step instructions
- Prep
- Cook
- Total
- Serves
- 4
Before you start
Before beginning, ensure your slow cooker is clean and ready for use. Take your baby back ribs out of the refrigerator about 20 minutes before you are ready to start, allowing them to lose some of their chill, which helps with even cooking.
Measure out all your glaze ingredients—hoisin, honey, soy sauce, Shaoxing wine, and five-spice powder—so they are ready to pour immediately. Have your garnishes, the green onions and sesame seeds, prepped and ready on the counter so you can plate the dish quickly once the cooking cycle ends.
Ingredients at a glance (8)
- 2 racks baby back ribs
- 3/4 cup hoisin sauce
- 1/3 cup honey
- 1/4 cup soy sauce
- 2 tbsp Shaoxing wine
- 1 tbsp five-spice powder
- green onions, for serving
- white sesame seeds, for serving
Instructions
Layering the ribs
- Prepare the ribsPlace the racks of baby back ribs upright inside the ceramic bowl of the slow cooker. Arrange them carefully so they fit comfortably, ensuring the meat is facing outward to maximize exposure to the heat and glaze.Look for Ribs are standing vertically in the cookerTip If the racks are too long to fit, cut them in half to ensure they stand properly.
- Add the glaze ingredientsPour the hoisin sauce, honey, soy sauce, Shaoxing wine, and five-spice powder directly over the upright ribs. Ensure the mixture coats the meat as it travels down to the bottom of the stoneware.Look for Glaze ingredients are poured over the ribsTip Do not worry about perfect coverage initially; the sauce will circulate during the slow-cooking process.
At the end of this phase, the ribs should be standing firmly in the slow cooker, and the glaze ingredients should be evenly distributed over the surface. The aroma of the five-spice and hoisin should be present as you cover the pot.
Ensure the lid is seated correctly to trap the steam, which is vital for the slow-cooking process that follows. The setup should look orderly, with the ribs occupying the space effectively to allow for proper heat circulation.
Slow cooking and glazing
- Slow cookCover the slow cooker with the lid and set it to cook on LOW for 6 hours. This slow, steady heat is essential for breaking down the connective tissues and rendering the fat for tender results.Look for Ribs are tender and meat is pulling away from the boneTip Avoid lifting the lid unnecessarily to keep the temperature consistent throughout the cooking cycle.
- Glaze and finishOnce the cooking time is complete, use a basting brush to coat the ribs thoroughly with the thickened, syrupy red glaze collected at the bottom of the pot. Ensure the internal temperature of the pork reaches 145°F (63°C), then allow the ribs to rest for 5 minutes before serving.Look for Ribs are glazed and meat reaches the target temperatureSafe temperature 145°F (63°C) internal temperature (steaks, chops and roasts)Tip The residual heat in the pot will help keep the glaze sticky while you prepare your serving platter.
When the six hours are up, the ribs should look deeply lacquered and dark red. The sauce at the bottom of the pot will have thickened significantly, bubbling with a syrupy texture. The meat should appear very tender and start to pull away from the bones. Use your brush to apply the reduction, ensuring every part of the rib is coated in the glossy glaze. The kitchen should smell incredibly savory and aromatic at this stage.
Plating and serving
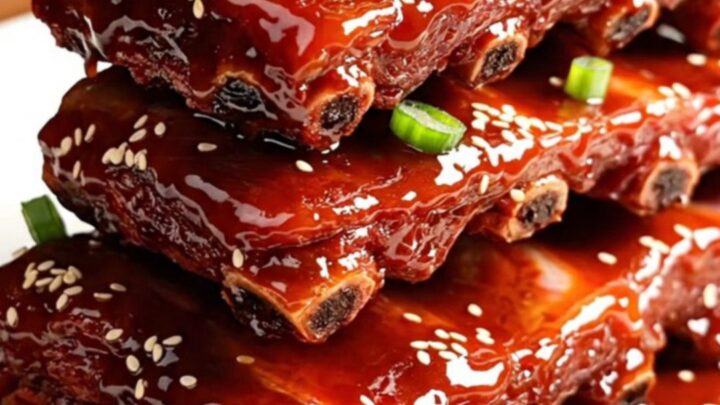
- Plating and garnishCarefully remove the ribs from the slow cooker and stack them on a white ceramic platter. Garnish the top generously with sliced green onions and toasted white sesame seeds for a vibrant finish and added texture before serving immediately.Look for Ribs are stacked and garnishedTip Serve with the extra sauce from the bottom of the pot drizzled over the top.
The ribs should be stacked beautifully on the platter, glistening with the red glaze. The green onions and sesame seeds should be evenly distributed, adding color and a slight crunch to the presentation.
The meat should be soft enough to pull apart with a fork, and the sauce should cling to the ribs without being overly runny. The final dish should be visually appealing, with a professional look that highlights the deep, caramelized color of the Char Siu.
Common mistakes
Avoid the common mistake of adding too much liquid; the ribs will release their own juices during the long cooking time, which will thin out the glaze. If the sauce looks too watery at the end, you can remove the ribs and simmer the sauce on the stovetop for a few minutes to reduce it to a syrup. Also, do not skip the resting period, as this allows the juices to redistribute throughout the meat, ensuring every bite is as moist and flavorful as possible.
How to tell it’s done
To determine if the ribs are done, look for meat that has visibly pulled away from the ends of the bones, indicating the connective tissue has successfully broken down. The ribs should feel tender when nudged with a fork.
Using a meat thermometer, insert it into the thickest part of the meat, ensuring it does not touch the bone, to confirm an internal temperature of at least 145°F (63°C). Once reached, allow the meat to rest for 5 minutes before slicing and serving.
- Steaks, chops and roasts: 145°F (63°C) in the thickest part, then a 3-minute rest
Up next · Part 3 of 3
2 variations · storage & make-ahead · 3 answers · printable card
Tips, FAQ & printable recipe (Part 3)← Back to the ingredients (Part 1)