Desserts · Part 2 of 3: Instructions
Spooky Purple Crispy Rice Treats for Halloween Step-by-step instructions
- Prep
- Cook
- Total
- Serves
- 12
Before you start
Before beginning, ensure all ingredients are at room temperature to facilitate the chocolate application process. Clear a flat, stable area on the counter where the baking sheet can rest undisturbed while the chocolate sets.
Have a bowl of warm water nearby to quickly clean the spoon if the chocolate begins to harden during the process. Verify that the parchment paper is securely taped or tucked to the baking sheet to prevent movement while decorating.
Ingredients at a glance (3)
- 12 squares purple crispy rice squares
- 2 oz dark chocolate, melted
- 24 pieces candy eyes
Instructions
Preparation and Setup
- Prepare the workspaceLine a baking sheet with parchment paper to ensure the treats do not stick. Arrange the purple crispy rice squares in neat rows on the prepared sheet to create a steady surface for decorating.Look for The squares are laid out evenly.Tip Using a flat, parchment-lined surface makes cleanup much faster after the chocolate sets.
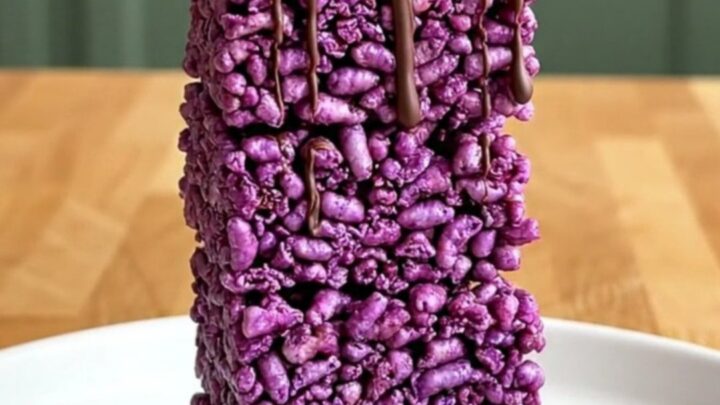
The baking sheet is lined with parchment and the purple squares are aligned in uniform rows. The space is clear of debris, and all decorative elements are ready for immediate use. The surface should be perfectly flat to ensure the chocolate drizzle does not pool to one side during the application process.
Chocolate Application
- Drizzle with chocolateMelt the dark chocolate in a microwave-safe bowl in short intervals until smooth. Using a spoon, drizzle the chocolate back and forth over each square to create thin, decorative stripes.Look for The chocolate flows in a smooth stream from the spoon.Tip Let the chocolate cool slightly before drizzling to maintain better control over the stripe thickness.
The chocolate has a glossy finish and flows steadily from the spoon. The stripes are consistent in width and cover the squares evenly without creating excessive thickness. The kitchen environment should be relatively cool to allow the chocolate to begin setting as soon as it hits the surface of the squares.
Final Decoration
- Add candy eyesWhile the chocolate drizzle is still soft, gently press two candy eyes onto each square. Once all eyes are in place, allow the treats to rest until the chocolate has completely hardened before serving.Look for The candy eyes remain fixed in place.Tip Work quickly so the chocolate does not set before the eyes are attached.
Each square features two well-placed candy eyes that are securely embedded in the chocolate. The chocolate drizzle has hardened, and the treats are stable enough to be moved to a serving plate without the decorations shifting.
The final result should look uniform and festive, with no visible streaks or messy chocolate spills.
Common mistakes
A common mistake is applying the chocolate while it is too hot, which can cause it to run and lose its decorative shape. Avoid overloading the squares with chocolate, as this can overwhelm the texture of the treats.
Ensure the candy eyes are added immediately after drizzling, as the chocolate will begin to set rapidly in cooler environments, making it difficult to adhere the decorations properly.
How to tell it’s done
The treats are considered done when the chocolate drizzle has reached a firm, set state. Gently touch the edge of a stripe; if it does not smudge and feels hard to the touch, the chocolate has reached the proper consistency.
The candy eyes should be firmly attached to the squares, showing no signs of sliding or movement when the squares are tilted.
Up next · Part 3 of 3
2 variations · storage & make-ahead · 3 answers · printable card
Tips, FAQ & printable recipe (Part 3)← Back to the ingredients (Part 1)