Dinner · Part 2 of 3: Instructions
Spinach Artichoke Queso Chicken Enchiladas in 45 Minutes Step-by-step instructions
- Prep
- Cook
- Total
- Serves
- 4
Before you start
Get everything ready before the first tortilla is filled, because assembly moves quickly once the filling is mixed. Shred 2 cups of cooked chicken and set it in a large bowl. Wilt the baby spinach in a skillet, squeeze it dry and chop it. Drain, pat dry and chop the artichoke hearts.
Let the cream cheese sit out until it softens, or soften it briefly in the microwave. Grate the mozzarella and Monterey Jack if using blocks, and warm the white jalapeño queso sauce so it pours. Heat the oven to 375°F (190°C), grease the baking dish, and warm the tortillas last so they stay pliable for rolling.
Ingredients at a glance (10)
- 2 cups shredded cooked chicken (about 10 oz, rotisserie or leftover)
- 1 cup sautéed baby spinach, squeezed dry and chopped
- 1 cup chopped artichoke hearts, patted dry
- 4 oz cream cheese, softened
- 1 cup shredded mozzarella
- 8 flour tortillas (8-inch), warmed
- 1 1/2 cups white jalapeño queso sauce, warmed (store-bought or made ahead)
- 1 cup shredded Monterey Jack
- Roma tomatoes, diced, for serving
- Fresh parsley, chopped, for serving
Instructions
Prep the filling
- Heat the oven and prep the dishHeat the oven to 375°F (190°C) and lightly grease a 9x13-inch baking dish. Spread a thin layer of the warm white jalapeño queso sauce over the bottom so the tortillas do not stick and pick up flavor as they bake.Look for The oven should be fully preheated before the enchiladas go in, so the cheese melts evenly.Tip Warm the queso in the microwave in 30-second bursts so it pours smoothly.
- Sauté and dry the spinachWilt the baby spinach in a dry skillet over medium heat for 1 to 2 minutes, then transfer it to a paper towel and squeeze out as much water as possible. Chop it roughly. Wet spinach is the number one cause of a watery filling.Look for The leaves should be fully wilted and the squeezed ball should feel barely damp.Tip Frozen thawed spinach works too; squeeze it very dry before measuring.
- Mix the creamy fillingIn a large mixing bowl, stir together the shredded chicken, squeezed spinach, chopped artichoke hearts, softened cream cheese and mozzarella until every piece is coated and the mixture holds together when pressed. Divide it into 8 even portions with a spatula.Look for The filling should clump together like a thick chicken salad, not crumble apart.Tip Soften the cream cheese fully or it will leave cold streaks in the filling.
By the end of this phase the oven is at 375°F (190°C), the baking dish is greased and slicked with a thin layer of warm queso, and the filling sits in the mixing bowl ready to portion. It should look thick and glossy, with spinach and artichoke pieces evenly distributed through the chicken and no visible streaks of plain cream cheese.
Press a spoonful between your fingers: it should clump and hold its shape. If it slides apart or a puddle of liquid collects in the bowl, squeeze more water out of the spinach before moving on.
Roll and sauce
- Warm the tortillasWrap the flour tortillas in a damp paper towel and microwave them for 30 to 45 seconds, or slide the stack into the warming oven for a few minutes. Warm tortillas bend without cracking, which is what keeps each enchilada sealed.Look for A warmed tortilla should fold over your hand with no white cracking lines at the bend.Tip Warm them right before rolling so they stay pliable.
- Fill and roll the enchiladasSpoon one portion of filling down the center of each tortilla, roll it up snugly, and place it seam side down in the prepared dish. Nestle the 8 enchiladas side by side so they support each other while baking.Look for The seams should face down and stay closed with no filling peeking out at the ends.Tip Do not overfill; a snug roll bakes more evenly than a bursting one.
- Sauce and topPour the remaining warm white jalapeño queso sauce evenly over the rolled enchiladas, letting it run into the gaps between them, then scatter the shredded Monterey Jack over the top in an even layer. Every surface should be covered so the tortillas steam rather than dry out.Look for No dry tortilla should show through the sauce and cheese blanket.Tip Keep the sauce warm until this moment; cold queso clumps instead of pouring.
The dish now holds 8 snugly rolled enchiladas, seam side down, packed side by side in two rows. The warm queso covers every surface and has run into the gaps between the rolls, and the shredded Monterey Jack lies in an even layer on top with no tortilla showing through. Nothing should be floating loose or uncovered. Give the pan a gentle tilt: the sauce should move slowly, like warm custard. If any corner looks dry, spoon a little extra queso over it before the pan goes into the oven.
Bake and finish
- Bake until golden and bubblingBake at 375°F (190°C) for 20 minutes, until the top is golden in spots and the sauce bubbles at the edges. Because the filling contains cooked chicken, check that the center of the filling reaches 165°F (74°C) on an instant-read thermometer before serving.Look for Bubbling sauce at the edges and light golden freckles on the cheese mean it is ready.Safe temperature 165°F (74°C) internal temperature (poultry)Tip Switch the oven to broil for the last minute if the top needs more color.
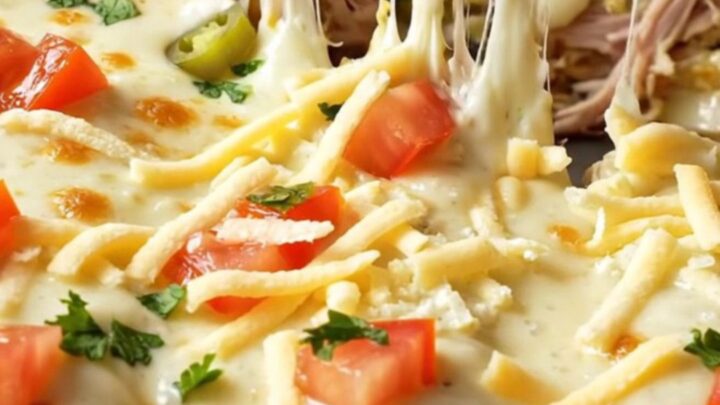
- Rest, garnish and serveRest the dish for 5 minutes so the queso thickens slightly and the enchiladas hold their shape. Scatter diced Roma tomatoes and chopped fresh parsley over the top, then lift out portions with a wide spatula and serve while the cheese still stretches.Look for The queso should settle from a rolling bubble to a slow shimmer before serving.Tip A thin spatula lifted straight up keeps every enchilada intact on the plate.
Out of the oven, the top is lightly golden with bubbling sauce visible at the edges, and the whole pan smells of toasted cheese and mild jalapeño. The center of the filling has reached 165°F (74°C) on an instant-read thermometer. After a 5-minute rest, the queso has settled from a rolling bubble to a slow shimmer, and a fork drawn through the top leaves a clean track that slowly fills back in. Garnish with the diced Roma tomatoes and parsley just before serving, while the cheese still stretches in long strings.
Common mistakes
Three mistakes account for almost every disappointing pan. First, wet spinach: if the wilted greens are not squeezed nearly dry, the filling weeps and the tortillas turn soggy. Second, cold queso: sauce straight from the refrigerator clumps and sits on top in blobs instead of flowing into the gaps, leaving dry patches.
Warm it before pouring. Third, overfilling the tortillas: more than about a third of a cup each makes rolling difficult and the seams burst during baking. Also resist skipping the sauce layer on the bottom of the dish; without it, the underside of the enchiladas sticks and tears when served.
How to tell it’s done
The enchiladas are done when the queso bubbles steadily at the edges of the dish and the Monterey Jack on top shows light golden freckles, about 20 minutes in a fully preheated 375°F (190°C) oven. The sauce should look thickened rather than watery, and the tortilla edges should be soft and saturated, never brittle.
Because the filling is built around cooked chicken, confirm doneness with an instant-read thermometer: the center of the filling should reach 165°F (74°C). If the top browns before the center is there, tent the dish with foil and continue a few minutes longer. A 5-minute rest after baking lets the queso thicken so each enchilada lifts out cleanly.
- Poultry: 165°F (74°C) in the thickest part
Up next · Part 3 of 3
4 variations · storage & make-ahead · 5 answers · printable card
Tips, FAQ & printable recipe (Part 3)← Back to the ingredients (Part 1)