Dinner · Part 2 of 3: Instructions
Spinach and Feta Orzo Bake for a Quick Weeknight Dinner Step-by-step instructions
- Prep
- Cook
- Total
- Serves
- 4
Before you start
Before beginning, ensure all ingredients are measured and ready to go. Chop the baby spinach into bite-sized pieces to ensure it distributes evenly. Preheat the oven to 375°F (190°C) well in advance so it reaches the target temperature before you slide the dish inside.
Have your baking dish placed on a stable surface, such as a countertop, to make the assembly process clean and efficient. Using a pitcher to pour the broth makes it much easier to control the flow and avoid spills while filling the baking dish.
Ingredients at a glance (4)
- 1 1/2 cups dry orzo pasta
- 2 cups fresh baby spinach, chopped
- 3 cups lemon garlic vegetable broth
- 1/2 cup crumbled feta cheese
Instructions
Assembling the ingredients
- Assemble the basePreheat the oven to 375°F (190°C). In a large rectangular ceramic baking dish, spread the dry orzo in an even layer across the bottom. Scatter the chopped baby spinach evenly over the pasta.Look for The orzo should be distributed in a flat, uniform layer to ensure even absorption of the liquid during the baking process.Tip Ensure the baking dish is large enough so the orzo is not piled too deep, which helps it cook through evenly.
The orzo and spinach should be spread in a flat, even layer across the bottom of the dish. There should be no large piles of spinach that could prevent the liquid from reaching the pasta underneath. Everything should look organized and ready for the liquid addition, with the baking dish sitting steadily on the counter.
Adding liquid and seasoning
- Add liquid and cheesePour the lemon garlic broth over the orzo and spinach mixture until the pasta is just submerged. Distribute the crumbled feta cheese evenly over the top of the dish.Look for The liquid should cover the pasta completely but not overflow the sides of the baking dish.Tip Gently shake the baking dish to ensure the broth settles around all the orzo grains.
The broth should be poured gently to avoid displacing the orzo layer, and the feta should be scattered uniformly across the top. The dish should look moist but not flooded, and the feta should be visible as a distinct layer on the surface, ready to melt and flavor the pasta as it bakes.
Final baking and resting
- Bake and finishPlace the dish into the preheated oven and bake until the broth is fully absorbed and the edges of the pasta are lightly golden. Remove from the oven and let rest for five minutes before serving to allow the textures to set.Look for The surface will appear slightly golden, and the liquid will have been absorbed by the orzo, resulting in a tender texture.Tip If the top looks too dry, ensure the feta is well-distributed to provide moisture.
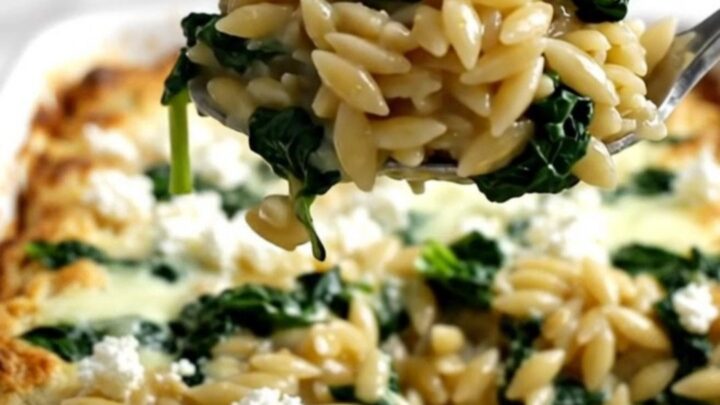
The finished bake will have a golden-brown top with visible bits of melted feta. The liquid will be mostly absorbed, creating a creamy coating on the orzo.
The kitchen will smell fragrant from the lemon and garlic. After resting for five minutes, the dish should be firm enough to hold its shape when scooped with a spoon.
Common mistakes
A common mistake is using too much or too little broth, which can result in either mushy pasta or dry, crunchy orzo. Always use the specified ratio of 3 cups of broth to 1 1/2 cups of orzo to achieve the perfect texture.
Another error is failing to spread the ingredients into an even layer, which can cause some parts of the pasta to cook through while others remain underdone. Ensure the spinach is well-distributed to avoid large, uneven clumps.
How to tell it’s done
The orzo is done when it is tender to the bite and has absorbed nearly all the liquid, leaving behind a creamy, thickened consistency. The edges of the orzo should appear slightly toasted and golden, and the feta on top should be soft and beginning to brown in spots.
Allow the dish to rest for at least five minutes after removing it from the oven, as this helps the sauce thicken further and makes the dish easier to scoop and serve.
Up next · Part 3 of 3
2 variations · storage & make-ahead · 3 answers · printable card
Tips, FAQ & printable recipe (Part 3)← Back to the ingredients (Part 1)