Dinner · Part 2 of 3: Instructions
Spicy Honey Chipotle Garlic Fried Chicken Sandwich Step-by-step instructions
- Prep
- Cook
- Total
- Serves
- 4
Before you start
Before you start, set up your workspace. Combine the marinade ingredients in a large bowl and add the chicken; cover and refrigerate for at least 30 minutes. In a shallow dish, mix the flour, cornstarch, salt, and pepper. Have a wire rack ready for the coated and fried chicken.
Fill a deep skillet or Dutch oven with oil and attach a deep-fry thermometer. Prepare the glaze ingredients and the assembly components: split the brioche buns, measure the ranch, and slice the pickles. This mise en place makes the frying and assembly seamless.
Ingredients at a glance (19)
- 2 lb boneless, skinless chicken breasts
- 2 cups buttermilk
- 1/2 cup pickle juice
- 1 tbsp garlic powder
- 1 tbsp paprika
- 2 cups all-purpose flour
- 1/2 cup cornstarch
- 1 tsp salt
- 1/2 tsp black pepper
- 4 cups vegetable oil, for frying
- 4 tbsp butter
- 1/3 cup honey
- 2 tbsp minced chipotle peppers in adobo sauce
- 2 tbsp soy sauce
- 3 cloves garlic, minced
- 1 tbsp apple cider vinegar
- 4 brioche burger buns
- 1/2 cup homemade dill ranch dressing
- 1/2 cup crinkle-cut pickles
Instructions
Marinate and Dredge
- Marinate the chickenIn a large bowl, whisk together the buttermilk, pickle juice, garlic powder, and paprika. Add the chicken breasts, turning to coat. Cover and refrigerate for at least 30 minutes or up to 4 hours.Look for The chicken is fully submerged in the marinade.Tip For extra flavor, poke the chicken a few times with a fork before marinating.
- Prepare the breadingIn a shallow dish, whisk together the flour, cornstarch, salt, and black pepper. Set aside.Look for The breading is well combined and free of lumps.Tip Use a fork to mix; this keeps the mixture airy.
The chicken is submerged in a tangy buttermilk marinade, and the flour mixture is ready. The chicken pieces are coated in a thick, craggy layer of flour, with no bare spots.
The coating should feel dry to the touch but have visible nubs and crannies that will crisp up during frying.
Fry and Glaze
- Dredge the chickenRemove the chicken from the marinade, letting excess drip off. Dredge each piece in the flour mixture, pressing firmly to create craggy crumbles. Dip back into the marinade, then dredge again, pressing to adhere. Place on a wire rack.Look for The coating is thick and craggy, with no dry spots.Tip Let the coated chicken sit for 10 minutes before frying to help the coating stick.
- Heat the oilIn a deep skillet or Dutch oven, heat the vegetable oil over medium-high heat until it reaches 350°F (175°C) on a deep-fry thermometer.Look for The oil shimmers and a pinch of flour sizzles immediately.Tip Use a thermometer for accuracy; oil that is too hot will burn the coating.
- Fry the chickenCarefully place the chicken in the hot oil, working in batches to avoid crowding. Fry for 6 minutes, turning occasionally, until deep golden brown and cooked through. Transfer to a wire rack.Look for The chicken is deeply golden and crispy.Safe temperature 165°F (74°C) internal temperature (poultry)Tip Maintain the oil temperature between 325°F and 350°F.
- Make the glazeIn a small saucepan over medium heat, melt the butter. Add the honey, minced chipotle, soy sauce, garlic, and vinegar. Simmer for 2-3 minutes until slightly thickened and bubbling.Look for The glaze is glossy and coats the back of a spoon.Tip Keep the glaze warm on low heat while you assemble.
- Toss the chicken in glazeAdd the fried chicken to the saucepan with the glaze and toss until each piece is well coated and dripping.Look for The chicken is sticky and glossy with glaze.Tip Work quickly so the chicken stays crispy.
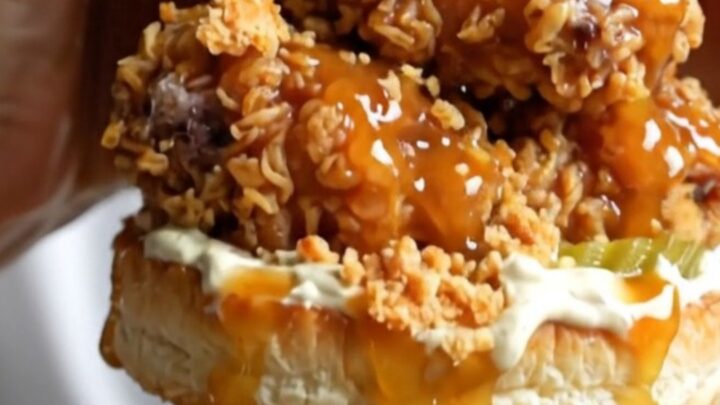
The oil is at a steady 350°F, and the chicken is frying with a vigorous sizzle. After 6 minutes, the pieces are deep golden brown and floating. The glaze is bubbling and glossy, and when the chicken is tossed, it's thoroughly coated and dripping with sticky, spicy sweetness.
Assemble and Serve
- Toast the bunsSlice the brioche buns in half. Toast them cut-side down in a dry skillet over medium heat until golden brown.Look for The buns are lightly toasted and fragrant.Tip Toasting adds structure and prevents sogginess.
- Spread the ranchSpread a generous amount of dill ranch on both the top and bottom halves of each toasted bun.Look for A thick, even layer of ranch covers the buns.Tip The cool ranch balances the spicy glaze.
- Assemble the sandwichesPlace a glazed chicken breast on the bottom bun. Top with a handful of crinkle-cut pickles. Cover with the top bun.Look for The sandwich is tall, with pickles peeking out.Tip Press gently to keep the filling in place.
- Serve immediatelyServe the sandwiches right away while the chicken is still crispy and the glaze is warm.Look for The glaze glistens and the bun is crisp.Tip Have napkins ready—this is a messy, delicious sandwich.
The brioche buns are toasted to a golden hue, and a generous layer of dill ranch spreads easily. The glazed chicken sits proudly on the bottom bun, topped with crunchy pickles. The top bun is in place, and the sandwich is tall and inviting, with glaze and ranch peeking out.
Common mistakes
One common mistake is overcrowding the skillet, which drops the oil temperature and results in soggy, greasy chicken. Fry in batches, giving each piece room to float. Another is skipping the resting time after dredging; this lets the coating set and adhere better.
Also, be careful not to overheat the glaze—it can burn and become bitter. Finally, don't skip toasting the buns; it provides a barrier that keeps the sandwich from becoming soggy.
How to tell it’s done
The chicken is done when it reaches an internal temperature of 165°F (74°C) in the thickest part, and the coating is deep golden brown. The glaze should be bubbling and slightly thickened.
The buns should be toasted until golden and crisp. When you take a bite, the crust should shatter, the chicken should be juicy, and the glaze should be sticky and sweet with a kick of heat.
- Poultry: 165°F (74°C) in the thickest part
Up next · Part 3 of 3
4 variations · storage & make-ahead · 5 answers · printable card
Tips, FAQ & printable recipe (Part 3)← Back to the ingredients (Part 1)