Dinner · Part 2 of 3: Instructions
Smothered Hamburger Steak with Onion Gravy in One Pan Step-by-step instructions
- Prep
- Cook
- Total
- Serves
- 4
Before you start
Set out all ten ingredients and the equipment before the skillet goes on the heat. Slice both onions thin and evenly so they soften at the same rate. Measure the breadcrumbs, Worcestershire sauce, flour, and broth into small bowls near the stove.
Chill the ground beef until the last moment; cold meat mixes and shapes more cleanly than meat that has sat out. Give the cast-iron skillet a dry burner with room to work, set the instant-read thermometer beside the cutting board, and lay out four warm plates so the steaks can go straight from the pan to the table while the gravy is still loose and glossy.
Ingredients at a glance (10)
- 1 1/2 lb ground beef (80/20)
- 1/2 cup plain breadcrumbs
- 1 large egg
- 2 tsp Worcestershire sauce
- 1 tsp kosher salt, divided
- 1/2 tsp freshly ground black pepper
- 3 tbsp unsalted butter
- 2 large yellow onions, thinly sliced
- 3 tbsp all-purpose flour
- 2 cups beef broth
Instructions
Mix and Shape
- Mix the Steak MixtureIn a large bowl, combine the ground beef, breadcrumbs, egg, Worcestershire sauce, 3/4 teaspoon of the kosher salt, and the black pepper. Mix gently with your hands just until everything comes together. Overworking the meat makes the patties dense, so stop as soon as no dry streaks remain.Look for The mixture should hold together when squeezed gently but still look loose, shaggy, and slightly tacky rather than smooth.Tip Cold beef blends more cleanly, so keep the meat in the refrigerator until this exact moment.
- Shape the PattiesDivide the mixture into four equal portions and shape each into an oval patty about 3/4 inch thick. Press a small dimple into the center of each one with your thumb so the patties stay flat as they cook. Set them on a plate and keep them chilled until the skillet is ready.Look for Even thickness matters: each patty should look uniform, with no large cracks at the edges.Tip Damp hands keep the beef mixture from sticking while you shape, so wet them between patties.
By the end of the first phase, four uniform oval patties sit chilled on a plate, ready for the skillet. The raw mixture should look cohesive but still loose, holding together when squeezed without being compacted into something sausage-like.
Each patty should be about 3/4 inch thick with a thumb dimple in the center, and the edges should show no large cracks. If the patties have softened while shaping, slide them back into the refrigerator for five minutes so they hold their shape during the sear. Cold patties brown more cleanly and release less moisture into the pan.
Sear Hard
- Preheat and Sear the SteaksPlace a 12-inch cast-iron skillet over medium-high heat and let it preheat for 3 minutes, until a faint wisp of smoke rises. Lay the patties into the hot dry skillet and sear undisturbed for 4 minutes. Turn each steak and sear the second side for another 3 minutes until deeply browned.Look for The crust should release easily from the pan and look deep mahogany brown, never gray or pale.Tip No oil is needed; the beef renders enough fat to sear in, and a hot pan prevents sticking.
- Rest the Steaks on a PlateTransfer the seared steaks to a clean plate; they will finish cooking in the gravy later. Pour off all but about 2 tablespoons of the rendered fat, reserving the rest for another use. The browned bits stuck to the pan bottom are pure flavor and stay right where they are.Look for The steaks should look browned on both sides but not yet cooked all the way through.Tip Leave every dark speck in the pan; it dissolves into the gravy and deepens the flavor.
The second phase ends with every steak deeply browned on both faces and resting on a clean plate while the skillet holds a thin film of fat over a carpet of dark browned bits. The crust should look mahogany, not gray or pale, and the pan should smell toasty and savory.
Nothing should be black; if any spot has gone past dark brown to charred, lower the heat slightly. Check that only about 2 tablespoons of rendered fat remain before starting the onions, and confirm the steaks look seared but visibly not cooked through, since the gravy phase finishes the job gently.
Smother in Gravy
- Soften the OnionsSet the skillet over medium heat and add the butter. Once it melts, add the sliced onions and the remaining 1/4 teaspoon of kosher salt. Cook, stirring often and scraping the pan bottom, for 8 to 10 minutes until the onions are soft, golden, and coated with the pan drippings.Look for The onions should slump, turn golden at the edges, and smell sweet and savory rather than sharp.Tip Scraping up the browned bits here seasons the onions from the very start of cooking.
- Build the Gravy BaseSprinkle the flour evenly over the onions and stir constantly for 1 minute to cook out the raw taste. The flour should coat every slice and the pan should look dry and slightly pasty. This quick roux is what turns the broth into a gravy that clings instead of pooling.Look for A faint nutty smell means the flour is ready; any darker and it may taste bitter.Tip Stir the whole time so the flour does not scorch on the hot cast iron.
- Add Broth and SimmerPour in the beef broth a little at a time, stirring after each addition so no lumps form. Bring the gravy to a gentle simmer, then nestle the steaks and any collected juices back into the pan. Simmer uncovered for 8 to 10 minutes, spooning gravy over the steaks now and then, until the center of the thickest steak reaches 160°F (71°C).Look for The gravy should coat the back of a spoon and the steaks should look glossy.Safe temperature 160°F (71°C) internal temperature (ground meat)Tip Add the broth slowly at first; a smooth, thick start means no lumps later on.
- Check Temperature and ServeCheck the thickest steak with an instant-read thermometer; it must register 160°F (71°C) in the center, the safe temperature for ground beef. Spoon the onions and gravy generously over the steaks on warm plates and serve right away. The gravy thickens slightly as it sits, so have the plates ready before you check.Look for The juices around the steaks should run clear, and the gravy should nap the meat thickly.Safe temperature 160°F (71°C) internal temperature (ground meat)Tip Warm plates keep the gravy fluid on the way from the skillet to the table.
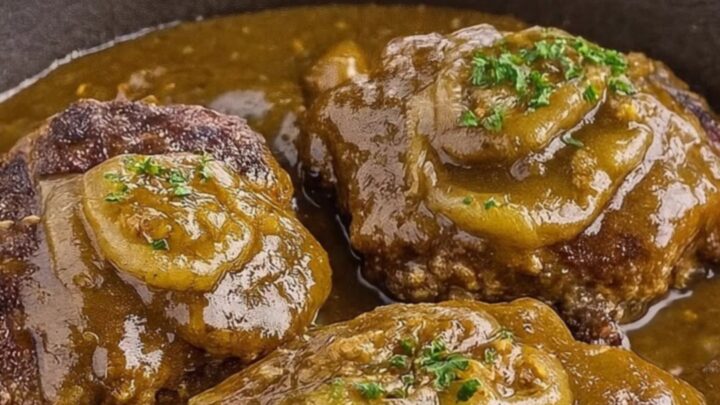
The final phase ends with steaks simmered through to 160°F (71°C) at the center of the thickest one, buried under soft golden onions and a gravy that thickly coats the back of a spoon. The pan should smell sweet and savory, with the broth reduced and seasoned by the onions and the seared drippings. Lift a steak with the spatula: it should hold together cleanly and glisten. Taste the gravy for salt and adjust before serving, remembering the broth and Worcestershire both carry salt. Spoon everything over warm plates immediately, while the gravy still flows.
Common mistakes
The most common mistake is rushing the sear: patties placed in a not-quite-hot pan steam instead of browning and never build a crust. The second is overmixing the beef, which turns tender steaks dense; mix only until the ingredients disappear. Skipping the flour-cooking minute leaves a raw, pasty taste in the gravy. Adding all the broth at once almost guarantees lumps, so pour gradually and stir. Finally, crowding the skillet drops the temperature; four patties fit comfortably in a 12-inch pan, but in anything smaller, sear in two batches.
How to tell it’s done
The surest sign of doneness is temperature: the center of the thickest steak must read 160°F (71°C) on an instant-read thermometer, the safe internal temperature for ground beef. Visually, the steaks should look glossy and fully coated in gravy with no pink at the surface, and the juices around them should run clear.
The onions should have collapsed into soft golden strands, and the gravy should be thick enough to coat a spoon and hold a line when dragged across the pan bottom. If the gravy thickens past spoonable, loosen it with a splash of broth; if it seems thin, simmer two more minutes uncovered.
- Ground meat: 160°F (71°C) in the thickest part
Up next · Part 3 of 3
4 variations · storage & make-ahead · 5 answers · printable card
Tips, FAQ & printable recipe (Part 3)← Back to the ingredients (Part 1)