Dinner · Part 2 of 3: Instructions
Smoky Cajun Blackened Chicken Alfredo Step-by-step instructions
- Prep
- Cook
- Total
- Serves
- 4
Before you start
Before beginning, ensure all ingredients are measured and ready, as the cooking process moves quickly. Slice the bell peppers into thin strips and mince the garlic finely to ensure they cook evenly. Grate the Parmesan cheese and have the heavy cream and butter measured.
Pat the chicken breasts thoroughly dry with paper towels, as excess moisture will steam the chicken rather than searing it. Prepare a large pot of salted water for the pasta and have it ready to boil when the chicken is finished searing.
Ingredients at a glance (12)
- 500 g chicken breasts
- 2 tbsp Cajun seasoning
- 1 tsp smoked paprika
- 1/4 tsp cayenne pepper
- 150 g bell peppers, sliced
- 5 cloves garlic, minced
- 400 g fettuccine
- 300 ml heavy cream
- 45 g butter
- 110 g Parmesan cheese, grated
- 2 Roma tomatoes, diced
- 2 tbsp green onions, sliced
Instructions
Searing the seasoned chicken
- Season the chickenPat the chicken breasts dry with paper towels to ensure a better sear. Rub the Cajun seasoning, smoked paprika, and cayenne pepper evenly over all sides of the chicken to create a flavorful crust.Look for The chicken is fully and evenly coated with the spice blend.Tip Using dry chicken helps the spices adhere better for a superior blackened crust.
- Sear the chickenHeat a cast-iron skillet over medium-high heat. Once hot, add the seasoned chicken breasts and sear for 4 minutes per side at approximately 410°F (210°C). Cook until the internal temperature reaches 165°F (74°C). Remove from the pan, let rest for at least 5 minutes, then slice into strips.Look for The chicken develops a dark, spicy crust and reaches the required internal temperature.Safe temperature 165°F (74°C) internal temperature (poultry)Tip Ensure the pan is hot before adding the chicken to achieve that signature blackened texture.
The kitchen should be filled with the smoky aroma of toasted spices and searing meat. The chicken breasts should have a dark, charred exterior that looks crisp and inviting. Check that the chicken is cooked through to the center, ensuring the juices run clear and the texture is firm.
The pan will have some flavorful browned bits on the bottom, which are essential for the next phase of the sauce preparation. Allow the chicken to rest for a few minutes before slicing.
Creating the velvety sauce
- Prepare the sauce baseIn the same skillet, sauté the sliced bell peppers and minced garlic until fragrant and tender. Pour in the heavy cream and add the butter. Bring the mixture to a gentle simmer at 190°F (88°C) while stirring.Look for The cream mixture begins to bubble gently and thicken slightly.Tip Scrape the browned bits from the bottom of the skillet for extra flavor.
- Finish the sauceStir in the grated Parmesan cheese until fully melted and smooth. Simmer for another minute until the sauce is velvety and coats the back of a spoon.Look for The sauce is creamy, smooth, and coats a spoon evenly.Tip Use freshly grated Parmesan for the best melting consistency.
The sauce should smell rich and garlicky, with the bell peppers softened but still retaining a slight bite. The mixture of cream, butter, and Parmesan should look smooth, thick, and perfectly emulsified. There should be no signs of oil separation. Test the consistency by dipping a spoon; the sauce should cling to the back of the spoon without running off too quickly. Ensure the heat is kept low to maintain the smooth, creamy texture of the Parmesan base.
Tossing and final assembly
- Assemble the dishAdd the cooked fettuccine to the sauce, tossing gently to coat every strand. Top with the sliced blackened chicken, diced Roma tomatoes, and fresh green onions before serving.Look for The pasta is glossy and perfectly coated in the Cajun-infused cream sauce.Tip Add a splash of pasta water if the sauce becomes too thick.
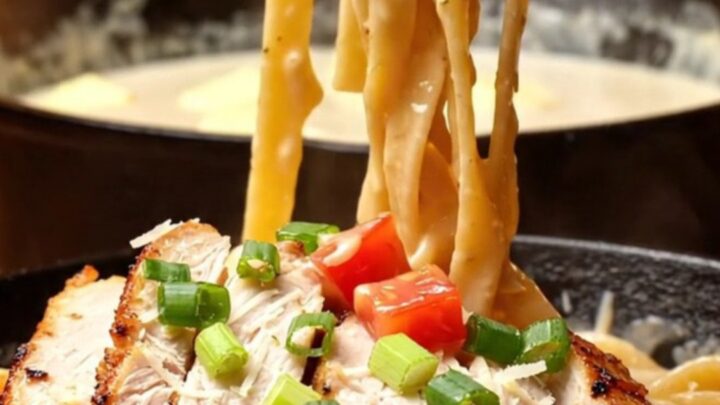
The final dish should be a beautiful combination of glossy, cream-coated pasta topped with slices of blackened chicken and bright pops of color from the tomatoes and green onions. Every piece of pasta should be evenly coated. The dish should look vibrant and cohesive, with the chicken slices arranged neatly on top. Check that the sauce is clinging well to the fettuccine. Serve immediately while hot to enjoy the best texture and flavor of the cream sauce.
Common mistakes
Avoid overcrowding the skillet when searing the chicken, as this lowers the pan temperature and prevents the development of a proper crust. Do not rush the searing process; allow the chicken to develop a deep color on each side.
When making the sauce, avoid boiling the cream vigorously, as this can cause the fat to separate. Instead, maintain a steady, gentle simmer. Ensure the pasta is not overcooked before adding it to the sauce, as it will continue to absorb the heat and moisture in the pan.
How to tell it’s done
The chicken is done when it reaches an internal temperature of 165°F (74°C). The meat should be opaque throughout with a deeply browned, spicy crust on the surface.
The sauce is considered done when it has thickened enough to coat the back of a spoon and the Parmesan is completely melted and incorporated. When the pasta is added, it should be al dente, providing a firm contrast to the creamy sauce. The final dish should be glossy, aromatic, and steaming hot.
- Poultry: 165°F (74°C) in the thickest part
Up next · Part 3 of 3
2 variations · storage & make-ahead · 3 answers · printable card
Tips, FAQ & printable recipe (Part 3)← Back to the ingredients (Part 1)