Drinks · Part 2 of 3: Instructions
Slow Cooker Warm Spiced Pear Juice for Easy Entertaining Step-by-step instructions
- Prep
- Cook
- Total
- Serves
- 6
Before you start
Before beginning, ensure the slow cooker insert is clean and dry. Gather the cinnamon sticks and star anise, ensuring they are whole and fresh for maximum aroma. Measure the maple syrup accurately to maintain the balance of sweetness.
Have the mugs or serving glasses ready nearby so the juice can be served immediately once it has reached the desired temperature. No complex prep is required, making this an ideal recipe to assemble quickly before the evening begins.
Ingredients at a glance (5)
- 1 lemon, sliced
- 2 cinnamon sticks
- 2 star anise
- 2 tbsp maple syrup
- 6 cups pear juice
Instructions
Layering the aromatics
- Assemble the aromaticsPlace the lemon slices in the bottom of the slow cooker basin to provide a bright citrus base. Arrange the cinnamon sticks and star anise on top of the lemon slices to ensure the flavors infuse evenly into the liquid.Look for The base layer of spices and lemon should be evenly distributed across the bottom of the slow cooker insert.Tip Layering the spices at the bottom helps them steep more effectively as the juice warms up.
The bottom of the slow cooker should be covered with the lemon slices, with the cinnamon and star anise resting on top.
This setup ensures that as the liquid is added, the spices are properly positioned for optimal infusion during the heating process. Confirm that all ingredients are accounted for before adding the liquid components.
Infusing the flavors
- Add liquids and sweetenDrizzle the maple syrup directly over the spices and lemon slices. Pour the pear juice into the slow cooker, ensuring all ingredients are combined. Cover the slow cooker and set to low heat for approximately two hours to allow the spices to bloom.Look for The liquid should be clear and well-mixed with the syrup before starting the heating cycle.Tip Ensure the lid is secure to keep the aromatic steam trapped inside during the cooking process.
The mixture should be covered and set to heat. During this phase, the aroma of the spices will gradually begin to fill the kitchen. The pear juice will slowly absorb the woody notes of the cinnamon and the subtle licorice notes of the star anise, resulting in a complex and inviting scent.
Serving the warm drink
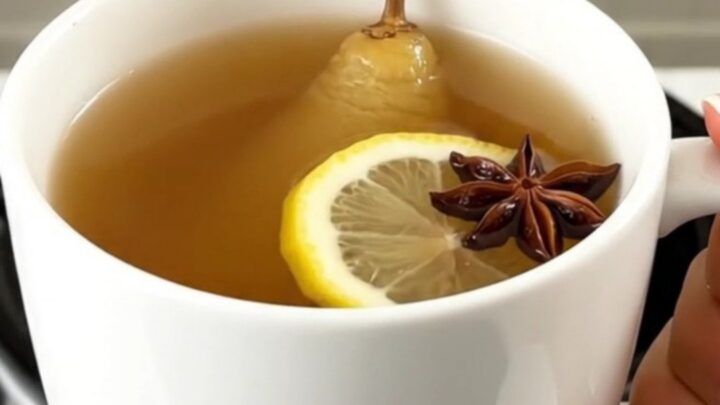
- Final warm and serveOnce the juice is heated through and the spices have infused their flavor, remove the lid. Carefully ladle the warm spiced pear juice into mugs or heat-safe glasses, ensuring each serving is clear of the whole spices.Look for The drink should be steaming and fragrant with the scent of cinnamon and star anise.Tip Use a fine-mesh strainer if preferred when pouring to catch any small spice debris from the star anise.
The juice should be steaming and ready to pour. Before serving, verify that the liquid is consistent in temperature throughout. Ensure the star anise and cinnamon sticks remain in the cooker or are removed before pouring so that each mug contains only the clear, spiced pear liquid.
Common mistakes
A common mistake is using ground spices instead of whole ones, which results in a cloudy and sandy-textured drink. Always stick to whole cinnamon sticks and star anise for clarity.
Another error is adding too much sweetener initially; start with the suggested amount and adjust only after the juice has warmed, as heating can intensify the perception of sweetness. Finally, avoid boiling the juice on a high heat setting, as this can cause the delicate pear flavor to become flat and dull.
How to tell it’s done
The spiced pear juice is ready when it is steaming hot and the fragrance of the cinnamon and star anise is prominent. The liquid should look glossy and slightly deepened in color from the infusion of the spices and maple syrup.
There is no protein to cook, so the focus is entirely on achieving a consistent, warm temperature throughout the entire volume of the liquid. It should be hot enough to be comforting but not boiling, which preserves the delicate flavor profile.
Up next · Part 3 of 3
2 variations · storage & make-ahead · 4 answers · printable card
Tips, FAQ & printable recipe (Part 3)← Back to the ingredients (Part 1)