Desserts · Part 2 of 3: Instructions
Slow Cooker Vanilla Apple and Pear Compote Step-by-step instructions
- Prep
- Cook
- Total
- Serves
- 4
Before you start
Before beginning, ensure the slow cooker is clean and placed on a flat, heat-resistant surface near an electrical outlet. Peel and core the apples and pears thoroughly, removing any stems or seeds.
Have all ingredients measured and ready to go. A small glass measuring cup is ideal for mixing the water and lemon juice together before pouring it over the fruit, ensuring the acidity is distributed evenly throughout the dish.
Ingredients at a glance (6)
- 3 cups apples, peeled and chopped
- 2 cups pears, peeled and chopped
- 2 tbsp vanilla sugar
- 1/4 cup water
- 1 tsp lemon juice
- crumbled biscuits, for serving
Instructions
Preparation and layering
- Prepare and combine ingredientsPeel and chop the apples and pears into uniform chunks. Place the apple pieces into the bottom of the slow cooker, then scatter the pear chunks evenly over the top. Sprinkle the vanilla sugar over the fruit mixture to ensure even distribution.Look for fruit pieces are uniformly sizedTip Keep the fruit chunks relatively similar in size to ensure they cook at the same rate for a consistent texture.
The fruit should be peeled and chopped into uniform pieces. The apples and pears should be layered in the slow cooker with the vanilla sugar sprinkled evenly over them.
Everything should look tidy and ready for the liquid to be added, ensuring the sugar can begin to draw out the fruit juices immediately.
Slow cooking process
- Add liquid and cookIn a small glass measuring cup, combine the water and lemon juice. Pour the mixture over the fruit in the slow cooker. Cover with the lid and cook on low heat for approximately 4 hours, or until the fruit is very tender and has broken down into a smooth, glossy consistency.Look for fruit is soft and mixture is glossyTip The lemon juice helps balance the sweetness and prevents the fruit from oxidizing too quickly during the cooking process.
The mixture should be covered and left undisturbed. After the cooking time, the fruit should appear very soft and have released a significant amount of liquid. The kitchen should smell sweet and fragrant. Test a piece of fruit with a spoon to ensure it yields easily with no resistance.
Final assembly and serving
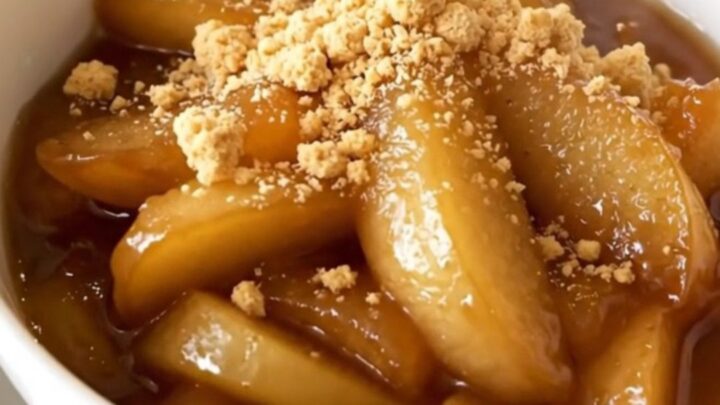
- Serve the compoteOnce the compote is finished, gently stir it to reach the desired consistency. Spoon the warm, smooth mixture into individual serving bowls. Top each portion with a generous scattering of crumbled biscuits just before serving to add a pleasant, crisp textural contrast.Look for compote is steaming and fragrantTip Serving the compote warm highlights the vanilla notes and makes the fruit texture feel especially luxurious and comforting.
The compote should have a smooth, glossy, and uniform consistency. It should be warm and ready to be divided into bowls. The final step of adding the crumbled biscuits provides a necessary textural contrast, turning the simple fruit base into a complete and visually appealing dessert ready for the table.
Common mistakes
Avoid over-crowding the slow cooker, as this can lead to uneven cooking and excess liquid that might make the compote too thin. Always resist the urge to stir the fruit during the main cooking phase, as this can break the fruit down prematurely and affect the final texture.
Finally, do not forget the lemon juice, as it is essential for balancing the sweetness and preventing the fruit from becoming cloyingly sweet or dull in flavor.
How to tell it’s done
The compote is done when the fruit pieces have completely softened and the mixture has transformed into a thick, glossy, and uniform puree. There should be no large, firm chunks remaining, and the fruit should look translucent.
The overall volume will have reduced slightly, and the liquid should be syrupy rather than watery. The aroma will be distinctly sweet and fragrant with vanilla, indicating that the flavors have fully melded together.
Up next · Part 3 of 3
2 variations · storage & make-ahead · 3 answers · printable card
Tips, FAQ & printable recipe (Part 3)← Back to the ingredients (Part 1)