Dinner · Part 2 of 3: Instructions
Slow Cooker Turkey Thighs with Leeks and Mustard Step-by-step instructions
- Prep
- Cook
- Total
- Serves
- 2
Before you start
Before starting, ensure your slow cooker is placed on a level, heat-resistant surface. Clean and trim the leeks, discarding the tough dark green tops. Prepare the turkey by patting it dry with paper towels.
Have your measuring tools ready to ensure the ratios of wine and mustard are precise, which will prevent the sauce from becoming too thin or overly concentrated during the cooking process.
Ingredients at a glance (5)
- 2 raw turkey thighs
- 1 cup sliced leeks
- 1 crumbled bouillon cube
- 1/2 cup white wine
- 2 tbsp wholegrain mustard
Instructions
Preparation and layering
- Assemble the slow cookerPlace the turkey thighs at the bottom of the slow cooker. Scatter the sliced leeks over the meat to ensure they cook evenly. Sprinkle the crumbled bouillon cube over the top of the leeks and turkey.Look for The slow cooker should be clean and ready on the counter.Tip Ensure the leeks are cleaned thoroughly to remove any hidden grit.
The turkey thighs are neatly arranged at the bottom of the slow cooker, topped evenly with the sliced leeks and the crumbled bouillon. Everything looks organized and ready for the liquid.
Braising in the slow cooker
- Add the sauce and cookMix the white wine and wholegrain mustard in a small glass measuring cup until well combined. Pour this mixture over the ingredients in the slow cooker. Cover and cook on low for 4 hours until the turkey is tender.Look for The liquid should just partially cover the turkey thighs.Tip Whisking the mustard into the wine first ensures a uniform sauce.
The kitchen should smell aromatic as the wine and mustard meld with the leeks. The liquid is simmering gently, and the turkey is slowly becoming tender. Check that the liquid is bubbling.
Final check and serving
- Check temperature and serveVerify the internal temperature of the turkey thighs using a meat thermometer. The meat must reach 165°F (74°C) to be safely cooked through. Once reached, let the meat rest for 5 minutes before serving to ensure the juices redistribute for maximum tenderness.Look for The sauce should be slightly thickened and the meat should pull away from the bone easily.Safe temperature 165°F (74°C) internal temperature (poultry)Tip Insert the thermometer into the thickest part of the thigh, avoiding the bone.
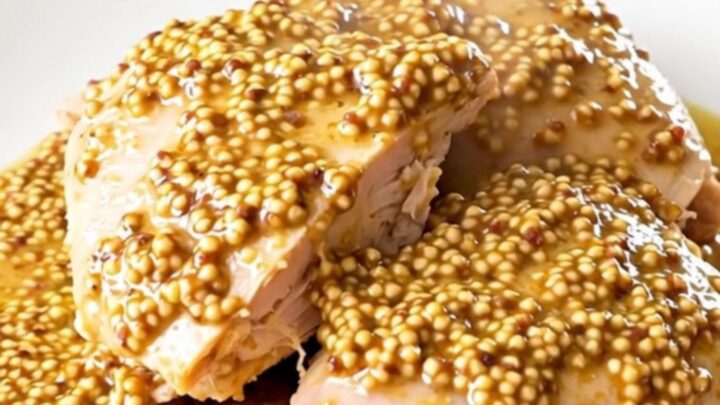
The turkey has reached the safe temperature of 165°F (74°C) and the sauce has a velvety, rich consistency. The meat is tender and ready to be plated for serving.
Common mistakes
A common mistake is overcrowding the slow cooker, which can lead to uneven cooking and excess liquid accumulation. Ensure the turkey thighs are arranged in a single layer.
Another error is checking the temperature too early, which releases heat and extends the cooking time.
Trust the process and keep the lid closed until the final hour of cooking to maintain a consistent environment for the meat.
How to tell it’s done
The turkey is done when it reaches an internal temperature of 165°F (74°C). The meat should be opaque throughout and easily pull away from the bone with a fork. The sauce will have reduced slightly, appearing creamy and glossy.
Always verify the temperature with an instant-read thermometer inserted into the thickest part of the thigh, ensuring it does not touch the bone for an accurate reading.
- Poultry: 165°F (74°C) in the thickest part
Up next · Part 3 of 3
2 variations · storage & make-ahead · 3 answers · printable card
Tips, FAQ & printable recipe (Part 3)← Back to the ingredients (Part 1)