Dinner · Part 2 of 3: Instructions
Slow Cooker Turkey Chimichurri Tenderloins Step-by-step instructions
- Prep
- Cook
- Total
- Serves
- 4
Before you start
Before beginning, ensure your slow cooker is clean and placed on a stable surface away from the edge of the counter. Prepare your ingredients by slicing the red onions into uniform half-moons; this ensures they cook consistently.
If you are making the chimichurri from scratch, have it prepared and stored in the refrigerator until you are ready to assemble. Having all your dry seasonings and sauce measured out in advance will make the assembly process move quickly and smoothly once you are ready to load the slow cooker.
Ingredients at a glance (5)
- 2 lb turkey breast tenderloins
- 1 medium red onion, sliced into half-moons
- 1 tsp dried oregano
- 1/4 tsp red pepper flakes
- 3/4 cup chimichurri sauce, store-bought or made ahead
Instructions
Preparation and layering
- Assemble the ingredientsPlace the raw turkey breast tenderloins into the base of the slow cooker, arranging them in a single layer. Scatter the sliced red onion half-moons evenly over the turkey pieces to ensure even flavor distribution during the cooking process.Look for The turkey should be arranged in a single layer at the bottom of the cooker.Tip Ensure the onions are distributed evenly to help aromatics penetrate the meat.
The turkey should be laid out evenly in the slow cooker base. The onions should be scattered over the top to provide a bed of flavor. The atmosphere should be clean and organized, with all ingredients prepped and ready for the seasoning phase.
Seasoning and braising
- Season and finish cookingSprinkle the dried oregano and red pepper flakes over the turkey. Spoon the chimichurri sauce generously over the top. Cover the slow cooker and cook on low for 4 hours until the turkey reaches an internal temperature of 165°F (74°C).Look for The turkey meat should be opaque throughout and tender when pierced with a fork.Safe temperature 165°F (74°C) internal temperature (poultry)Tip Check the temperature at the thickest part of the tenderloin.
The herbs should be evenly distributed over the turkey. The chimichurri should be spooned over the meat so it coats the surface. The slow cooker should be set to the low setting, and the lid should be firmly in place to trap the moisture.
Resting and final inspection
- Rest and serveCarefully remove the tenderloins from the slow cooker and let them rest on a plate for 5 minutes before slicing or serving whole. This allows the juices to redistribute, ensuring the meat remains moist and flavorful for every bite.Look for The meat should be rested and juices settled before cutting into it.Tip Cover the plate loosely with foil to keep the meat warm while resting.
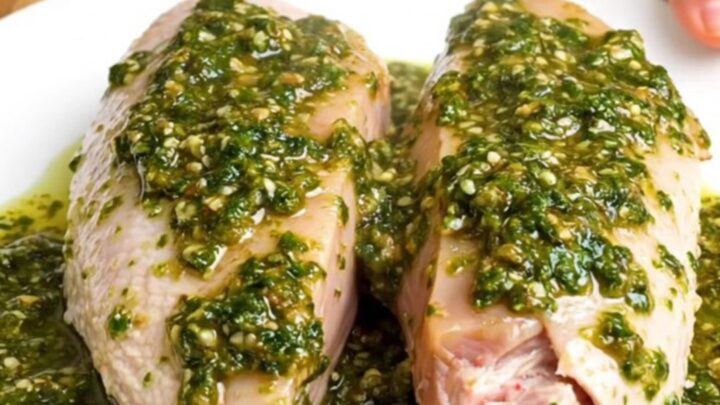
The turkey should be removed to a clean plate. The surface of the meat should look pale and braised, with no signs of raw pinkness. The sauce should be thick and clinging to the meat, with the onions soft and translucent.
Common mistakes
A common mistake is overcrowding the slow cooker, which can prevent even cooking; ensure the tenderloins are laid out in a single layer.
Another error is failing to let the turkey rest after cooking, which allows the meat to retain its juices; slicing immediately will cause the moisture to escape, resulting in dry meat.
Finally, avoid lifting the lid unnecessarily during the cooking process, as this releases heat and steam, which can significantly increase the total required cooking time for the dish.
How to tell it’s done
The turkey is done when it is opaque throughout and reaches a safe internal temperature of 165°F (74°C). Use a digital meat thermometer inserted into the thickest part of the tenderloin to verify this.
The meat should be soft to the touch and easily pulled apart with a fork. If the tenderloins are not quite at temperature, continue cooking for an additional 15 to 20 minutes and re-check, as slow cooker temperatures can vary by model and capacity.
- Poultry: 165°F (74°C) in the thickest part
Up next · Part 3 of 3
2 variations · storage & make-ahead · 3 answers · printable card
Tips, FAQ & printable recipe (Part 3)← Back to the ingredients (Part 1)