Dinner · Part 2 of 3: Instructions
Slow-Cooker Tikka Masala Beef Brisket Step-by-step instructions
- Prep
- Cook
- Total
- Serves
- 6
Before you start
Before you start, cut the beef brisket into 1-inch cubes if not already done. Have your tikka masala sauce, garam masala, garlic herb butter, and Greek yogurt measured and ready. No need to preheat or brown anything—this recipe is truly dump-and-go.
Make sure your slow cooker is clean and dry, and have a wooden spoon on hand for stirring later. If you plan to serve with rice and naan, start those about 30 minutes before the curry is done.
Ingredients at a glance (5)
- 2 lb beef brisket, cut into 1-inch cubes
- 2 cups tikka masala sauce
- 2 tsp garam masala
- 4 tbsp garlic herb butter, cut into medallions
- 1/2 cup plain Greek yogurt
Instructions
Layer the Ingredients
- Layer the IngredientsPlace the cubed beef brisket in the bottom of a 6-quart slow cooker. Pour the tikka masala sauce over the beef, then sprinkle with garam masala. Dot the top with the garlic herb butter medallions and dollop the Greek yogurt over everything. Do not stir—just let the layers sit as they are.Look for The beef is covered with sauce, butter, and yogurt in distinct layers.Tip For best flavor, use a good-quality tikka masala sauce with visible spices.
At the start, you'll see distinct layers: raw beef on the bottom, sauce and spices in the middle, and butter and yogurt on top. The aromas of garam masala and tomato will be evident as you add each ingredient. This is the easiest phase—just layer and cover.
Slow-Cook Until Tender
- Slow-Cook Until TenderCover the slow cooker and cook on LOW for 8 to 10 hours, or on HIGH for 4 to 5 hours, until the beef is fork-tender and easily shreds. The sauce will have melded into a rich, creamy curry. Stir gently before serving, breaking up any large pieces of beef with a spoon. Let it rest for 3 minutes before slicing.Look for The beef is fork-tender and the sauce is bubbling and aromatic.Safe temperature 145°F (63°C) internal temperature (steaks, chops and roasts)Tip Avoid lifting the lid during cooking—each peek adds 20 minutes of cook time.
After 8 hours on low, the kitchen will smell richly spiced and slightly sweet. When you lift the lid, you'll see bubbling sauce with tender beef that pulls apart easily. The sauce should be deep red and creamy, with visible pools of melted butter on the surface.
Serve and Enjoy
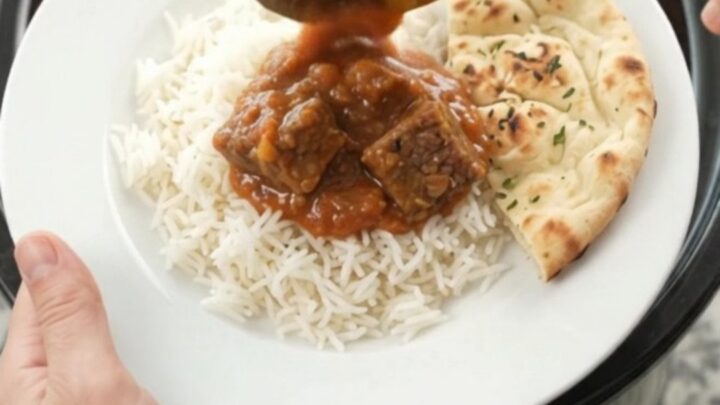
- Serve and EnjoyLet the beef rest for at least 3 minutes after cooking. Serve the curry over steamed basmati rice with warm naan on the side. Ladle the sauce generously over the rice and beef.Look for The curry is thick, glossy, and ready to be ladled over rice.Tip For a restaurant-style finish, garnish with fresh cilantro if desired (not shown in video).
The final dish is a thick, glossy curry with fork-tender beef. The sauce coats the back of a spoon, and the flavors are balanced—creamy, spicy, and tangy. Serve it over rice with naan, and enjoy the satisfied silence of everyone digging in.
Common mistakes
One common mistake is lifting the lid to check on the curry, which lets heat escape and extends cooking time. Trust the recipe and resist the urge to peek. Another is using low-fat or non-fat yogurt, which can curdle during the long cooking time; stick with full-fat Greek yogurt.
Also, don't skip the garlic herb butter—it adds essential richness and flavor. Finally, if you prefer a thicker sauce, you can remove the lid during the last 30 minutes of cooking to let some moisture evaporate.
How to tell it’s done
The curry is done when the beef is fork-tender—it should shred easily with a fork and offer no resistance when pierced. The sauce will have thickened slightly and will be bubbling gently around the edges.
For food safety, the beef must reach an internal temperature of at least 145°F (63°C) as measured with an instant-read thermometer, but because it cooks for so long, it will likely be much higher.
Let the beef rest for at least 3 minutes before serving to allow the juices to redistribute.
- Steaks, chops and roasts: 145°F (63°C) in the thickest part, then a 3-minute rest
Up next · Part 3 of 3
4 variations · storage & make-ahead · 5 answers · printable card
Tips, FAQ & printable recipe (Part 3)← Back to the ingredients (Part 1)