Dinner · Part 2 of 3: Instructions
Slow-Cooker Teriyaki Chicken Drumsticks with Garlic and Scallions Step-by-step instructions
- Prep
- Cook
- Total
- Serves
- 4
Before you start
Before you start, make sure the chicken drumsticks are thawed if they were frozen. Pat them dry with paper towels—this helps the glaze stick better. Peel the garlic cloves and slice the scallions, separating the white and green parts.
Measure out the teriyaki glaze and have the sesame seeds ready. If you plan to serve the dish with rice, start that before you begin layering the slow cooker, or use a rice cooker that can be set to finish around the same time as the chicken.
Ingredients at a glance (6)
- 8 chicken drumsticks
- 12 peeled whole garlic cloves
- 4 scallions, sliced (white and green parts separated)
- 1 cup teriyaki glaze
- 1 tbsp toasted sesame seeds
- Steamed jasmine rice, for serving
Instructions
Layer and Glaze
- Layer the Chicken and AromaticsPlace the chicken drumsticks in the slow cooker, arranging them in a single layer if possible. Scatter the whole garlic cloves and the white parts of the sliced scallions over the chicken.Look for The drumsticks should be nestled together with garlic and scallion pieces tucked between them.Tip For even cooking, try to keep the drumsticks in one layer; if they overlap, rotate them halfway through cooking.
- Pour the Glaze and Sprinkle SesamePour the teriyaki glaze evenly over the chicken and aromatics. Sprinkle the toasted sesame seeds on top.Look for The chicken should be well coated with the glaze; the sesame seeds will float on the surface.Tip If the glaze is very thick, you can thin it with 2 tablespoons of water to help it spread.
At this stage, the chicken drumsticks are arranged in a single layer, with garlic cloves and scallion whites scattered around. The teriyaki glaze is poured evenly over everything, and sesame seeds are sprinkled on top.
The raw chicken looks glossy and coated, and the aroma of the glaze is sweet and savory. Before moving on, make sure the chicken is well coated and the garlic cloves are nestled between the drumsticks so they cook evenly.
Slow-Cook and Check
- Slow-Cook on LowCover the slow cooker and cook on low for 4 to 5 hours, until the chicken is tender and cooked through.Look for The sauce will be bubbling gently and the chicken will look glossy and caramelized.Safe temperature 165°F (74°C) internal temperature (poultry)Tip Avoid opening the lid during cooking to keep the heat steady; check only at the end.
- Check for DonenessInsert an instant-read thermometer into the thickest part of a drumstick without touching bone. The temperature should read at least 165°F (74°C).Look for The meat should pull away from the bone easily and the juices should run clear.Safe temperature 165°F (74°C) internal temperature (poultry)Tip If the chicken isn't done, continue cooking for another 30 minutes and check again.
After 4 to 5 hours on low, the slow cooker is filled with bubbling, aromatic steam. The chicken is deeply browned and glistening, with the sauce reduced to a thick, shiny coating. The garlic cloves are soft and golden, and the scallions have wilted into the sauce. The smell is intoxicating—sweet soy, garlic, and ginger. Before serving, check that the chicken reaches 165°F (74°C) and that the meat easily pulls from the bone.
Serve and Garnish
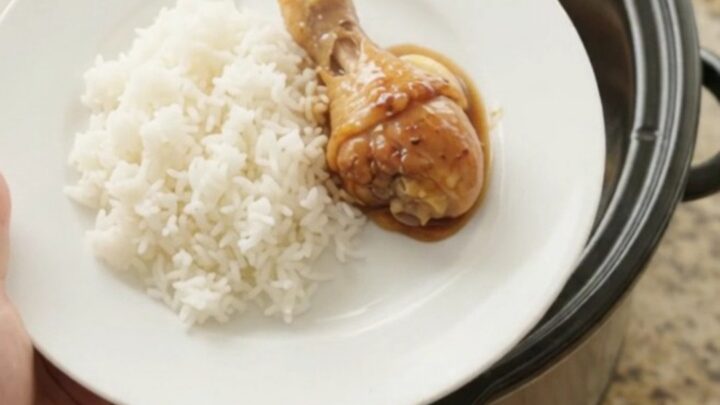
- Serve Over RiceSpoon the chicken and garlic cloves over steamed jasmine rice. Garnish with the reserved green parts of the scallions and an extra sprinkle of sesame seeds if desired.Look for The chicken should be falling off the bone and the sauce thick and clinging to the meat.Tip For a thicker sauce, remove the chicken and simmer the sauce on the stovetop for 5 minutes before serving.
The chicken is now fall-off-the-bone tender, with the glaze clinging to every piece. The garlic cloves are sweet and buttery, and the sauce is thick enough to coat a spoon. When you lift a drumstick, the meat starts to separate from the bone. The dish is ready to be served over steamed jasmine rice, garnished with the reserved scallion greens and an extra sprinkle of sesame seeds for a fresh, crunchy finish.
Common mistakes
One common mistake is lifting the lid too often to check on the chicken. Every time you open the slow cooker, heat escapes, which can extend the cooking time. Trust the recipe and wait until the end. Another mistake is using a teriyaki marinade instead of a glaze—marinades are thinner and won't thicken the same way.
If you only have marinade, add a cornstarch slurry at the end to thicken the sauce. Finally, don't overcrowd the slow cooker; if you double the recipe, use a larger slow cooker or cook in batches.
How to tell it’s done
The chicken is done when it is fork-tender and the internal temperature reaches 165°F (74°C) in the thickest part of the drumstick, without touching the bone. The meat should easily pull away from the bone, and the juices should run clear.
The garlic cloves should be soft and golden, and the sauce should be thickened and glossy. If the sauce seems too thin, you can remove the chicken and simmer the sauce on the stovetop for a few minutes to reduce it, or stir in a slurry of 1 tablespoon cornstarch and 2 tablespoons water.
- Poultry: 165°F (74°C) in the thickest part
Up next · Part 3 of 3
4 variations · storage & make-ahead · 5 answers · printable card
Tips, FAQ & printable recipe (Part 3)← Back to the ingredients (Part 1)