Dinner · Part 2 of 3: Instructions
Slow Cooker Taco Chicken Thighs with Monterey Jack Step-by-step instructions
- Prep
- Cook
- Total
- Serves
- 6
Before you start
Before starting, drain and rinse the canned pinto beans in a colander. Measure the salsa, sour cream, and shredded cheese so everything is ready to layer. If using a slow cooker liner, place it in the insert now.
There is no need to preheat the slow cooker or brown the chicken — the dish is designed to be assembled cold and cooked low and slow. Have warm tortillas ready just before serving, but wait until the chicken is fully cooked to warm them.
Ingredients at a glance (7)
- 6 boneless skinless chicken thighs
- 1 oz taco seasoning mix
- 15 oz canned pinto beans, drained and rinsed
- 1 1/2 cups chunky salsa
- 1/2 cup sour cream
- 2 cups shredded Monterey Jack cheese
- warm flour tortillas, for serving
Instructions
Layer and Seal
- Layer the ChickenPlace the boneless skinless chicken thighs in the bottom of a 6-quart slow cooker in a single layer, overlapping slightly if needed. Sprinkle the taco seasoning evenly over the chicken, turning the pieces to coat as much as possible.Look for The chicken thighs should be well coated with the seasoning, with no large dry spots.Tip For even coating, use your hands to rub the seasoning into the chicken.
- Add Beans and SalsaScatter the drained and rinsed pinto beans over the chicken. Pour the chunky salsa over the beans and chicken, spreading it into an even layer. Do not stir; the layers will meld during cooking.Look for The salsa should cover most of the beans and chicken, creating a saucy base.Tip Use a salsa with a thick texture for the best sauce consistency.
- Top with Sour Cream and CheeseDollop the sour cream over the salsa layer, then sprinkle the shredded Monterey Jack cheese evenly over the top. Cover the slow cooker with the lid.Look for The top should be covered with cheese, with sour cream visible in spots.Tip Cold sour cream straight from the fridge is fine; it will melt into the sauce.
After the first phase, the slow cooker contains distinct layers: seasoned chicken on the bottom, beans and salsa on top, and a creamy cheese layer crowning everything. The aroma is fresh and spicy, with the salsa and taco seasoning making their presence known. The cheese should look cold and piled on, not yet melted. This is the calm before the long, slow transformation.
Slow-Cook to Tender
- Cook on LowSet the slow cooker to low and cook for 6 hours, or until the chicken is tender and easily shreds with a fork. Avoid opening the lid during the first 4 hours to keep the heat steady.Look for The sauce will be bubbling gently at the edges, and the chicken will be fork-tender.Safe temperature 165°F (74°C) internal temperature (poultry)Tip If the slow cooker runs hot, check at 5 hours to prevent overcooking.
- Shred the ChickenTurn off the slow cooker. Use two forks to shred the chicken thighs directly in the pot, mixing them with the beans and sauce. Stir gently to combine everything into a thick, creamy taco-bean mixture.Look for The chicken should shred easily and be coated with the cheesy sauce.Tip Leave some larger chunks for a heartier texture if desired.
At the end of cooking, the sauce is bubbling gently, the cheese has melted into a golden blanket, and the kitchen smells deeply of taco spice and cooked chicken. The chicken is fork-tender and pulls apart with little resistance. The beans are soft but intact, and the sauce has thickened slightly. The mixture should look cohesive and glossy, with no raw spots.
Shred and Serve
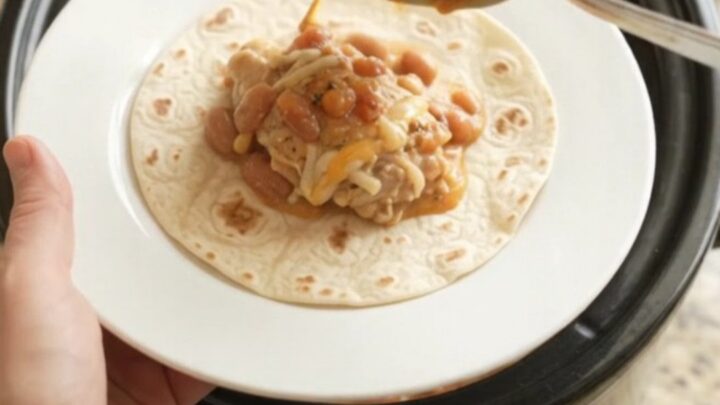
- Serve with Warm TortillasWarm the flour tortillas according to package directions. Spoon the chicken mixture onto a serving plate or directly into tortillas. Serve immediately.Look for The mixture should be thick and saucy, with melted cheese stretching in ribbons.Tip Warm tortillas in a dry skillet for a light char if preferred.
After shredding, the dish becomes a thick, chunky stew with shreds of chicken, whole beans, and a creamy, cheesy sauce. The texture is hearty and spoonable.
When served with warm tortillas, it should look inviting and steamy, with the cheese stretching slightly as you scoop. The flavor is balanced — savory, tangy, and mildly spicy, with a rich finish from the sour cream and Monterey Jack.
Common mistakes
A common mistake is lifting the lid too often, which releases heat and extends the cooking time. Another is using a watery salsa, which can make the sauce thin. To avoid a bland dish, check that the taco seasoning is well distributed over the chicken.
Overcooking can make the chicken dry and stringy, so start checking at the 5-hour mark if your slow cooker runs hot. Also, do not add extra liquid — the salsa and beans provide enough moisture.
How to tell it’s done
The chicken is done when it reaches an internal temperature of 165°F (74°C) and shreds easily with a fork. The sauce should be bubbling gently around the edges, and the cheese should be fully melted and incorporated.
If the chicken is still firm after 6 hours, continue cooking in 30-minute increments. The finished dish should look saucy and creamy, not dry or watery. Let the slow cooker sit for 5 minutes before serving to allow the sauce to settle.
- Poultry: 165°F (74°C) in the thickest part
Up next · Part 3 of 3
4 variations · storage & make-ahead · 5 answers · printable card
Tips, FAQ & printable recipe (Part 3)← Back to the ingredients (Part 1)