Dinner · Part 2 of 3: Instructions
Slow-Cooker Sweet Teriyaki Chicken Thighs Step-by-step instructions
- Prep
- Cook
- Total
- Serves
- 6
Before you start
Before starting, make sure the slow cooker is clean and ready. Slice the bell peppers into strips and cut the onion into wedges. Measure the teriyaki glaze and have the sesame seeds ready.
There is no need to sear the chicken or pre-cook anything; the slow cooker will handle it all. If you prefer a thicker sauce, you can mix a tablespoon of cornstarch with water and stir it in during the last 30 minutes of cooking.
Ingredients at a glance (5)
- 2 lb boneless skinless chicken thighs
- 3 bell peppers (red, yellow, green), sliced
- 1 medium sweet onion, cut into wedges
- 1 cup teriyaki glaze
- 2 tbsp toasted sesame seeds
Instructions
Layer and Glaze
- Layer the Chicken and VegetablesPlace the chicken thighs in the bottom of the slow cooker in a single layer. Scatter the sliced bell peppers and onion wedges over the chicken.Look for The slow cooker should be filled about halfway with the chicken and vegetables.Tip Arrange the chicken evenly so it cooks uniformly.
- Add the Glaze and SesamePour the teriyaki glaze over the chicken and vegetables. Sprinkle with the toasted sesame seeds.Look for The glaze should coat the ingredients evenly, with sesame seeds visible on top.Tip No need to stir; the slow cooker will blend the flavors.
At the end of this phase, the slow cooker contains raw chicken thighs with sliced peppers and onion scattered on top, and the teriyaki glaze is poured over everything. The sesame seeds are sprinkled on top.
The ingredients should look colorful and well-coated, with the glaze pooling around the chicken. No cooking has started yet, so the chicken is still raw and the vegetables are crisp.
Slow Cook
- Cook on LowCover the slow cooker and cook on low for 4 hours, or until the chicken is tender and reaches an internal temperature of 165°F (74°C).Look for The chicken should be fork-tender and the sauce bubbling gently.Safe temperature 165°F (74°C) internal temperature (poultry)Tip Avoid lifting the lid during cooking to keep the heat steady.
After 4 hours on low, the slow cooker should be bubbling gently. The chicken should be fork-tender and cooked through, with an internal temperature of 165°F (74°C). The peppers and onions will be soft and translucent, and the sauce will have thickened slightly, turning a deeper brown. The aroma is sweet and savory, with a hint of sesame.
Serve and Enjoy
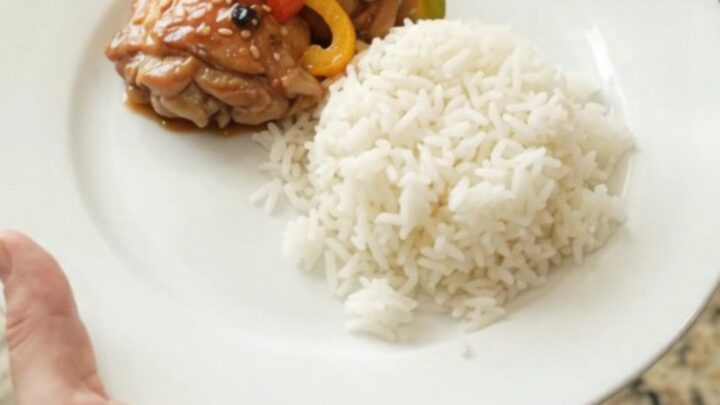
- Serve Over RiceSpoon the chicken and vegetables over steamed jasmine rice, and drizzle with extra glaze from the slow cooker.Look for The chicken should be glistening and the peppers tender.Tip For a thicker sauce, simmer the glaze in a saucepan for a few minutes before serving.
When serving, the chicken should be glistening with glaze, and the peppers should be tender but still holding their shape. The sauce should coat the back of a spoon. Plating over steamed rice, the dish looks vibrant and appetizing. The final taste is sweet, savory, and rich, with the sesame seeds adding a subtle crunch.
Common mistakes
One common mistake is lifting the lid to stir or check on the food, which releases heat and extends cooking time. Another is using chicken breasts, which can dry out if cooked too long.
Also, avoid overcrowding the slow cooker; if you have more than 2 pounds of chicken, cook in batches or use a larger slow cooker. Finally, don't skip the sesame seeds—they add a subtle nuttiness that balances the sweetness.
How to tell it’s done
The dish is done when the chicken is tender and reaches an internal temperature of 165°F (74°C) on an instant-read thermometer. The chicken should shred easily with a fork, and the peppers should be soft but not mushy.
The sauce will be bubbling and slightly thickened. If you want a thicker sauce, remove the chicken and vegetables, then simmer the sauce on the stovetop until reduced.
- Poultry: 165°F (74°C) in the thickest part
Up next · Part 3 of 3
4 variations · storage & make-ahead · 5 answers · printable card
Tips, FAQ & printable recipe (Part 3)← Back to the ingredients (Part 1)