Dinner · Part 2 of 3: Instructions
Slow Cooker Sweet Tea Ham with Lemon Step-by-step instructions
- Prep
- Cook
- Total
- Serves
- 8
Before you start
Before you begin, ensure your slow cooker insert is clean and dry. Prepare the ham by patting it dry with paper towels.
Slice your lemons into thin, uniform rounds to ensure they cook evenly and release their juices effectively into the braising liquid. Have your brown sugar and sweet tea measured and ready to go for a seamless assembly process.
Ingredients at a glance (4)
- 4 lb boneless half ham
- 2 medium lemons, sliced into thin rounds
- 1/2 cup brown sugar
- 2 cups sweet tea
Instructions
Layering the ingredients
- Layering the ingredientsPlace the boneless half ham cut-side down into the base of the slow cooker. Arrange the thin lemon slices evenly over the top of the ham to provide a bright citrus infusion. Generously sprinkle the brown sugar over the lemons and the sides of the ham, then pour the sweet tea carefully into the bottom of the slow cooker insert to create the braising liquid.Look for The ham should sit snugly in the insert with the tea pooled around the bottom.Tip Ensure the ham is positioned cut-side down to maximize the surface area for the glaze.
The ham should be positioned securely in the bottom of the slow cooker, with the lemon slices and brown sugar evenly distributed to ensure the flavors permeate the meat as it begins to heat up.
Slow cooking the ham
- Slow cooking the hamCover the slow cooker with its lid. Cook the ham on the low setting for approximately 4 hours. This slow, steady heat ensures the meat remains moist and absorbs the flavors of the tea and lemon. Avoid lifting the lid during the cooking process to maintain a consistent temperature. Ensure the ham reaches an internal temperature of 145°F (63°C) and let the meat rest at least 3 minutes before serving.Look for The ham should be heated through and tender when pierced with a fork.Safe temperature 145°F (63°C) internal temperature (steaks, chops and roasts)Tip Check the temperature with a meat thermometer in the thickest part of the ham.
During this phase, the ham should remain undisturbed while the liquid gently simmers around it. The aroma of citrus and sweet tea should be present, indicating the braising process is working correctly.
Resting and slicing
- Resting and slicingOnce the ham reaches the required temperature, carefully remove it from the slow cooker and transfer it to a carving board. Let the meat rest for at least 10 minutes before slicing. This resting period allows the juices to redistribute, ensuring each slice is succulent. Fan the slices on a serving platter and spoon the reduced sweet tea sauce from the slow cooker over the top before serving.Look for The ham is ready when the meat is firm but tender and the juices run clear.Safe temperature 145°F (63°C) internal temperature (steaks, chops and roasts)Tip Use the remaining liquid in the slow cooker as a natural jus to drizzle over the carved portions.
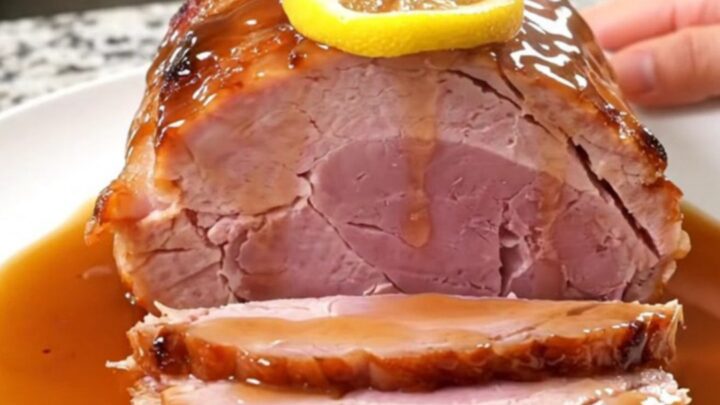
The ham should look firm yet moist on the outside. After resting, it should slice cleanly into uniform pieces, ready to be fanned out and served with the reduced juices from the cooker.
Common mistakes
A common mistake is failing to let the ham rest after cooking, which causes the juices to run out immediately upon slicing, resulting in drier meat.
Another error is overcooking the ham; while the slow cooker is forgiving, leaving it on for too long can lead to a mushy texture.
Always use a thermometer to check the temperature rather than relying solely on the cooking time, as slow cooker models vary in heat output.
How to tell it’s done
The ham is finished when it reaches an internal temperature of 145°F (63°C). Use a digital meat thermometer inserted into the thickest part of the ham to confirm it is fully heated through.
The meat should be tender and sliceable without falling apart excessively. Remember to allow the ham to rest for at least 10 minutes before carving to ensure maximum juiciness in every slice.
- Steaks, chops and roasts: 145°F (63°C) in the thickest part, then a 3-minute rest
Up next · Part 3 of 3
2 variations · storage & make-ahead · 3 answers · printable card
Tips, FAQ & printable recipe (Part 3)← Back to the ingredients (Part 1)