Dinner · Part 2 of 3: Instructions
Slow Cooker Sweet Potato and Chestnut Stew Step-by-step instructions
- Prep
- Cook
- Total
- Serves
- 4
Before you start
Before beginning, ensure the slow cooker basin is clean and dry. Prepare all ingredients by peeling the sweet potatoes and slicing the onion. Having the chestnuts and dried thyme ready to go makes the assembly process seamless.
Clear enough counter space to accommodate the slow cooker and the necessary prep tools. Ensure the power outlet is accessible and the cord is safely positioned away from the edge of the counter to prevent any accidents during the cooking process.
Ingredients at a glance (5)
- 2 lbs sweet potatoes, peeled and cubed
- 1 cup cooked chestnuts
- 1 red onion, sliced
- 1 tsp dried thyme
- 2 cups vegetable broth
Instructions
Assembly of Ingredients
- Prepare and Layer IngredientsPeel the sweet potatoes and cut them into even one-inch cubes. Place the sweet potato cubes into the bottom of the slow cooker basin. Arrange the sliced red onion and the whole cooked chestnuts over the sweet potatoes in an even layer.Look for Ensure the sweet potatoes are distributed evenly to allow for consistent cooking.Tip Cut the sweet potatoes into uniform pieces to ensure they finish cooking at the same time.
At this point, the slow cooker basin should contain a neat, layered arrangement of cubed sweet potatoes, sliced red onion, and chestnuts. The ingredients should be distributed evenly across the bottom to ensure they are all in contact with the heat source. Confirm that all ingredients are prepared and ready for seasoning before moving to the next stage of the process.
Seasoning and Liquid Addition
- Season and Add LiquidSprinkle the dried thyme over the vegetables and chestnuts. Carefully pour the vegetable broth over the contents of the slow cooker, ensuring the liquid reaches near the top of the vegetables without submerging them completely.Look for The broth should be just enough to partially cover the base ingredients.Tip Adding the broth gently helps keep the thyme evenly distributed across the surface.
The dried thyme should be lightly scattered over the top, and the vegetable broth should be poured in carefully. The broth should fill the gaps between the vegetables without completely submerging the top layer. Check that the liquid level is appropriate; it should look like a stew base, ready for the slow, steady heat that will develop the flavors.
Slow Cooking Completion
- Slow Cook and ServeCover the slow cooker with the lid. Set the device to cook on low for four hours. Once the time is up, test the sweet potatoes with a fork to ensure they are tender. Stir the stew gently before serving warm in deep bowls.Look for The sweet potatoes should be fork-tender and the broth aromatic.Tip Avoid lifting the lid during the first three hours to maintain a consistent internal temperature.
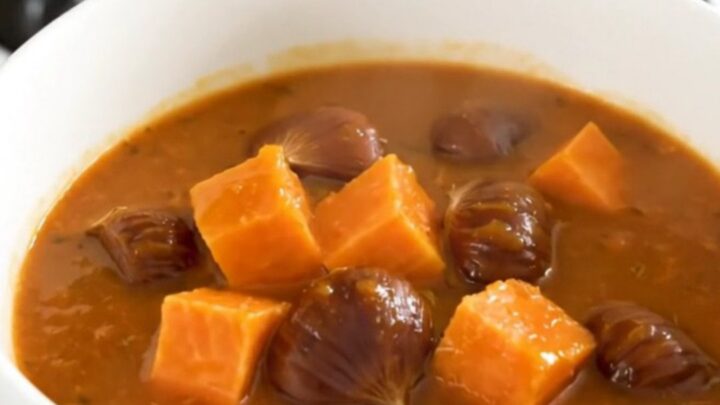
After four hours of low-temperature cooking, the stew should smell fragrant and savory. The liquid will have transformed into a slightly thickened, aromatic broth.
The sweet potatoes should be fork-tender and the onions translucent. Ensure everything is well-integrated and the texture is consistent before serving the dish into warm bowls for an immediate, comforting meal.
Common mistakes
A common mistake is cutting the sweet potato cubes into uneven sizes, which leads to some pieces being mushy while others remain undercooked. Always aim for uniform one-inch cubes. Another error is overfilling the slow cooker, which can prevent the ingredients from cooking evenly.
Leave enough space at the top for steam to circulate. Finally, refrain from lifting the lid frequently, as each time the lid is opened, heat escapes and the cooking time needs to be extended to compensate for the temperature drop.
How to tell it’s done
The stew is finished when the sweet potatoes are easily pierced with a fork, indicating they are fully cooked through and tender throughout. The broth should be slightly thickened and flavorful, having absorbed the essence of the thyme and onions.
The chestnuts should be soft but still hold their shape, providing a pleasant contrast to the creamy texture of the potatoes. If the potatoes offer any resistance, continue cooking for an additional thirty minutes before checking again.
Up next · Part 3 of 3
2 variations · storage & make-ahead · 3 answers · printable card
Tips, FAQ & printable recipe (Part 3)← Back to the ingredients (Part 1)