Dinner · Part 2 of 3: Instructions
Slow Cooker Sweet Potato and Black Bean Chili Step-by-step instructions
- Prep
- Cook
- Total
- Serves
- 6
Before you start
Before starting, ensure your slow cooker insert is clean and dry. Peel the sweet potatoes and cut them into consistent 1-inch cubes to ensure they cook evenly. Drain and rinse the canned black beans in a colander until the water runs clear, which helps to keep the final dish from becoming overly starchy.
Have your crushed tomatoes and seasoning packet ready on the counter so you can assemble the dish quickly. No pre-heating of the slow cooker is necessary for this method, but ensure it is plugged in near a safe, heat-resistant surface.
Ingredients at a glance (4)
- 2 cups sweet potato cubes, peeled and cut into 1-inch pieces
- 2 cans (15 oz each) black beans, rinsed and drained
- 1 packet chili seasoning
- 28 oz crushed tomatoes
Instructions
Layering the base
- Layering the ingredientsPlace the sweet potato cubes in the bottom of the slow cooker to ensure they cook evenly. Scatter the rinsed and drained black beans over the sweet potatoes.Look for Sweet potatoes form an even layer on the bottom of the slow cooker insert.Tip Cut the sweet potatoes into uniform 1-inch cubes so they cook at the same rate.
The sweet potatoes are evenly distributed at the bottom of the insert, and the beans are spread over them. The slow cooker is ready for the final additions of seasoning and tomatoes. Everything looks neat and organized, setting the stage for the flavors to meld together perfectly during the long, slow cooking process that follows.
Adding seasoning
- Seasoning and adding liquidSprinkle the entire packet of chili seasoning evenly over the beans. Pour the crushed tomatoes over the top of the seasoning and beans, ensuring everything is well-distributed.Look for The crushed tomatoes cover the seasoning and beans.Tip Do not stir the ingredients yet; the slow cooker will combine the flavors during the cooking process.
The chili seasoning and crushed tomatoes have been added, creating a vibrant red layer over the beans and potatoes. The ingredients are now ready to be covered.
The kitchen should smell like mild spices as the seasoning hits the tomatoes, indicating that the flavors are ready to begin their slow transformation into a delicious, hearty chili.
Slow cooking
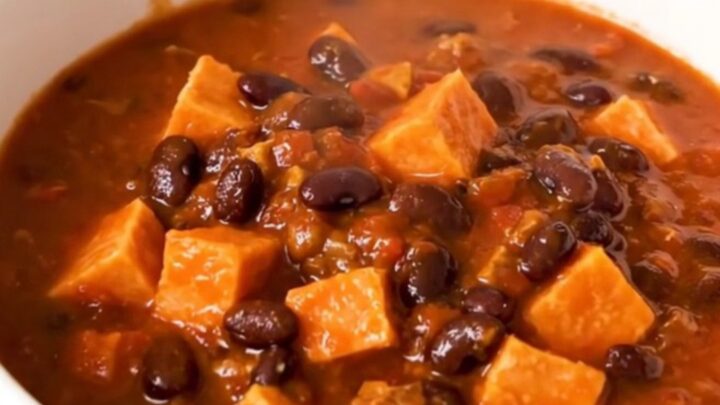
- Slow cooking the chiliCover the slow cooker with its lid and set to cook on high for 4 hours or low for 6 to 8 hours until the sweet potatoes are fork-tender. Once finished, stir the chili gently to incorporate all the ingredients before serving warm.Look for The sweet potatoes are tender when pierced with a fork and the sauce has thickened.Tip Stirring right before serving helps create a cohesive, thickened sauce.
The chili has finished cooking and the sweet potatoes are tender. The sauce is thick, rich, and aromatic, with the beans and potatoes perfectly incorporated. After a final gentle stir, the dish is ready to be portioned into bowls. It should look glossy and inviting, with a consistent texture throughout the entire mixture.
Common mistakes
A common mistake is cutting the sweet potato cubes too large, which can result in undercooked, hard centers while the rest of the chili is finished. Always aim for uniform 1-inch pieces to ensure consistent results.
Another error is over-stirring at the beginning; layering the ingredients as directed is essential for the flavors to meld correctly during the slow cooking process. Finally, ensure the lid remains securely on the slow cooker throughout the cooking time, as removing it frequently lets out heat and extends the total time required.
How to tell it’s done
The chili is done when the sweet potatoes are fork-tender, meaning they yield easily when pierced with a knife or fork. The sauce should be thickened and glossy, with the tomatoes having broken down into a rich, flavorful base.
Because there are no raw proteins in this recipe, you do not need to check for internal temperatures; visual cues and the texture of the vegetables are your best indicators of success. The dish should be steaming hot throughout before serving.
Up next · Part 3 of 3
2 variations · storage & make-ahead · 3 answers · printable card
Tips, FAQ & printable recipe (Part 3)← Back to the ingredients (Part 1)