Dinner · Part 2 of 3: Instructions
Slow Cooker Sweet Heat Banana Pepper Chicken Step-by-step instructions
- Prep
- Cook
- Total
- Serves
- 4
Before you start
Before beginning, ensure your slow cooker is clean and placed on a flat, heat-resistant surface away from the edge of the counter. Have all ingredients measured and ready to go. If your chicken breasts were stored in the refrigerator, they can be placed directly into the slow cooker.
Avoid rinsing the raw chicken to prevent the spread of bacteria in your kitchen; if you choose to rinse it, ensure you clean and sanitize your sink and surrounding surfaces immediately afterward.
Ingredients at a glance (5)
- 4 boneless skinless chicken breasts
- 1/2 cup banana pepper rings
- 1/4 cup brown sugar
- 1/2 tsp red pepper flakes
- 1/4 cup honey
Instructions
Layering the ingredients
- Prepare the slow cookerPlace the raw boneless skinless chicken breasts into the bottom of the slow cooker, arranging them in an even layer so they cook consistently.Look for The chicken should be snug in the insert.Tip Ensure the chicken breasts are of similar size.
The chicken breasts should be arranged in a single, even layer at the base of the slow cooker to ensure uniform cooking. Once the peppers and seasonings are added, the slow cooker is ready to be covered. Check that the lid fits securely to lock in the heat and moisture, which is essential for the slow-braising process that keeps the chicken tender and prevents it from drying out.
Seasoning and braising
- Add aromatics and seasoningsScatter the banana pepper rings over the chicken, then sprinkle the brown sugar and red pepper flakes evenly over the top, followed by a drizzle of honey.Look for The ingredients should cover the surface of the chicken.Tip Drizzle the honey in a zigzag motion to ensure even distribution.
During the cooking phase, the chicken will slowly release its juices, which combine with the honey, brown sugar, and pepper brine to form a flavorful liquid. The kitchen will begin to smell savory and slightly sweet as the ingredients meld together. You do not need to stir the contents during this time, as the slow cooker will do the work of infusing the chicken with the sweet and spicy flavors.
Final reduction
- Cook and serveCover and cook on low for 4 hours until the chicken reaches an internal temperature of 165°F (74°C). Allow the chicken to rest for 5 minutes before serving with the accumulated sauce.Look for The sauce will appear thick and pourable.Safe temperature 165°F (74°C) internal temperature (poultry)Tip Use a meat thermometer inserted into the thickest part.
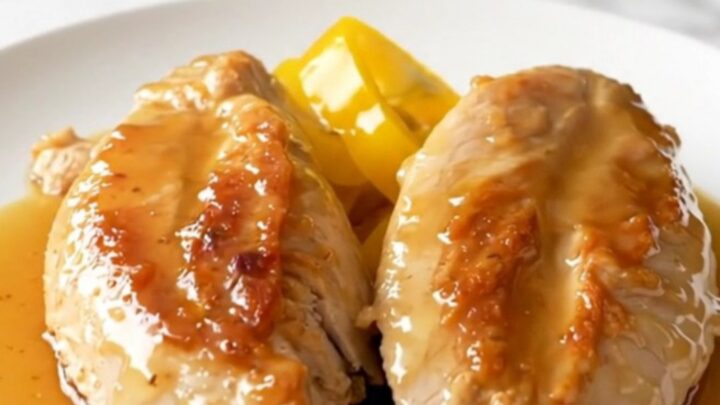
At the end of the cooking time, the chicken should look soft and succulent, with a thick, pourable glaze clinging to the surface. The banana peppers should be tender, and the sauce will have a beautiful, glossy finish.
Verify the internal temperature with a thermometer to ensure safety before letting the dish rest for five minutes, which allows the juices to redistribute and ensures the best possible texture.
Common mistakes
A common mistake is overcooking the chicken, which can lead to a dry texture even in a slow cooker. Avoid lifting the lid frequently, as this releases heat and moisture, which extends the cooking time and can affect the consistency of the sauce.
Another error is using chicken breasts that vary significantly in size, which causes some pieces to become overcooked while others remain under-done. Always check the thickest part of the meat to ensure it is cooked through safely.
How to tell it’s done
The chicken is perfectly cooked when it reaches an internal temperature of 165°F (74°C) as measured by a meat thermometer inserted into the thickest part of the breast.
At this stage, the meat should be opaque throughout and easily pull apart with a fork. The sauce will have thickened slightly and appear glossy, coating the chicken breasts in a vibrant, sweet, and tangy glaze that is ready to be served immediately.
- Poultry: 165°F (74°C) in the thickest part
Up next · Part 3 of 3
2 variations · storage & make-ahead · 3 answers · printable card
Tips, FAQ & printable recipe (Part 3)← Back to the ingredients (Part 1)