Dinner · Part 2 of 3: Instructions
Slow Cooker Sweet Glazed Ham for Easy Entertaining Step-by-step instructions
- Prep
- Cook
- Total
- Serves
- 12
Before you start
Before you begin, ensure your slow cooker is clean and positioned on a stable, heat-resistant surface. Remove the ham from its packaging and take a moment to pat it dry with paper towels.
If your ham includes a seasoning packet, you may choose to incorporate it, but the brown sugar method provides a rich, classic flavor on its own. Have your tongs and serving platter ready nearby to facilitate a smooth transition from the slow cooker to the table once the cooking time is complete.
Ingredients at a glance (2)
- 1 whole spiral-sliced ham
- 2 cups brown sugar
Instructions
Preparation and Seasoning
- Prepare the HamPlace the spiral-sliced ham into the bottom of an 8-quart slow cooker. Ensure the ham fits securely within the vessel to allow for even heat distribution during the cooking process. If the ham is too large, trim the base slightly to ensure the lid closes tightly to trap the steam and moisture effectively.Look for The ham should sit level in the slow cooker base.Tip Ensure the ham is fully thawed if it was previously frozen to maintain consistent cooking times.
- Apply the Brown SugarSpread the brown sugar evenly over the entire surface of the ham, pressing it gently into the spiral slices to ensure the sugar penetrates deep into the meat. This layer will melt and combine with the natural juices of the ham to create the signature sweet, sticky glaze as it cooks slowly.Look for The sugar should coat the top and sides of the ham thoroughly.Tip Use your hands to pack the sugar firmly between the slices for maximum flavor absorption.
At the end of this phase, the ham should be snugly fitted in the slow cooker with a thick, even layer of brown sugar covering all exposed surfaces. The kitchen should smell faintly of the cured meat, and the setup should feel secure. Check that the lid fits properly to ensure no steam escapes, as this is vital for the slow-cooking process that will transform the texture of the ham over the next several hours.
Slow Cooking Process
- Slow Cook the HamCover the slow cooker with the lid and set it to cook on low heat for 4 hours. This slow, steady heat allows the fat to render and the sugar to caramelize into a deep, rich syrup without drying out the meat. Ensure the ham reaches an internal temperature of 145°F (63°C) and let it rest for at least 3 minutes before carving.Look for The glaze will be bubbling and the ham will appear glistening.Safe temperature 145°F (63°C) internal temperature (steaks, chops and roasts)Tip Avoid opening the lid frequently, as this releases essential heat and moisture.
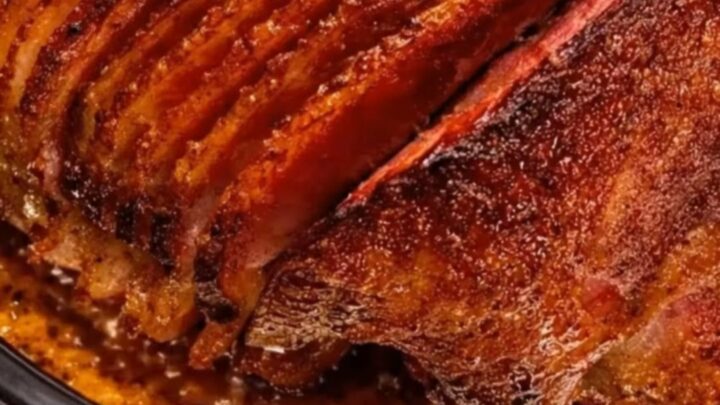
By the end of the cooking phase, you will notice a rich, sweet aroma filling the kitchen as the brown sugar has fully liquefied and merged with the ham juices. The ham should appear glistening and dark, with the glaze bubbling around the base of the slow cooker.
Ensure the meat is heated through, and use a thermometer to verify that the internal temperature has reached the safe threshold of 145°F (63°C) before proceeding to the final serving stage.
Resting and Serving
- Serve the HamCarefully remove the ham from the slow cooker using large tongs and transfer it to a serving platter. Let the ham rest for at least 15 minutes before carving to allow the juices to redistribute throughout the meat. Drizzle any remaining glaze from the bottom of the slow cooker over the slices before serving.Look for The meat should be tender and easily pull away from the bone.Tip Use a sharp carving knife to slice between the pre-cut spiral sections for perfect portions.
After resting, the ham should be firm enough to slice cleanly without falling apart. The glaze will have thickened slightly as it cooled during the resting period, creating a beautiful, sticky finish on the surface. Check that the slices are moist and that the glaze is evenly distributed. The ham is now ready to be carved and served immediately, offering a tender, flavorful experience that highlights the success of the slow cooking method.
Common mistakes
A common mistake is overcrowding the slow cooker, which can prevent the ham from heating evenly and lead to uneven caramelization. Another issue is cooking the ham for too long, which may cause the meat to fall apart too easily, making it difficult to carve into clean, uniform slices.
Additionally, ensure you do not use high heat settings; the slow cooker is designed for low and slow cooking, which is crucial for maintaining the delicate texture of the meat and preventing the sugar glaze from burning.
How to tell it’s done
The ham is considered done when it has reached a safe internal temperature of 145°F (63°C) at its thickest point. Beyond the temperature, look for a visual change: the glaze should be bubbling, deep brown, and slightly thickened.
The edges of the spiral slices will appear tender and slightly curled, indicating that the heat has penetrated through the entire cut. Always use a meat thermometer inserted into the center to confirm the internal temperature before you proceed to the carving stage.
- Steaks, chops and roasts: 145°F (63°C) in the thickest part, then a 3-minute rest
Up next · Part 3 of 3
2 variations · storage & make-ahead · 3 answers · printable card
Tips, FAQ & printable recipe (Part 3)← Back to the ingredients (Part 1)