Dinner · Part 2 of 3: Instructions
Slow Cooker Sweet Chili Spareribs for Easy Weeknight Dinners Step-by-step instructions
- Prep
- Cook
- Total
- Serves
- 4
Before you start
Before you begin, make sure your slow cooker is clean and dry. Have all your ingredients measured out and ready to go. If you are using a large rack of spareribs, cut them into individual sections between the bones to ensure they fit properly and cook evenly.
Keep your green onions pre-sliced and your garlic powder within reach so that the assembly process remains quick and efficient, allowing you to get the ribs cooking as soon as possible.
Ingredients at a glance (4)
- 3 lb pork spareribs, cut into sections
- 1/2 cup green onions, sliced
- 1 tbsp garlic powder
- 1 cup sweet chili sauce
Instructions
Rib assembly
- Assemble the ribsPlace the pork sparerib sections into the slow cooker, arranging them around the crock wall to ensure even cooking. Take care to tuck them in neatly for optimal space usage.Look for Ribs are snugly packed against the sides of the slow cooker insert.Tip Do not overcrowd the slow cooker too much as it can affect the braising process.
The ribs should be arranged in a single layer or stacked neatly around the perimeter of the slow cooker. This ensures that the heat circulates evenly around the meat, allowing the braising process to begin immediately. Ensure the crock is not overflowing, as this can prevent the lid from sealing properly and result in uneven cooking across the different rib sections.
Seasoning and glazing
- Season and glazeScatter the sliced green onions over the ribs. Evenly dust the ribs with the garlic powder, then pour the sweet chili sauce over the entire mixture to coat each piece thoroughly.Look for The sauce is drizzled over all the meat and aromatics.Tip Ensure the sauce covers the ribs as evenly as possible for a consistent flavor.
At this stage, the ribs should be evenly coated with the sweet chili sauce and the aromatic garlic powder. The green onions should be distributed throughout the cooker.
Everything should look well-prepared and ready for the long, slow heat. There is no need to stir the ingredients once added, as the sauce will naturally distribute itself as it warms and the meat renders its juices.
Final cook and rest
- Slow cook and serveCover and cook on low for 5 to 6 hours until the meat is tender. Once done, ensure the pork reaches an internal temperature of at least 145°F (63°C). Remove the ribs carefully and let them rest for at least 5 minutes before serving.Look for Meat is very tender and pulls away from the bone easily when tested.Safe temperature 145°F (63°C) internal temperature (steaks, chops and roasts)Tip The residual heat during the resting phase helps to lock in the juices.
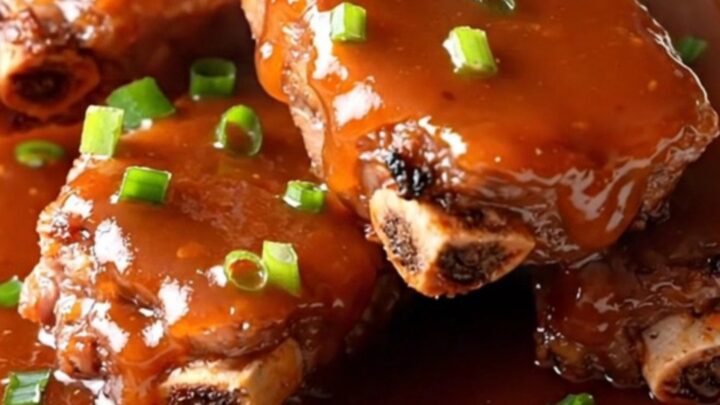
The ribs should be dark, glossy, and incredibly tender. The sauce will have reduced into a thick, sticky consistency that clings to the pork. Before serving, the meat must rest for at least 5 minutes. This pause allows the juices to redistribute throughout the meat, ensuring that every bite is as moist and flavorful as possible when you finally plate the dish.
Common mistakes
Avoid lifting the lid too frequently during the cooking process, as each time you open the slow cooker, heat escapes and the cooking time is extended.
Another common mistake is adding too much liquid; the ribs will release their own juices as they cook, so do not be tempted to add extra water or broth, or the sauce will become thin and watery rather than the desired sticky glaze consistency.
How to tell it’s done
The ribs are perfectly cooked when the meat is extremely tender and begins to pull away from the bone naturally. When you lift a rib section with tongs, it should feel soft and yield easily under light pressure.
Use a meat thermometer to check that the thickest part of the meat has reached an internal temperature of at least 145°F (63°C) to ensure it is safe to consume and perfectly textured for serving.
- Steaks, chops and roasts: 145°F (63°C) in the thickest part, then a 3-minute rest
Up next · Part 3 of 3
2 variations · storage & make-ahead · 3 answers · printable card
Tips, FAQ & printable recipe (Part 3)← Back to the ingredients (Part 1)