Dinner · Part 2 of 3: Instructions
Slow Cooker Spicy Giardiniera Shredded Beef Step-by-step instructions
- Prep
- Cook
- Total
- Serves
- 6
Before you start
Before you begin, ensure your slow cooker is clean and placed on a flat, heat-resistant surface away from any wall outlets or clutter. Take the chuck roast out of the refrigerator about 30 minutes before cooking to allow it to lose its initial chill, which helps with even cooking.
Have your two forks ready for shredding, and ensure you have a clean workspace for the assembly process. Keep the beef broth measured and the giardiniera jar ready to open to ensure a quick and seamless setup of the slow cooker insert.
Ingredients at a glance (4)
- 2 lb chuck roast
- 1 jar spicy giardiniera
- 1 packet Italian seasoning
- 1 cup beef broth
Instructions
Preparation and assembly
- Assemble ingredientsPlace the chuck roast into the bottom of the slow cooker. Pour the spicy giardiniera over the beef, ensuring the vegetables are evenly distributed. Sprinkle the Italian seasoning packet over the top of the beef and vegetables, then pour in the beef broth to provide moisture during the cooking process.Look for The beef should be sitting flat in the bottom of the cooker.Tip Ensure the beef is trimmed of excess fat for a cleaner final sauce.
At this stage, the beef is nestled at the bottom of the slow cooker, covered by a vibrant layer of giardiniera vegetables and seasoning.
The broth has been added, and the ingredients are ready for the long, slow cooking process to begin. Ensure the lid is securely in place to lock in the moisture and heat.
Slow cooking
- Slow cook the beefCover the slow cooker with its lid. Cook on the low setting for 8 hours. The beef is ready when it reaches an internal temperature of 145°F (63°C). Once cooked, let the meat rest for at least 3 minutes before shredding.Look for The beef should be extremely tender and pulling away from itself.Safe temperature 145°F (63°C) internal temperature (steaks, chops and roasts)Tip If the beef still feels tough, cook for an additional hour.
After 8 hours, the kitchen should be filled with the savory, tangy aroma of the cooking beef. The meat will have shrunk slightly, and the liquid will have become infused with the spices and the brine from the giardiniera. The beef should look very soft and be easily pierced by a fork.
Shredding and finishing
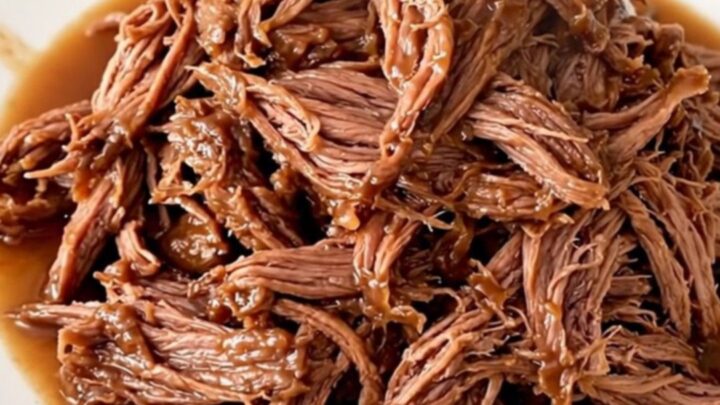
- Shred and serveOnce the beef has rested, remove it from the slow cooker and transfer to a plate. Use two forks to shred the meat into bite-sized pieces. Return the shredded beef to the cooking juices to absorb the flavor for a few minutes before serving.Look for The liquid should be thick and glossy from the rendered beef fat.Tip Skim any excess fat from the surface of the juices before adding the shredded meat back.
The meat is now tender enough to shred effortlessly. After being pulled apart, the shredded beef should be glossy and thoroughly coated in the juices. It is now ready to be served hot, having rested for at least 10 minutes to ensure the most succulent texture possible for your meal.
Common mistakes
One common mistake is lifting the lid too frequently, which causes significant heat loss and extends the cooking time unnecessarily. Another potential issue is using a cut of meat that is too lean, like a top round, which may turn out dry and stringy instead of tender.
Always ensure the slow cooker is at least halfway full to prevent the liquid from evaporating too quickly. Finally, be sure to let the meat rest for 10 minutes after shredding to allow the juices to redistribute properly.
How to tell it’s done
The beef is done when it reaches an internal temperature of 145°F (63°C) and the fibers pull apart easily with a fork. It should be fork-tender, meaning a fork can pierce the meat with zero resistance.
If the meat still offers resistance or feels rubbery, it needs more time in the slow cooker. Once shredded, the meat should look dark and glossy, having absorbed the reduced juices from the slow cooker.
- Steaks, chops and roasts: 145°F (63°C) in the thickest part, then a 3-minute rest
Up next · Part 3 of 3
2 variations · storage & make-ahead · 3 answers · printable card
Tips, FAQ & printable recipe (Part 3)← Back to the ingredients (Part 1)