Dinner · Part 2 of 3: Instructions
Slow Cooker Spareribs in Onion Gravy Step-by-step instructions
- Prep
- Cook
- Total
- Serves
- 4
Before you start
Before starting, ensure your slow cooker insert is clean and dry. Prepare the ribs by cutting them into individual or manageable sections if they are sold as a full rack. Slice your yellow onions into even, thin strips to ensure they soften at the same rate as the meat.
Have your measuring cups and gravy packets ready on the counter to streamline the assembly process, making the transition from preparation to cooking as efficient as possible.
Ingredients at a glance (4)
- 3 lb bone-in spareribs, cut into serving sections
- 2 large yellow onions, sliced
- 1 packet brown gravy mix
- 1 cup beef broth
Instructions
Arranging the ribs
- Prepare the slow cookerArrange the bone-in sparerib sections around the interior wall of the slow cooker insert. Ensure they are placed upright to allow for even cooking throughout the process.Look for Ribs are lined along the inner wall.Tip Trim any excess fat from the ribs before placing them in the cooker for a cleaner final sauce.
The ribs should be placed vertically along the wall of the slow cooker. They should feel secure and stable, forming a ring that allows the center of the pot to remain clear for the aromatics and liquids.
Check that the ribs are not overlapping too heavily, as this can block the heat from reaching the center of the meat.
Adding the flavor base
- Add aromatics and seasoningScatter the sliced onions into the center of the slow cooker among the ribs. Sprinkle the brown gravy mix evenly over the ribs and onions, then pour the beef broth over the top of the ingredients.Look for Broth covers the base of the insert.Tip Pouring the broth slowly helps distribute the gravy powder evenly across all the meat surfaces.
The onions should be distributed evenly among the ribs. Once the gravy mix and broth are added, the liquid should settle at the bottom of the pot. The ribs will remain partially submerged, allowing the steam and liquid to work together to braise the meat. The aroma should be savory and slightly sweet from the onions.
Braising to perfection
- Slow cook and serveCover the slow cooker and cook on low for 8 hours or high for 4 hours. Ensure the ribs reach an internal temperature of 145°F (63°C). Let the meat rest for at least 5 minutes before serving with the thickened onion gravy.Look for Meat pulls away easily from the bone.Safe temperature 145°F (63°C) internal temperature (steaks, chops and roasts)Tip The residual heat from the slow cooker will keep the meat warm while you prepare sides.
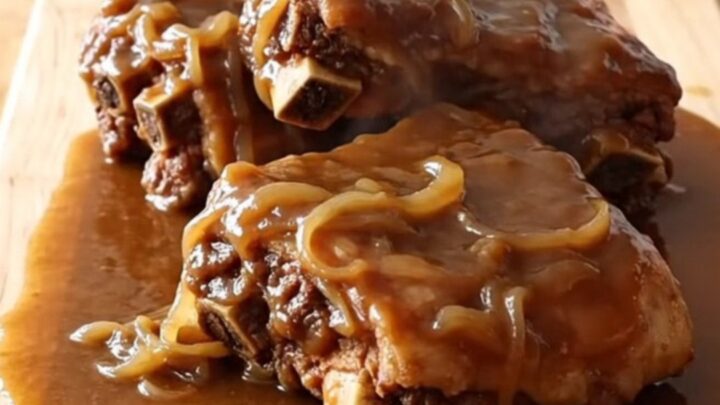
The ribs will look deeply browned and softened. The onion gravy will have transformed into a thick, rich sauce that coats the meat. The smell will be savory and robust. Before serving, verify the internal temperature of the meat and ensure the ribs are tender enough to be easily pierced with a fork.
Common mistakes
Avoid lifting the lid frequently during the cooking process, as each time you do, heat and steam escape, significantly increasing the total cooking time and potentially drying out the meat.
Do not overcrowd the slow cooker; if the ribs are packed too tightly, the heat will not circulate effectively, leading to uneven cooking. Finally, ensure you do not skip the resting period, as this allows the juices to redistribute throughout the meat, ensuring maximum tenderness and flavor in every bite.
How to tell it’s done
The spareribs are perfectly cooked when the meat is extremely tender and begins to pull away from the bone with minimal effort. Using a digital meat thermometer, ensure the thickest part of the meat reaches an internal temperature of at least 145°F (63°C).
The onion gravy should be thick, glossy, and cling to the ribs when lifted. If the sauce appears too thin, you can remove the lid for the final thirty minutes of cooking.
- Steaks, chops and roasts: 145°F (63°C) in the thickest part, then a 3-minute rest
Up next · Part 3 of 3
2 variations · storage & make-ahead · 3 answers · printable card
Tips, FAQ & printable recipe (Part 3)← Back to the ingredients (Part 1)