Dinner · Part 2 of 3: Instructions
Slow Cooker Southern Green Beans with Savory Bacon Step-by-step instructions
- Prep
- Cook
- Total
- Serves
- 6
Before you start
Before beginning, ensure that the green beans are properly washed and the woody ends are trimmed. Dice the yellow onion into uniform pieces to ensure even cooking, and chop the cooked bacon into small, bite-sized strips.
Have the chicken broth measured out and the garlic powder ready near the slow cooker for quick assembly. Ensure your slow cooker is placed on a stable surface with enough clearance for heat release, and confirm that all ingredients are prepared and ready to be added to the insert.
Ingredients at a glance (5)
- 2 lbs fresh green beans, trimmed
- 6 slices cooked bacon, chopped
- 1 medium yellow onion, diced
- 1 tsp garlic powder
- 1 cup chicken broth
Instructions
Ingredient Preparation
- Assemble the IngredientsPlace the trimmed fresh green beans into the slow cooker insert. Add the chopped cooked bacon and diced yellow onion on top of the beans in an even layer.Look for beans fill the bottom of the slow cookerTip Ensure the beans are evenly distributed for consistent cooking throughout the process.
At this phase, the ingredients are layered in the slow cooker. The beans are fresh and firm, the bacon is chopped, and the onion is diced. The slow cooker insert should be clean and ready for the seasoning step. Verify that all components are present and the beans have been trimmed properly before moving on to the seasoning phase to ensure a smooth cooking process.
Seasoning and Liquid Addition
- Season and PourSprinkle the garlic powder evenly over the beans, bacon, and onion mixture. Pour the chicken broth over the ingredients to ensure the flavors are well distributed during the slow cooking process.Look for broth is poured over the topTip Do not stir the mixture, as the slow cooker will naturally combine the flavors as it heats.
The garlic powder is evenly distributed over the beans, and the chicken broth has been poured over the mixture. At this stage, the ingredients are ready for the heat. Check that the broth has reached the base of the insert to facilitate the steaming and braising process. Ensure the lid is clean and ready to be placed on the slow cooker to seal in the moisture.
Slow Cooking
- Slow Cook and ServeCover the slow cooker and cook on low for 4 to 6 hours or on high for 2 to 3 hours until the green beans are tender and have absorbed the savory broth. Remove the lid and serve warm.Look for beans are tender and moistTip Check the beans at the minimum time to ensure they reach your desired level of tenderness.
The slow cooker is now at work, and the kitchen should begin to smell like savory broth and bacon. By the end of this phase, the beans should be tender, and the liquid should be reduced and flavorful.
Check for the desired level of tenderness by sampling a bean before serving. Ensure the final temperature is consistent and the beans are warm throughout before transferring them to a serving dish.
Common mistakes
A common mistake is overcrowding the slow cooker, which can prevent even cooking; ensure the beans are packed but not overly compressed. Another error involves using too much liquid, which can result in a watery dish rather than a concentrated, savory braise.
Avoid lifting the lid frequently, as this releases heat and moisture, significantly increasing the cooking time. Finally, do not add salt until the end of the cooking process, as the bacon and broth already contain significant amounts of sodium.
How to tell it’s done
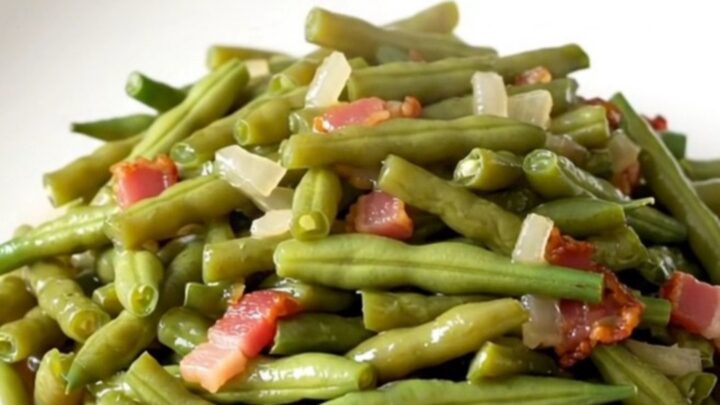
The green beans are finished when they are tender throughout and have lost their raw, crisp texture, yet they should still hold their shape without falling apart. The onion should be translucent and completely soft, and the bacon should have infused the broth with its smoky essence.
The liquid in the bottom of the slow cooker should be flavorful and aromatic, indicating that the beans have properly braised. There is no protein to test for temperature in this dish, so focus on the texture of the beans.
Up next · Part 3 of 3
2 variations · storage & make-ahead · 3 answers · printable card
Tips, FAQ & printable recipe (Part 3)← Back to the ingredients (Part 1)