Dinner · Part 2 of 3: Instructions
Slow Cooker Southern Butter Beans with Savory Ham Step-by-step instructions
- Prep
- Cook
- Total
- Serves
- 6
Before you start
Before beginning, ensure all ingredients are measured and ready. Dice the onion into small, uniform pieces to ensure they soften completely during the cooking process.
If the ham is not pre-cubed, cut it into bite-sized pieces that are roughly the same size as the beans. Have the chicken broth measured and melt the butter so it is ready to be combined with the liquid for easy pouring into the slow cooker.
Ingredients at a glance (7)
- 1 lb cooked ham cubes
- 2 lbs butter beans
- 1 large onion, diced
- 1/4 tsp black pepper
- 1 tsp garlic powder
- 4 cups chicken broth
- 2 tbsp butter, melted
Instructions
Layering the ingredients
- Assemble the basePlace the cubed cooked ham into the bottom of the slow cooker insert. Add the butter beans and the diced onion on top of the ham to build the base of the dish.Look for The ham should cover the bottom of the slow cooker evenly.Tip Ensure the ham is distributed evenly to allow the juices to permeate the beans during the slow cooking process.
At the end of this phase, the ingredients should be layered neatly in the slow cooker. The ham should be at the bottom to absorb the initial heat, followed by the beans and onions. Ensure the ingredients are distributed evenly across the base of the insert so that the heat can circulate properly once the machine is turned on and the lid is secured in place.
Seasoning and liquid addition
- Season and liquidSprinkle the black pepper and garlic powder over the beans and ham. Pour the chicken broth mixed with the melted butter over the entire mixture to ensure everything is well-hydrated.Look for The liquid should just cover the beans to ensure they cook evenly.Tip Whisking the melted butter into the broth before pouring helps distribute the richness more uniformly throughout the dish.
Once the pepper, garlic powder, and broth-butter mixture are added, the beans should be mostly submerged. The liquid should look clear and well-distributed. If the beans appear too dry, add a small amount of extra broth, but be cautious not to overfill the cooker, as the beans will release their own moisture as they simmer over the next several hours.
Simmering to perfection
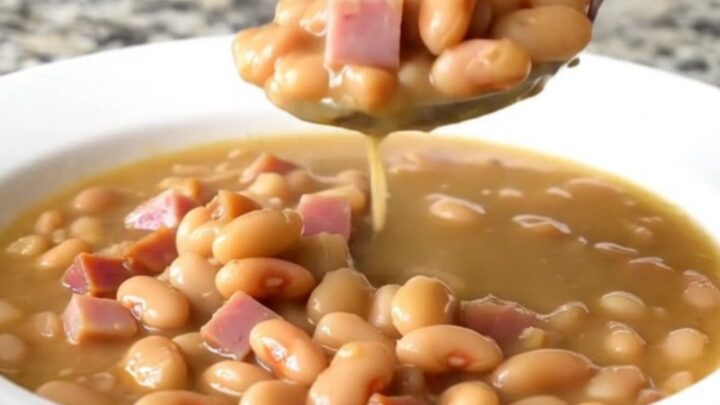
- Slow cook and serveCover and cook on low for 8 hours or high for 4 hours until the beans are tender and the flavors have melded into a creamy, savory broth. Serve hot in shallow bowls.Look for The beans should be tender when pierced with a fork and the broth should be slightly thickened.Tip Check the beans near the end of the cooking time to ensure they reach your preferred level of tenderness.
After the slow cooking cycle, the kitchen should smell rich and savory. The beans should be tender and the broth should have thickened into a creamy, flavorful sauce.
The ham will have softened, and the onions will have practically melted into the mixture. Check for seasoning and adjust with a pinch of salt if necessary before serving the dish warm in shallow bowls.
Common mistakes
One common mistake is overcrowding the slow cooker, which can prevent the beans from cooking evenly. Another potential issue is adding too much liquid, which can result in a thin, watery broth rather than the desired creamy consistency.
Be sure to follow the recommended proportions to achieve the best texture. Finally, avoid lifting the lid frequently during the cooking process, as this releases heat and moisture, significantly extending the required cooking time and potentially affecting the tenderness of the beans.
How to tell it’s done
The dish is considered done when the butter beans are soft and creamy, yielding easily to the pressure of a fork. The ham should be heated through and tender. The broth will have reduced slightly, becoming opaque and flavorful from the starch released by the beans and the savory essence of the ham.
There is no specific internal temperature required for the beans themselves, but ensure the ham has reached a safe serving temperature of at least 140°F (60°C).
Up next · Part 3 of 3
2 variations · storage & make-ahead · 3 answers · printable card
Tips, FAQ & printable recipe (Part 3)← Back to the ingredients (Part 1)