Dinner · Part 2 of 3: Instructions
Slow Cooker Sesame Ginger Pork Tenderloin Step-by-step instructions
- Prep
- Cook
- Total
- Serves
- 4
Before you start
Ensure the pork tenderloin is removed from the refrigerator about 20 minutes before cooking to take the chill off. Gather all your ingredients and measuring tools before beginning. If you are using a ceramic slow cooker insert, ensure it is clean and dry.
Have a clean cutting board and a sharp chef's knife ready for slicing the finished meat once it has rested. Double-check that your slow cooker is plugged into a dedicated outlet and is situated on a stable, heat-resistant surface away from any water sources.
Ingredients at a glance (4)
- 2 lbs pork tenderloin, trimmed
- 1 lb baby carrots
- 1 tbsp ground ginger
- 1 cup sesame ginger sauce (honey soy base)
Instructions
Arranging the Ingredients
- Prepare the slow cookerPlace the pork tenderloins into the bowl of the slow cooker, ensuring they are positioned side by side for even cooking. Add the baby carrots, tucking them around the meat to ensure they submerge in the cooking liquid.Look for The pork should be settled at the bottom of the insert.Tip Do not overcrowd the slow cooker; arrange the tenderloins so they are flat.
The pork and carrots are neatly arranged in the slow cooker. Ensure the tenderloins are lying flat and the carrots are tucked into the gaps to maximize surface area contact with the sauce. Everything should look organized before you add the seasoning and sauce.
Seasoning and Braising
- Season and pour sauceSprinkle the ground ginger evenly over the top of the pork and carrots. Pour the sesame ginger sauce directly over the ingredients, ensuring the pork is well-coated to allow the flavors to penetrate the meat during the slow braising process.Look for The sauce should pool slightly at the bottom of the cooker.Tip Use a silicone spatula to scrape every bit of sauce from the measuring cup.
The ginger is evenly distributed and the sauce covers the meat. As the cooking progresses, the kitchen will begin to smell like ginger and savory soy. The sauce will begin to bubble slightly, and the carrots will soften as they absorb the liquid.
Resting and Serving
- Braise and finishCover and cook on low for 4 hours until the pork reaches an internal temperature of 145°F (63°C). Once cooked, remove the tenderloin from the slow cooker and let it rest for at least 5 minutes before slicing it into medallions to serve.Look for The meat should be tender and easily pierced with a fork.Safe temperature 145°F (63°C) internal temperature (steaks, chops and roasts)Tip Resting the meat is crucial to keep the juices inside the tenderloin.
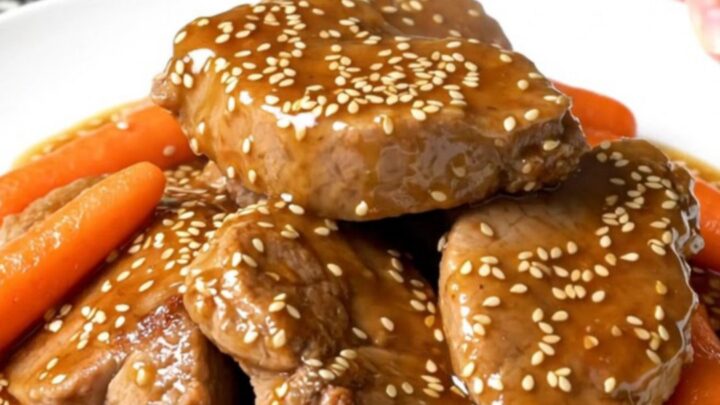
The pork is cooked to 145°F (63°C) and removed from the heat. The meat should appear glossy and tender, and the carrots should be soft when pierced with a fork. Ensure the meat rests for 5 minutes before you begin slicing it into thick medallions.
Common mistakes
Avoid lifting the lid of the slow cooker unnecessarily during the cooking process, as this releases heat and moisture, significantly increasing the cooking time.
Another common mistake is failing to trim the silver skin from the pork tenderloin, which can leave a tough, chewy texture even after long cooking.
Lastly, do not substitute a high-fat cut of meat without adjusting the cooking time, as pork tenderloin is specifically prized for its lean composition and requires precise timing to avoid dryness.
How to tell it’s done
The pork is done when it reaches an internal temperature of 145°F (63°C) as measured by a meat thermometer inserted into the thickest part of the tenderloin. At this temperature, the meat will be cooked through while remaining juicy and tender.
Avoid overcooking the pork, as this will cause it to become dry and tough. Always allow the meat to rest on a carving board for at least 5 minutes before slicing to allow the internal juices to redistribute, ensuring a succulent texture in every bite.
- Steaks, chops and roasts: 145°F (63°C) in the thickest part, then a 3-minute rest
Up next · Part 3 of 3
2 variations · storage & make-ahead · 3 answers · printable card
Tips, FAQ & printable recipe (Part 3)← Back to the ingredients (Part 1)