Dinner · Part 1 of 3: Ingredients
Slow Cooker Salisbury Steak and Potatoes with Rich Onion Gravy
- Prep
- Cook
- Total
- Serves
- 6
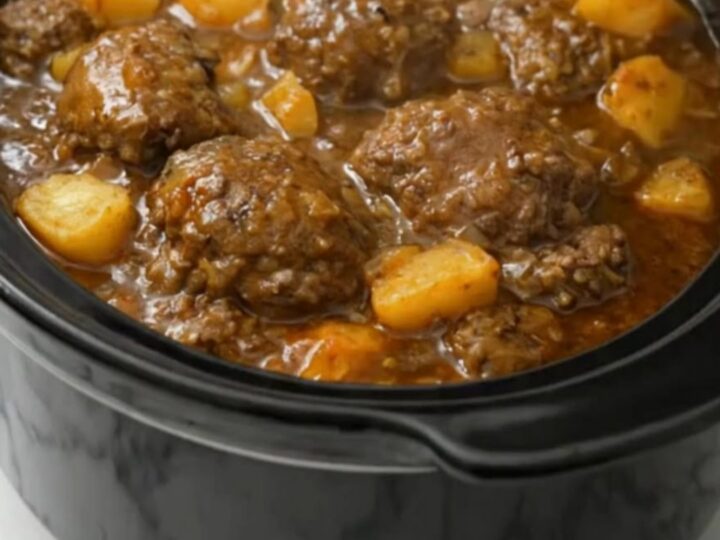
Six tender Salisbury steak patties, a pot of golden potatoes and a deep, steaming onion gravy — all from one slow cooker and about twenty minutes of hands-on work. The patties braise right on top of the potatoes, so every drop of flavor drips down into the vegetables, and the gravy builds itself while the house fills with the smell of onions and beef.
Salisbury steak is the kind of dinner that usually asks for a skillet, constant attention and a separate pot of potatoes. This version moves the whole thing to the slow cooker: seasoned ground beef patties rest on a bed of sliced onions and potato chunks, a flour-thickened broth pours over, and six unhurried hours turn it all into a rich, glossy gravy with fork-tender everything.
There is no browning step, no oven and no last-minute rush — assemble the pot in the morning, walk away, and come back to a complete plate of meat, potatoes and gravy. The recipe below walks through shaping the patties, layering the cooker, and finishing the gravy so it clings to the spoon rather than pooling watery. One pot, one warm plate, and the exact kind of meal a cold evening calls for.
Ingredients
- 2 lb ground beef (80/20)
- 1/2 cup plain breadcrumbs
- 1 large egg
- 1 tbsp Worcestershire sauce
- 2 tbsp ketchup
- 1 tsp garlic powder
- 1 tsp kosher salt
- 1/2 tsp black pepper
- 1 large yellow onion, thinly sliced
- 2 lb Yukon Gold potatoes, cut into 1 1/2-inch chunks
- 2 cups beef broth
- 3 tbsp all-purpose flour
Why this recipe works
The slow cooker is an ideal match for Salisbury steak because braising is gentler than pan-frying. Patties cooked in a skillet shrink, toughen and need careful browning; here they sit above the liquid on the potato layer and cook in moist, steady heat, staying tender and holding their oval shape.
As they cook, their juices drip into the broth below, seasoning the potatoes from above while the onions underneath melt into the gravy base — one layer feeding the next.
The gravy thickening is built into the layering, not bolted on at the end. Flour whisked into cold broth first means no lumps, and the long, low cook gives the starch time to hydrate fully while the onions break down and release their sweetness.
Onion slices under the patties act as a rack and a flavor source at once, and the potatoes absorb broth from below and meat juices from above, so they taste seasoned all the way through rather than boiled.
Notes and substitutions
Choose 80/20 ground beef for patties that stay juicy over the long cook; leaner blends can turn dry and crumbly after hours of heat. Plain breadcrumbs, an egg and a spoonful of ketchup bind and season the meat the classic way, and Worcestershire sauce deepens the savory flavor — keep it in, since it does real work here. Yukon Gold potatoes hold their shape best; russets soften more and thicken the gravy further.
A 6-quart slow cooker fits this recipe with room for the gravy to bubble gently at the edges; a smaller 4-quart pot will be crowded, so reduce to 5 patties or accept slightly longer cooking.
Every slow cooker runs differently, so treat the time ranges as a guide and rely on the thermometer. If the gravy is thinner than expected at the end, the flour slurry in the final step fixes it in fifteen minutes without disturbing the patties.
- plain breadcrumbs: Use crushed saltine crackers or quick oats in the same amount; both hold the patties together as they simmer.
- Yukon Gold potatoes: Russet or red potatoes work well; cut red potatoes slightly larger so they hold their shape over the long cook.
- beef broth: Swapping in mushroom broth or half broth and half water with an extra teaspoon of Worcestershire keeps the gravy savory.
- ketchup: Tomato paste plus a pinch of sugar gives the same color and gentle sweetness in the patties.
Equipment
- 6-quart slow cooker
- Large mixing bowl
- Whisk
- Cutting board and knife
- Measuring cups and spoons
- Serving spoon
Up next · Part 2 of 3
8 steps · 6 h of cooking · what to look for at each stage
Step-by-step instructions (Part 2)