Dinner · Part 2 of 3: Instructions
Slow-Cooker Rosemary Thyme Bottom Round Roast Step-by-step instructions
- Prep
- Cook
- Total
- Serves
- 6
Before you start
Before you begin, make sure the slow cooker is clean and ready. Pat the roast dry with paper towels, but there's no need to season it—the gravy and herbs provide plenty of flavor. Smash the garlic cloves with the flat side of a knife to release their oils.
Rinse the fresh herbs and pat them dry. Measure out the gravy and cut the butter into small pats. Have all your ingredients within reach so you can layer them quickly and get the cooker going.
Ingredients at a glance (6)
- 3 1/2 lb bottom round roast
- 12 cloves garlic, smashed
- 4 sprigs fresh rosemary
- 6 sprigs fresh thyme
- 2 cups rich brown gravy
- 4 tbsp unsalted butter, cut into pats
Instructions
Layer and Go
- Layer the RoastPlace the bottom round roast in the center of the slow cooker insert. Scatter the smashed garlic cloves over the top of the roast. Lay the fresh rosemary and thyme sprigs evenly over the meat and garlic.Look for The roast should be surrounded by the garlic and herbs, with the herbs resting on top.Tip Smashing the garlic cloves helps release their flavor without mincing.
- Add Gravy and ButterPour the rich brown gravy over the roast, ensuring the meat is mostly coated. Dot the top of the roast with the butter pats.Look for The gravy should pool around the roast, and the butter will melt as it cooks.Tip Use a good-quality gravy for the best flavor, or make a quick homemade version.
After this phase, the slow cooker contains the raw roast, garlic, herbs, gravy, and butter. The gravy should cover the bottom and sides of the roast, with the herbs and garlic visible on top. The butter pats will start to melt as the cooker heats up. Everything looks neat and ready for the long, unattended cook.
Slow-Cook to Tender
- Slow CookCover the slow cooker and cook on low for 8 to 10 hours, or on high for 4 to 5 hours, until the meat is fork-tender and easily shreds. Let it rest for 3 minutes before slicing.Look for The meat should be fall-apart tender and the gravy bubbling gently around the edges.Safe temperature 145°F (63°C) internal temperature (steaks, chops and roasts)Tip Low and slow yields the most tender results; resist the urge to peek too often.
- Rest the RoastOnce the roast is cooked through, turn off the slow cooker and let the meat rest in the warm gravy for at least 10 minutes. This allows the juices to redistribute.Look for The meat will look moist and hold together when lifted with tongs.Safe temperature 145°F (63°C) internal temperature (steaks, chops and roasts)Tip Resting is essential for a juicy roast; don't skip this step.
At the end of this phase, the kitchen smells richly of roasted beef, garlic, and herbs. The gravy is bubbling gently around the edges, and the meat is visibly tender—it yields easily when pressed with a spoon.
The roast has darkened to a deep mahogany brown, and the garlic cloves have softened into sweet, jammy pockets of flavor. The meat should be fork-tender and ready to rest.
Shred and Serve
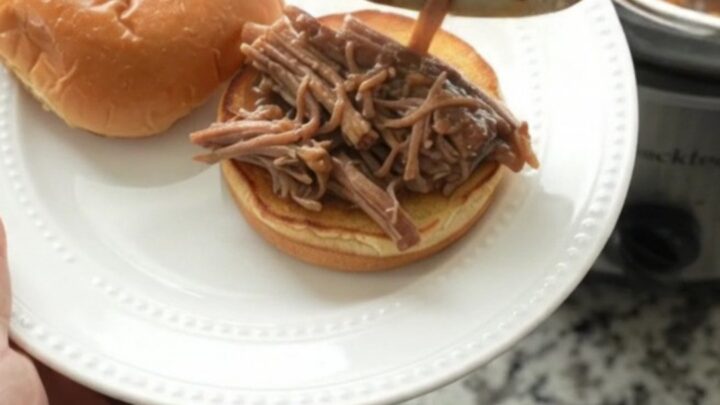
- Shred and ServeUsing two forks, shred the roast directly in the slow cooker, mixing it with the gravy. Serve the shredded beef on toasted brioche slider buns or over mashed potatoes, spooning extra gravy on top.Look for The meat should shred easily and be coated in glossy gravy.Tip For sliders, pile the beef high and add a spoonful of gravy for extra moisture.
The shredded beef is glossy with gravy, with strands that are moist and tender. The garlic cloves have mostly melted into the sauce, leaving behind a subtle sweetness. The herbs have softened and released their oils, perfuming the dish. When spooned over toasted buns or mashed potatoes, it looks hearty and inviting, with a rich, savory aroma that promises deep satisfaction.
Common mistakes
One common mistake is lifting the lid too often, which lets heat escape and extends cooking time. Another is using a lean cut without enough fat—bottom round is lean, but the gravy and butter compensate.
Avoid overcooking to the point where the meat becomes stringy and dry; check at the minimum time and adjust. Also, don't skip the resting step—it allows the juices to redistribute, ensuring every bite is moist and flavorful.
How to tell it’s done
The roast is done when it is fork-tender and easily pulls apart with little resistance. The internal temperature should read at least 145°F (63°C) for safety, but for optimal tenderness, you'll want to cook it well beyond that—until the meat shreds effortlessly.
If you're using a meat thermometer, insert it into the thickest part of the roast; it should read well above 145°F (63°C), often around 190°F (88°C) for fall-apart texture. Let the meat rest for at least 3 minutes before shredding.
- Steaks, chops and roasts: 145°F (63°C) in the thickest part, then a 3-minute rest
Up next · Part 3 of 3
4 variations · storage & make-ahead · 5 answers · printable card
Tips, FAQ & printable recipe (Part 3)← Back to the ingredients (Part 1)