Dinner · Part 2 of 3: Instructions
Slow Cooker Roquefort and Walnut Chicken Step-by-step instructions
- Prep
- Cook
- Total
- Serves
- 4
Before you start
Before beginning, ensure all ingredients are measured and ready. If the Roquefort is in a large block, crumble it into small, uniform pieces to ensure it melts evenly. The chicken breasts should be patted dry with paper towels to remove excess moisture.
If the walnuts are whole, crush them into smaller pieces using a knife or a mortar and pestle. Ensure the slow cooker is placed on a heat-resistant surface away from any edges, and verify that all tools are clean and ready for use.
Ingredients at a glance (5)
- 4 pieces chicken breasts
- 4 oz Roquefort cheese, crumbled
- 1/2 tsp ground black pepper
- 1 cup crème fraîche
- 1/4 cup walnuts, crushed
Instructions
Assembly Phase
- Prepare the slow cookerPlace the raw chicken breasts into the base of the slow cooker, ensuring they are arranged in a single layer to promote even cooking throughout the process.Look for Chicken pieces should lie flat without overlapping excessively.Tip Ensure the slow cooker is clean and dry before adding the ingredients.
The chicken breasts are arranged in the slow cooker, topped with the crumbled Roquefort, a dusting of pepper, and a generous layer of crème fraîche. Everything looks clean and ready for the slow cooking process to begin. Verify that the lid is tightly sealed to maintain the necessary temperature throughout the cooking duration.
Slow Cooking Phase
- Add sauce componentsScatter the crumbled Roquefort evenly over the chicken breasts. Dust the surface with ground black pepper, then spoon the crème fraîche over the top of the cheese.Look for The crème fraîche should form a thick layer covering the cheese and chicken.Tip Do not stir the ingredients; let the slow cooker do the work.
The kitchen should begin to fill with the savory, pungent aroma of the blue cheese and cooking chicken. Check the slow cooker periodically through the glass lid if possible, but avoid opening it.
The sauce should be bubbling gently, and the cheese should be fully incorporated into the crème fraîche, creating a smooth, pale, and fragrant mixture.
Finishing Phase
- Cook and serveCover and cook on low for 4 hours until the chicken reaches an internal temperature of 165°F (74°C). Once finished, remove the chicken, let it rest for 5 minutes, and garnish with crushed walnuts before serving immediately.Look for The chicken should be tender and the sauce should be bubbly and creamy.Safe temperature 165°F (74°C) internal temperature (poultry)Tip Check the internal temperature with a meat thermometer to ensure accuracy.
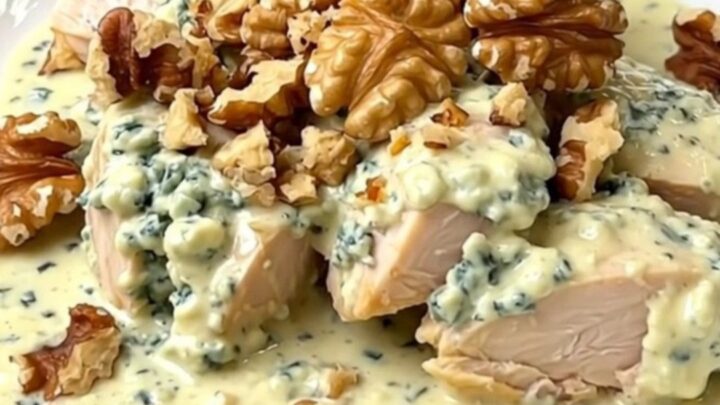
The chicken is tender and fully cooked, with the sauce having reached a perfect, coating consistency. The dish is ready for final assembly. Once garnished with the crunchy, toasted walnuts, it should look appetizing, with the creamy sauce clinging to the chicken and the walnuts providing a beautiful, rustic contrast against the pale, rich sauce.
Common mistakes
Avoid overcooking the chicken, which can lead to a dry texture even in a sauce-heavy dish. Another common error is stirring the ingredients during the cooking process; keep the lid closed to maintain a consistent temperature.
Ensure the Roquefort is crumbled rather than added in large chunks to prevent uneven melting. Finally, do not skip the resting period, as this allows the juices to redistribute through the meat, ensuring that every bite remains succulent and flavorful when served on the plate.
How to tell it’s done
The chicken is done when it is opaque throughout and reaches an internal temperature of 165°F (74°C). Use a meat thermometer inserted into the thickest part of the breast to confirm the temperature.
The sauce should appear thickened and creamy, with the cheese fully melted and incorporated into the crème fraîche. If the chicken is not yet at the required temperature, continue cooking for another 15 to 20 minutes before checking again, as internal temperatures can vary based on the slow cooker model.
- Poultry: 165°F (74°C) in the thickest part
Up next · Part 3 of 3
2 variations · storage & make-ahead · 3 answers · printable card
Tips, FAQ & printable recipe (Part 3)← Back to the ingredients (Part 1)