Dinner · Part 2 of 3: Instructions
Slow-Cooker Root Beer & Hickory BBQ Pulled Pork Step-by-step instructions
- Prep
- Cook
- Total
- Serves
- 8
Before you start
Before beginning, ensure the pork shoulder is removed from the refrigerator about 30 minutes before cooking, though keep it in a cool place. Have your slow cooker clean and ready on a heat-resistant surface.
Prepare your workspace by laying out the meat claws or forks and having the barbecue sauce measured and ready. If you are preparing the coleslaw and pickles, keep them chilled in the refrigerator until the very last moment before assembly to ensure they remain crisp and refreshing when served.
Ingredients at a glance (7)
- 4.5 lb boneless pork shoulder
- 3 tbsp smoked paprika brown sugar seasoning
- 12 oz artisanal root beer
- 1.5 cups hickory barbecue sauce
- brioche buns, for serving
- creamy coleslaw, for serving
- dill pickles, for serving
Instructions
Seasoning and Initial Setup
- Season and SetupRub the 4.5 pounds of boneless pork shoulder thoroughly with the smoked paprika brown sugar seasoning until evenly coated. Place the seasoned meat into the ceramic slow cooker basin.Look for Ensure the seasoning is pressed into all sides of the meat for maximum flavor.Tip Rub the meat while it is still chilled from the refrigerator for easier handling.
- Add LiquidPour the 12 ounces of artisanal root beer around the pork shoulder in the slow cooker. Do not pour directly over the meat if you want to keep the seasoning rub intact.Look for The liquid should pool at the base of the ceramic pot around the roast.Tip Using a glass or measuring cup allows for a controlled pour around the edges.
At the end of this phase, the pork shoulder should be thoroughly coated in the spice rub and positioned securely in the slow cooker. The root beer should be poured carefully around the base of the meat.
Ensure the lid is seated firmly on the ceramic pot to lock in the heat and moisture. Everything is now set for the long, slow transformation that will yield the signature tender texture and deep flavor profile required for the next stage.
Slow-Cooking the Pork
- Slow CookCover the slow cooker with the glass lid and set it to cook on low heat for 8 hours. The pork is ready when it reaches an internal temperature of 145°F (63°C). Let the meat rest for at least 3 minutes before shredding.Look for The pork is done when it reaches an internal temperature of 145°F (63°C) and shreds easily with a fork.Safe temperature 145°F (63°C) internal temperature (steaks, chops and roasts)Tip Avoid lifting the lid during the cooking process to maintain the internal temperature.
During the eight-hour cooking cycle, the kitchen will fill with the rich, sweet, and smoky aroma of root beer and hickory smoke. By the end of this phase, the meat should be visibly tender, with the edges starting to pull away from the main mass. The liquid in the pot will have reduced slightly, creating a savory braising broth. The pork should be soft to the touch, indicating it has reached the ideal state for easy, uniform shredding.
Shredding and Final Assembly
- Shred and FinishCarefully remove the pork from the slow cooker and drain the excess cooking liquid. Shred the meat using two forks or meat claws. Return the shredded meat to the pot and fold in the 1.5 cups of hickory barbecue sauce until well combined.Look for The meat should be fully coated in a glossy layer of barbecue sauce.Tip Keep the cooker on the warm setting while shredding to ensure the meat stays hot.
- AssemblePile the barbecue pork high onto toasted buttered brioche buns. Top each serving with a portion of creamy coleslaw and a few slices of dill pickles.Look for The buns should be warm and slightly toasted to hold the weight of the meat.Tip Toast the brioche buns lightly with a touch of butter for added richness.
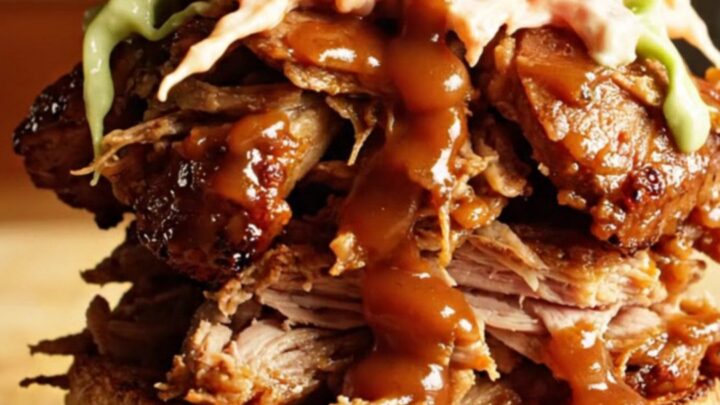
The pork is now fully shredded and tossed with the hickory barbecue sauce, resulting in a glossy, rich appearance. The meat should be piping hot and evenly coated in the sauce. When piled onto the toasted brioche buns, the pork should hold its shape while remaining tender. The final assembly with crisp coleslaw and pickles provides a vibrant contrast, signaling that the dish is ready for immediate serving at your table or cookout.
Common mistakes
Avoid the common mistake of lifting the slow cooker lid frequently, as this releases heat and moisture, significantly increasing the cooking time. Another frequent error is using a sauce that is too thin; ensure the hickory barbecue sauce has a thick, clingy consistency so it coats the shredded meat properly rather than pooling at the bottom.
Finally, do not skip the resting period; letting the meat sit for at least 3 minutes allows the juices to redistribute, ensuring the pork remains succulent when served on the buns.
How to tell it’s done
The pork is perfectly cooked when it reaches an internal temperature of 145°F (63°C) as measured with a digital meat thermometer. At this stage, the meat should be exceptionally soft and fall apart with the slightest pressure from a fork.
If the meat offers resistance when shredding, it needs more time in the slow cooker. The final result should be moist, tender, and easily pulled into uniform shreds without any signs of toughness or dryness, indicating the collagen has fully broken down.
- Steaks, chops and roasts: 145°F (63°C) in the thickest part, then a 3-minute rest
Up next · Part 3 of 3
2 variations · storage & make-ahead · 3 answers · printable card
Tips, FAQ & printable recipe (Part 3)← Back to the ingredients (Part 1)