Dinner · Part 2 of 3: Instructions
Slow Cooker Red Wine and Onion Pork Tenderloin Step-by-step instructions
- Prep
- Cook
- Total
- Serves
- 4
Before you start
Before beginning, ensure that your slow cooker insert is clean and dry. Remove the pork tenderloin from the refrigerator about 20 minutes before you are ready to start so it does not go into the cooker ice-cold.
Slice your yellow onions into consistent half-moon shapes to ensure they cook at the same rate. Have your measuring tools and the soup mix ready on the counter to streamline the assembly process, which should only take a few moments of active work.
Ingredients at a glance (4)
- 2 lbs pork tenderloin
- 2 cups yellow onions, sliced into half-moons
- 1 packet onion soup mix
- 1 cup dry red wine
Instructions
Layering the ingredients
- Prepare the slow cookerPlace the pork tenderloins into the base of the slow cooker. Arrange the sliced yellow onions evenly around and over the meat to ensure they cook down into the sauce.Look for The pork should lay flat in the bottom of the ceramic insert.Tip Ensure the onions are cut uniformly to help them soften consistently during the long cook time.
The pork should be positioned clearly at the bottom, surrounded by the onion slices. The onions should be distributed evenly to ensure they soften and incorporate into the final sauce effectively. Check that no ingredients are stuck to the sides of the ceramic insert, as this could lead to scorching during the long cooking time.
Adding the seasonings
- Season and add liquidSprinkle the onion soup mix evenly over the pork and onions. Pour the red wine over the top, covering the ingredients to create the braising liquid that will develop the flavor.Look for The liquid should pool slightly at the bottom of the cooker.Tip Distribute the soup mix thoroughly to ensure every part of the meat gets seasoned.
The onion soup mix should be sprinkled uniformly over the surface of the pork, followed by the measured red wine. Ensure that the wine is poured carefully so it does not wash away the seasoning from the top of the meat. The liquid should begin to mingle with the onions at the bottom, setting the stage for a flavorful braising process.
Final slow cooking
- Slow cook and serveCover and cook on low for 4 hours. Ensure the pork reaches an internal temperature of 145°F (63°C). Remove the pork and let it rest for at least 5 minutes before slicing.Look for The pork should be tender and easily pierced with a fork, and the sauce thickened.Safe temperature 145°F (63°C) internal temperature (steaks, chops and roasts)Tip Check the temperature in the thickest part of the meat to guarantee it is safe to serve.
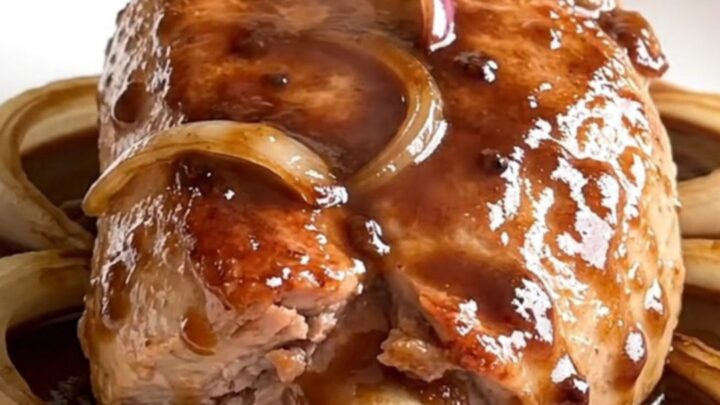
After the cooking time, the pork should appear soft and tender with a visible change in color. The onions should be translucent and well-integrated into the now-thickened red wine sauce.
Before removing, check the internal temperature to ensure safety and confirm the meat is cooked through. The kitchen should smell savory and slightly sweet from the reduced wine and onions.
Common mistakes
A common mistake is overcooking the pork, which can lead to a dry, stringy texture despite the braising liquid. Always monitor the cooking time closely, as slow cookers vary in temperature.
Another error is not allowing the meat to rest; skipping the resting phase will cause the juices to run out immediately upon slicing, leaving you with dry meat. Finally, do not overcrowd the slow cooker, as this prevents the wine and onion mixture from circulating properly around the pork tenderloin.
How to tell it’s done
The pork is done when it reaches an internal temperature of 145°F (63°C) when measured with a meat thermometer in the thickest part of the loin. At this stage, the meat should be opaque throughout and slightly firm to the touch.
It is crucial to let the meat rest for at least 5 minutes after removing it from the slow cooker; this allows the juices to redistribute throughout the fibers, ensuring the slices remain moist and succulent when served to your guests.
- Steaks, chops and roasts: 145°F (63°C) in the thickest part, then a 3-minute rest
Up next · Part 3 of 3
2 variations · storage & make-ahead · 3 answers · printable card
Tips, FAQ & printable recipe (Part 3)← Back to the ingredients (Part 1)