Dinner · Part 2 of 3: Instructions
Slow Cooker Ranchero Pork Chops for an Easy Weeknight Dinner Step-by-step instructions
- Prep
- Cook
- Total
- Serves
- 5
Before you start
Before you begin, ensure your slow cooker is clean and placed on a flat, heat-resistant surface. Have all your ingredients prepped and ready to go. Slice the onions into thin, even strips and cut the jalapenos into rounds, removing the seeds if you prefer a milder sauce.
Open the can of diced tomatoes with green chiles and ensure you have your measuring spoons ready. Having everything organized makes the assembly process fast and simple, allowing you to start the cooking process in just a few minutes.
Ingredients at a glance (5)
- 5 count bone-in pork chops
- 1 medium onion, sliced
- 2 count jalapeno peppers, sliced
- 1 tsp ground cumin
- 14.5 oz diced tomatoes with green chiles
Instructions
Preparation and Assembly
- Assemble the IngredientsPlace the five bone-in pork chops into the base of the slow cooker, arranging them in a slightly fanned layer to ensure even heat distribution during the cooking process.Look for The pork chops should be fanned out across the base of the slow cooker insert.Tip Ensure the slow cooker is clean and dry before adding the raw meat.
The pork chops are arranged in the slow cooker with onions, peppers, and tomatoes. The ingredients are ready to begin the slow braising process, and the slow cooker is set to the low setting to ensure gentle, consistent heat throughout the duration.
Slow Cooking
- Season and LayerScatter the sliced onions and jalapeno rounds evenly over the pork chops. Sprinkle the ground cumin over the top, then pour the diced tomatoes with green chiles over the entire mixture, ensuring all ingredients are distributed.Look for The vegetables and tomatoes should cover the pork chops to create a braising liquid.Tip Distribute the tomatoes thoroughly to ensure all pork is covered by the sauce.
During the cooking phase, the slow cooker maintains a steady temperature. The onions and peppers soften, and the tomatoes release their juices to form a fragrant sauce. The kitchen will begin to smell savory and aromatic as the flavors combine.
Finalizing and Serving
- Slow Cook and ServeCover the slow cooker and cook on low for 8 hours. Once the time is up, ensure the pork reaches an internal temperature of 145°F (63°C). Remove the chops and let them rest for at least 3 minutes before serving with the sauce.Look for The meat should be tender and easily pull away from the bone when tested with a fork.Safe temperature 145°F (63°C) internal temperature (steaks, chops and roasts)Tip Check the temperature in the thickest part of the meat away from the bone.
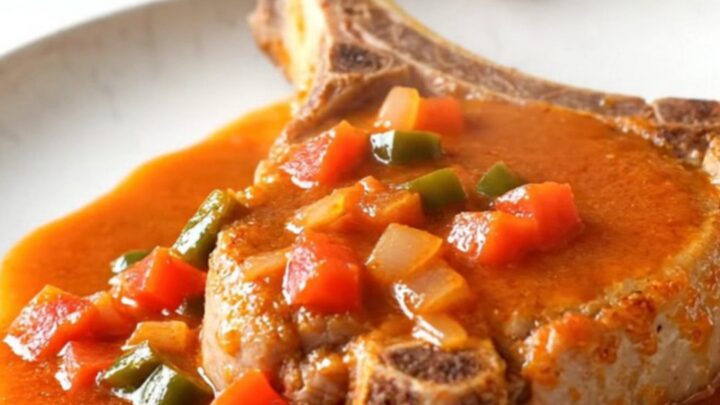
The pork is fully cooked and tender, having reached the required internal temperature. The sauce has thickened slightly, and the meat is ready to be plated. Check for seasoning one final time before serving the meal warm to your guests.
Common mistakes
A common mistake is overcrowding the slow cooker with too many layers of meat, which can lead to uneven cooking. Always try to arrange the chops in a single layer.
Another error is checking the food too frequently; opening the lid lets out steam and heat, which significantly increases the total cooking time and can lead to inconsistent results.
Finally, ensure the pork is not cooked for too long beyond the recommended time, as even slow-cooked meat can become dry if left on heat for several hours past completion.
How to tell it’s done
To determine if the pork chops are done, use a meat thermometer to check the thickest part of the chop, ensuring the probe does not touch the bone. The pork should reach an internal temperature of 145°F (63°C).
At this stage, the meat should be opaque throughout and tender enough to be easily pierced with a fork. Let the meat rest for at least 3 minutes before serving, which allows the juices to redistribute and ensures the most tender result.
- Steaks, chops and roasts: 145°F (63°C) in the thickest part, then a 3-minute rest
Up next · Part 3 of 3
2 variations · storage & make-ahead · 3 answers · printable card
Tips, FAQ & printable recipe (Part 3)← Back to the ingredients (Part 1)