Dinner · Part 2 of 3: Instructions
Slow Cooker Pumpkin Butter Glazed Chicken Thighs Step-by-step instructions
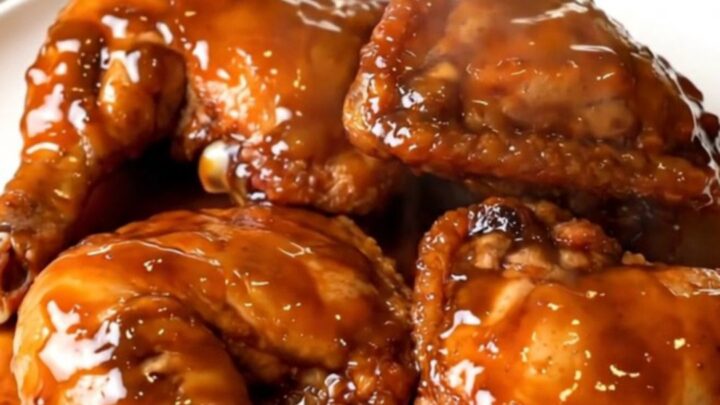
- Prep
- Cook
- Total
- Serves
- 4
Before you start
Before starting, ensure your slow cooker is clean and positioned on a stable, heat-resistant surface away from any water sources. Take the chicken thighs out of the refrigerator about 20 minutes before you plan to start assembling the dish to take the chill off.
Wash your hands thoroughly before and after handling the raw chicken, and ensure that your workspace is clear of any other items that might become cross-contaminated during the preparation process.
Ingredients at a glance (4)
- 4 lbs bone-in chicken thighs
- 1 large yellow onion, sliced
- 1 tbsp pumpkin pie spice
- 1 cup pumpkin butter (contains milk)
Instructions
Assembly Phase
- Prepare the slow cooker basePlace the bone-in chicken thighs into the bottom of the slow cooker. Scatter the sliced yellow onions evenly over the chicken pieces to provide a aromatic bed for the meat to cook in.Look for Chicken thighs are arranged in a single layer if possible.Tip Ensure the onions are spread out so they cook evenly and release their moisture.
At this stage, the slow cooker should be filled with the chicken thighs, sliced onions, and the pumpkin butter mixture. The onions should be distributed evenly to provide a base for the chicken, and the spice and glaze should be well-distributed. Ensure the lid is securely in place to begin the steady, low-heat cooking process that will develop the flavors over the next several hours.
Cooking Phase
- Season and glazeSprinkle the pumpkin pie spice evenly over the chicken and onions. Pour the pumpkin butter over the top of the ingredients, ensuring everything is lightly coated with the sauce.Look for The pumpkin butter covers the surface of the chicken.Tip Use a spatula to gently spread the pumpkin butter if it is very thick.
During this phase, the aroma of pumpkin spice and savory onion will begin to fill the kitchen. The chicken should be cooking gently in its own juices and the pumpkin butter glaze.
Check that the slow cooker is on the low setting to maintain a consistent temperature. The liquid level should be sufficient to keep the chicken moist, and the glaze should be slowly thickening around the meat.
Finishing Phase
- Cook and serveCover the slow cooker and cook on low for 4 to 6 hours. Once the chicken reaches an internal temperature of 165°F (74°C), remove the pieces to a plate. Let the chicken rest for at least 5 minutes before serving.Look for Chicken is tender and pulls away from the bone easily.Safe temperature 165°F (74°C) internal temperature (poultry)Tip Check the temperature with a meat thermometer in the thickest part of the thigh.
Once the cooking time is complete, the chicken should be glistening and tender. The glaze should have reduced into a thick, syrupy consistency that coats the meat. Confirm the internal temperature with a thermometer before removing the chicken from the slow cooker. Let the meat rest briefly to allow the glaze to set slightly on the surface of the chicken before you plate it for serving.
Common mistakes
A common mistake is overcrowding the slow cooker, which can lead to uneven cooking and excess moisture that thins out the glaze. Ensure the chicken thighs are arranged in a single layer.
Another error is checking the slow cooker too frequently; every time you lift the lid, heat escapes and the cooking time is extended, which can impact the final texture of the chicken and the consistency of the glaze.
How to tell it’s done
The chicken is perfectly cooked when the meat is tender and easily pulls away from the bone. Use a reliable digital meat thermometer to verify that the internal temperature has reached at least 165°F (74°C).
Because the chicken is cooked in a slow cooker, it should be succulent and hold its shape well. Always allow the chicken to rest for at least 5 minutes before serving to ensure the juices redistribute throughout the meat, resulting in the best possible texture.
- Poultry: 165°F (74°C) in the thickest part
Up next · Part 3 of 3
2 variations · storage & make-ahead · 3 answers · printable card
Tips, FAQ & printable recipe (Part 3)← Back to the ingredients (Part 1)