Dinner · Part 2 of 3: Instructions
Slow Cooker Provencal Chicken and Zucchini Step-by-step instructions
- Prep
- Cook
- Total
- Serves
- 4
Before you start
Before beginning, ensure your slow cooker is clean and positioned on a level, heat-resistant surface away from any water sources. Prepare the zucchini by washing it thoroughly, trimming the ends, and slicing it into rounds.
If the chicken thighs have excess surface moisture, pat them dry with paper towels to help the seasoning adhere better. Having all your ingredients measured and ready before you start assembling will make the process smooth and quick.
Ingredients at a glance (4)
- 4 pieces raw chicken thighs
- 2 medium zucchini, sliced
- 1 tbsp herbes de Provence
- 14 oz crushed peeled tomatoes
Instructions
Preparation and Layering
- Assemble the IngredientsPlace the raw chicken thighs into the bottom of the slow cooker insert. Distribute the sliced zucchini evenly over the top of the chicken pieces.Look for The chicken should be in a single layer at the base.Tip Ensure the chicken is fully thawed before placing it in the slow cooker for even cooking.
The chicken should be arranged in an even layer at the bottom of the slow cooker, providing a stable foundation. The zucchini slices should be distributed uniformly over the chicken, creating an organized assembly.
Check that all ingredients are accounted for and that the slow cooker is plugged in and ready to be set to the desired temperature level before starting.
Seasoning and Sauce Application
- Season and Add SauceSprinkle the herbes de Provence over the zucchini and chicken. Pour the crushed peeled tomatoes over the entire mixture, ensuring everything is lightly coated.Look for The tomatoes should cover most of the vegetable surface.Tip Use a spatula to spread the tomatoes if they clump in one spot.
The herbs should be evenly distributed to ensure every piece of chicken and zucchini receives flavor. The crushed tomatoes should form a consistent layer over the top, acting as a natural basting agent. Ensure the edges of the slow cooker are clean of any spilled tomato sauce to prevent burning during the long, slow cooking cycle that follows.
Slow Cooking Completion
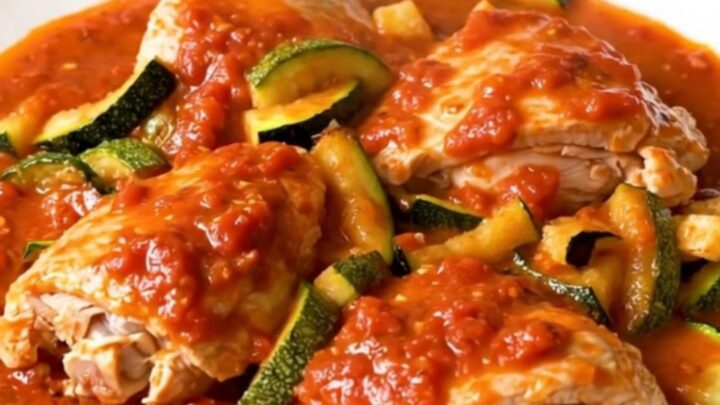
- Slow Cook to PerfectionCover the slow cooker and set to low. Cook until the chicken reaches an internal temperature of 165°F (74°C). Let the chicken rest for at least 5 minutes before serving to ensure tenderness.Look for The chicken is tender and the zucchini has softened significantly in the tomato sauce.Safe temperature 165°F (74°C) internal temperature (poultry)Tip Check the temperature at the thickest part of the thigh.
At the end of the cooking time, the kitchen should be filled with the savory aroma of herbs and tomatoes. The chicken should be tender and opaque, with the zucchini perfectly cooked but still holding its form. Check the internal temperature of the chicken with a meat thermometer to confirm it has reached 165°F (74°C) before proceeding to the final serving stage.
Common mistakes
Avoid lifting the lid frequently during the cooking process, as this releases heat and moisture, significantly extending the required cooking time. Another common mistake is over-slicing the zucchini; pieces that are too thin will disintegrate into the sauce.
Ensure the chicken is placed in a single layer at the bottom of the pot to prevent uneven cooking, and avoid overcrowding the slow cooker with unnecessary liquid, as the vegetables and tomatoes provide sufficient moisture on their own.
How to tell it’s done
The dish is ready when the chicken thighs are cooked through and tender. Use a food thermometer to verify that the internal temperature has reached at least 165°F (74°C) at the thickest part of the meat.
The zucchini should be soft and easily pierced with a fork, and the tomato sauce should be fragrant and bubbling. Allow the dish to rest for 5 minutes after turning off the slow cooker to let the juices redistribute through the meat.
- Poultry: 165°F (74°C) in the thickest part
Up next · Part 3 of 3
2 variations · storage & make-ahead · 3 answers · printable card
Tips, FAQ & printable recipe (Part 3)← Back to the ingredients (Part 1)