Dinner · Part 2 of 3: Instructions
Slow-Cooker Portobello Herb Garlic Butter Roast Step-by-step instructions
- Prep
- Cook
- Total
- Serves
- 6
Before you start
Before you start, make sure your slow cooker is clean and ready. Pat the beef roast dry with paper towels to help it brown later. Slice the portobello mushrooms about 1/2 inch thick, and mince the garlic if using fresh cloves.
If you're making your own cowboy butter, do that ahead of time and chill it in a log so you can slice medallions. Have your serving dish and any sides ready—this recipe is mostly hands-off, but a little prep goes a long way.
Ingredients at a glance (4)
- 3 1/2 lb beef bottom round roast
- 8 oz portobello mushroom caps, thickly sliced
- 2 tbsp minced garlic
- 4 medallions garlic-herb compound cowboy butter
Instructions
Layer and Forget
- Layer the RoastPlace the beef bottom round roast in the center of the slow cooker insert. It's okay if it fits snugly; the meat will shrink as it cooks. No need to sear—the slow cooker does the work.Look for The roast sits centered in the crock, with some space around the edges.Tip Pat the roast dry with paper towels before adding for better browning during cooking.
- Add Mushrooms and GarlicScatter the sliced portobello caps over and around the roast. Sprinkle the minced garlic evenly over the mushrooms and meat. The garlic will infuse the gravy as it cooks.Look for Mushrooms and garlic cover the top of the roast in an even layer.Tip Slice mushrooms about 1/2 inch thick so they hold their texture during the long cook.
- Top with Cowboy ButterPlace the medallions of cowboy butter on top of the roast. As the butter melts, it will create a rich, herby gravy that bastes the meat and mushrooms.Look for Butter medallions sit on the roast, ready to melt.Tip If using frozen butter medallions, no need to thaw—just place them on top.
At the end of this phase, the slow cooker is filled with the raw roast, mushrooms, garlic, and butter medallions. The butter is cold, so it hasn't melted yet. The setup looks simple and clean—just a few ingredients waiting for time to work their magic. Everything is in place, and you can cover the pot and walk away.
Slow Simmer and Rest
- Cover and Cook LowCover the slow cooker and cook on low for 8 to 10 hours, or on high for 4 to 5 hours, until the beef is fork-tender and easily shreds. The internal temperature should reach at least 145°F (63°C), but for braising, it will go higher. Let it rest for 3 minutes before slicing.Look for The meat is pull-apart tender and the gravy is bubbling gently.Safe temperature 145°F (63°C) internal temperature (steaks, chops and roasts)Tip Low and slow gives the best texture—resist the urge to open the lid too often.
- Rest the RoastOnce the beef is tender, turn off the slow cooker. Let the roast rest in the liquid for at least 10 minutes. This allows the juices to redistribute and makes shredding easier.Look for The gravy settles slightly, and the meat is very tender.Tip Resting in the hot liquid keeps the meat warm while it absorbs flavor.
After hours of cooking, the kitchen smells deeply beefy and buttery. The gravy is bubbling gently around the edges, and the meat is visibly tender, pulling apart at the slightest touch.
The mushrooms have softened and darkened, blending into the sauce. The butter has fully melted, creating a glossy, aromatic liquid that coats everything.
Shred and Serve
- Shred the BeefUsing two forks, shred the roast directly in the slow cooker. Stir the shredded beef into the gravy so every piece is coated. The mushrooms will have softened and blended into the sauce.Look for The beef pulls apart easily and mixes with the rich gravy.Tip Leave some larger chunks if you prefer a chunkier texture.
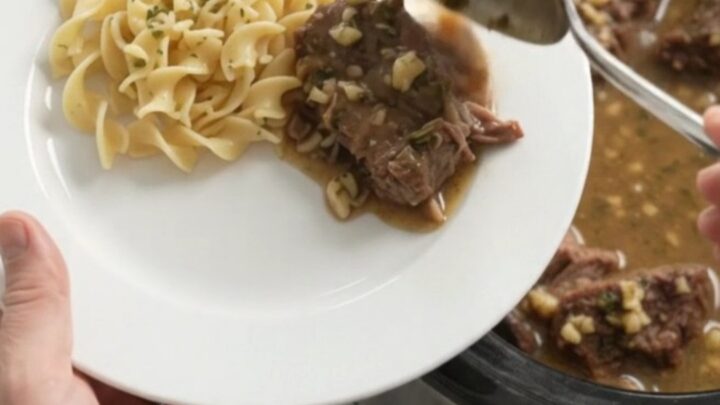
- Serve Over NoodlesSpoon the shredded beef and mushroom gravy over warm buttered egg noodles or your favorite side. The gravy will soak into the noodles, making every bite rich and savory.Look for The plated dish looks hearty, with glossy gravy coating the beef.Tip For extra richness, add a pat of butter to the noodles before serving.
The shredded beef is glossy with gravy, and the mushrooms are scattered throughout. The sauce is rich and savory, with a buttery sheen. When spooned over noodles, it looks like a hearty, homey meal that's both rustic and elegant. The first bite is fork-tender, juicy, and full of garlic-herb flavor.
Common mistakes
A common mistake is lifting the lid too often, which lets heat escape and extends cooking time. Try to resist the urge—every peek adds 15-20 minutes to the cook. Another mistake is using too little butter or skipping it entirely; the butter is what creates the luxurious gravy.
Also, don't cut the mushrooms too thin—they'll turn to mush. Stick to thick slices so they stay meaty. Finally, don't rush the resting time; letting the meat rest in the juices keeps it moist.
How to tell it’s done
The roast is done when it's fork-tender and easily shreds with a fork. For food safety, the internal temperature should reach at least 145°F (63°C), but because it braises for so long, it will likely exceed that.
The meat should be pull-apart tender, not chewy. The gravy should be rich and slightly thickened, with the mushrooms soft and silky. If the meat is still tough, cover and cook for another hour.
- Steaks, chops and roasts: 145°F (63°C) in the thickest part, then a 3-minute rest
Up next · Part 3 of 3
4 variations · storage & make-ahead · 5 answers · printable card
Tips, FAQ & printable recipe (Part 3)← Back to the ingredients (Part 1)