Dinner · Part 2 of 3: Instructions
Slow-Cooker Pineapple Honey Hickory Spare Ribs Step-by-step instructions
- Prep
- Cook
- Total
- Serves
- 6
Before you start
Before starting, make sure the slow cooker is clean and ready. If the ribs are very long, you may need to cut the racks to fit in a single layer. Drain the pineapple rings and set them aside.
Grate the fresh ginger and measure the barbecue sauce. Have all ingredients within reach so you can layer them quickly. No need to preheat the slow cooker; it will come to temperature gradually.
Ingredients at a glance (4)
- 4 lb St. Louis style pork spare ribs
- 1 can (20 oz) pineapple rings in juice, drained
- 2 tbsp fresh ginger, grated
- 1 1/2 cups honey hickory barbecue sauce
Instructions
Layer and Sauce
- Layer the Ribs and PineapplePlace the St. Louis style pork spare ribs into the slow cooker, arranging them in a single layer if possible, cutting the racks to fit. Lay the pineapple rings over the top of the ribs, then sprinkle the grated fresh ginger evenly over the pineapple and ribs.Look for The ribs should be nestled in the bottom of the slow cooker with pineapple rings covering the surface.Tip If the ribs are too large, cut between the bones to fit them in the slow cooker.
- Add the Barbecue SaucePour the honey hickory barbecue sauce over the ribs and pineapple, using a spatula to spread it evenly so all surfaces are coated. The sauce should pool around the ribs.Look for The ribs are generously coated with sauce, with some sauce pooling in the bottom of the slow cooker.Tip For extra flavor, brush the sauce onto the ribs with a basting brush.
At the end of this phase, the slow cooker contains the ribs in a single layer, topped with pineapple rings and grated ginger, and generously coated with honey-hickory barbecue sauce.
The sauce should be evenly distributed, with some pooling in the bottom. The raw ribs are visible through the sauce, and the pineapple adds a bright, golden contrast.
Slow Cook
- Slow Cook on LowCover the slow cooker and cook on low for 8 hours, or on high for 4-5 hours, until the meat is tender and easily pulls apart with a fork. Avoid lifting the lid during cooking to keep the heat inside. Let it rest for 3 minutes before slicing.Look for The meat is fork-tender and beginning to pull away from the bone; the sauce is bubbling and fragrant.Safe temperature 145°F (63°C) internal temperature (steaks, chops and roasts)Tip Cooking on low yields the most tender results, but high works in a pinch.
- Check for DonenessInsert an instant-read thermometer into the thickest part of the meat, avoiding bone. The internal temperature should read at least 145°F (63°C). The meat should be so tender that it nearly falls off the bone. Let it rest for 3 minutes before slicing.Look for The thermometer reads 145°F (63°C) or higher, and the meat shreds easily with a fork.Safe temperature 145°F (63°C) internal temperature (steaks, chops and roasts)Tip For fall-off-the-bone texture, cook until the meat reaches 190-200°F (88-93°C) internally.
After the cooking time, the slow cooker is bubbling gently, and the sauce has darkened and thickened. The ribs are fork-tender, and the meat is starting to pull away from the bones. The pineapple rings have softened and taken on a caramelized appearance. The aroma is intensely smoky, sweet, and spicy.
Rest and Serve
- Rest the RibsTurn off the slow cooker and let the ribs rest in the sauce for 10 minutes. This allows the juices to redistribute and the meat to become even more tender.Look for The ribs are resting in the hot sauce, and the kitchen smells of smoky barbecue and pineapple.Tip Resting is essential for juicy meat—don't skip it.
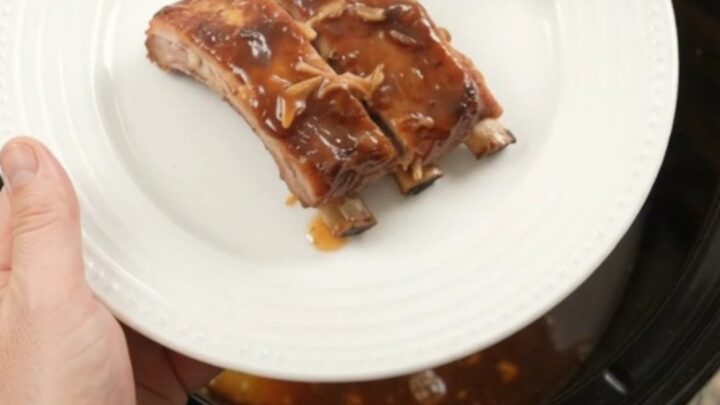
- Serve the RibsUsing tongs or a fork, carefully lift the ribs out of the slow cooker and transfer them to a serving plate. Spoon some of the caramelized pineapple and sauce over the top.Look for The ribs are glistening with sauce and the pineapple is caramelized and tender.Tip Serve with extra sauce on the side if desired.
The ribs have rested in the sauce for 10 minutes, becoming even more tender. When lifted, they hold together but easily separate with a fork. The sauce clings to the meat, and the pineapple is glossy. The ribs are transferred to a serving plate, with extra sauce spooned over the top, ready to be devoured.
Common mistakes
One common mistake is lifting the lid to check on the ribs too often. Every time you open the slow cooker, heat escapes and extends the cooking time. Resist the urge to peek and trust the process.
Another mistake is using a barbecue sauce that's too thin; a thicker sauce will cling better to the meat. Finally, don't skip the resting time—it allows the juices to redistribute, ensuring every bite is moist and flavorful.
How to tell it’s done
The ribs are done when the meat is fork-tender and easily pulls away from the bone. An instant-read thermometer inserted into the thickest part of the meat (avoiding bone) should register at least 145°F (63°C), though for fall-off-the-bone tenderness, you can cook until it reaches 190-200°F (88-93°C).
The sauce should be bubbling and slightly thickened, and the pineapple should be soft and caramelized.
- Steaks, chops and roasts: 145°F (63°C) in the thickest part, then a 3-minute rest
Up next · Part 3 of 3
4 variations · storage & make-ahead · 5 answers · printable card
Tips, FAQ & printable recipe (Part 3)← Back to the ingredients (Part 1)