Dinner · Part 2 of 3: Instructions
Slow Cooker Pineapple Barbecue Chicken Drumsticks Step-by-step instructions
- Prep
- Cook
- Total
- Serves
- 4
Before you start
Before beginning, ensure the slow cooker insert is clean and dry. Remove the chicken drumsticks from the refrigerator no more than 30 minutes before starting. If using frozen chicken, ensure it is completely thawed in the refrigerator overnight.
Prepare all ingredients by measuring the barbecue sauce and draining the crushed pineapple if it is packed in heavy syrup, as too much excess liquid can result in a thin sauce.
Ingredients at a glance (4)
- 8 chicken drumsticks
- 1 cup crushed pineapple, drained
- 2 tbsp barbecue rub
- 1 cup barbecue sauce
Instructions
Layering the Ingredients
- Prepare the Slow CookerArrange the raw chicken drumsticks in the bottom of the slow cooker in a single layer to ensure even cooking. If the drumsticks are large, ensure they are not overcrowded so the heat can circulate properly between each piece.Look for Drumsticks arranged in an even layer.Tip Pat the chicken dry with paper towels before placing them in the cooker to remove excess moisture for better sauce adherence.
The drumsticks should be arranged in a single, even layer at the bottom of the slow cooker. This positioning is critical for uniform heat distribution. Ensure the chicken is not bunched up, as this can create cold spots where the meat might not reach the necessary temperature for safe consumption.
Applying the Glaze
- Add Aromatics and GlazePour the crushed pineapple over the chicken pieces. Sprinkle the barbecue rub evenly over the top of the chicken and pineapple. Finally, pour the barbecue sauce over the entire mixture, ensuring the drumsticks are well coated.Look for Chicken is fully coated in sauce and pineapple.Tip Use a silicone spatula to scrape every bit of sauce from the measuring cup to avoid waste.
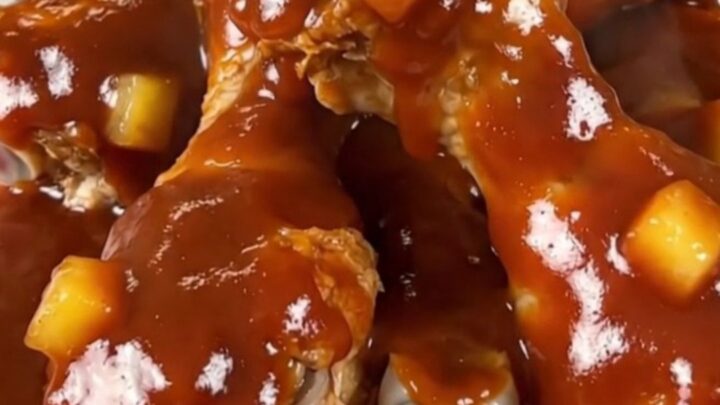
At this stage, the chicken is covered in pineapple, rub, and sauce. The mixture should look cohesive and well-distributed. Check that the barbecue rub is evenly sprinkled over the surface, as this will form the flavor crust that develops as the sauce reduces and concentrates during the long, slow cook.
Slow Cooking to Perfection
- Slow Cook and ServeCover the slow cooker and cook on high for 4 hours or low for 6 to 7 hours until the internal temperature of the chicken reaches 165°F (74°C). Once cooked, let the chicken rest for 5 minutes before serving to allow the juices to redistribute.Look for Meat is tender and pulls away easily from the bone.Safe temperature 165°F (74°C) internal temperature (poultry)Tip Use a meat thermometer to check the thickest part of the drumstick to ensure it is cooked through safely.
The final stage involves the slow, steady development of flavor. The sauce will darken and thicken, and the chicken will become incredibly tender.
Check that the liquid has reduced to a syrupy consistency and that the chicken is fully cooked through, reaching the required internal temperature of 165°F (74°C).
Common mistakes
Avoid lifting the lid frequently during the cooking process, as each time the lid is opened, significant heat and moisture escape, which adds to the total cooking time.
Additionally, do not overcrowd the slow cooker, as this prevents the heat from circulating properly and can lead to uneven cooking. Finally, ensure the sauce is distributed evenly over all pieces so that no part of the chicken remains dry or unseasoned during the braising process.
How to tell it’s done
The chicken is done when the meat is exceptionally tender and pulls easily away from the bone. Use a meat thermometer inserted into the thickest part of the drumstick, avoiding the bone, to confirm an internal temperature of 165°F (74°C).
The sauce should be thickened and glossy, clinging to the chicken. Always allow the chicken to rest for at least 5 minutes before serving to ensure maximum juiciness.
- Poultry: 165°F (74°C) in the thickest part
Up next · Part 3 of 3
2 variations · storage & make-ahead · 3 answers · printable card
Tips, FAQ & printable recipe (Part 3)← Back to the ingredients (Part 1)