Dinner · Part 2 of 3: Instructions
Slow Cooker Pepper Jelly Baby Back Ribs Step-by-step instructions
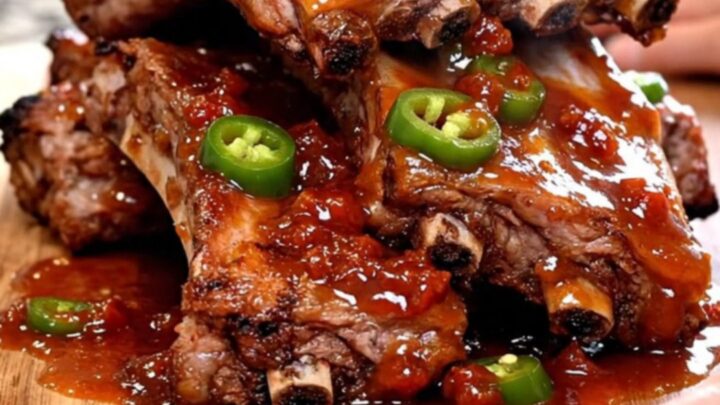
- Prep
- Cook
- Total
- Serves
- 4
Before you start
Before starting, ensure your slow cooker is clean and the interior ceramic insert is securely in place. Remove the rib racks from the refrigerator about 20 minutes before you begin to allow them to lose their chill, which helps with even cooking.
Pat the ribs dry with paper towels to ensure the garlic powder and jelly adhere properly to the surface. Have your ingredients measured and ready to go, as the assembly process is very quick once you begin.
Ingredients at a glance (4)
- 2 racks baby back ribs, cut into halves
- 2 tbsp jalapeno rings
- 1 tsp garlic powder
- 1/2 cup red pepper jelly
Instructions
Preparation and Arrangement
- Arrange the RibsPlace the baby back rib racks inside the slow cooker, standing them upright in a ring against the interior walls to ensure even cooking and space for the sauce.Look for Ribs standing securely against the wallTip Ensure the rack fits snugly to maintain shape during the long cooking process.
The ribs should be placed upright in a tight ring around the edge of the slow cooker. This position is vital because it allows the heat to circulate around the meat while keeping the ribs in a stable position as they soften.
Ensure there is no excess liquid at the bottom of the cooker before you add the aromatics, as the ribs will release their own juices during the cooking process.
Seasoning and Glazing
- Add Aromatics and GlazeScatter the jalapeno rings over the ribs, sprinkle evenly with the garlic powder, and dollop the red pepper jelly over the top of the meat.Look for Jelly evenly distributed over the ribsTip Distribute the jelly thoroughly to ensure every rib gets a good coating as it melts.
The jalapeno rings and garlic powder should be distributed evenly across the surface of the ribs. The red pepper jelly should be dolloped in several spots to ensure it melts uniformly over the entire rack. Check that the aromatics are not clumped in one area, as this ensures that the flavor profile remains balanced across every single rib when the dish is finally served.
Slow Cooking to Tenderness
- Cook and ServeCover and cook on low for 6 hours until the meat is tender. Use a meat thermometer to ensure the ribs reach an internal temperature of at least 145°F (63°C). Remove to a wooden board and let rest at least 3 minutes before carving.Look for Ribs are soft and pull away from the boneSafe temperature 145°F (63°C) internal temperature (steaks, chops and roasts)Tip Check for tenderness by testing a small piece with a fork before removing from the cooker.
At the end of the cooking time, the ribs should appear soft and the sauce should have thickened into a sticky, fragrant glaze. The ribs should be tender enough to handle with tongs without falling apart completely. Check the internal temperature to ensure safety and verify that the meat is cooked through. If the sauce seems too thin, you can reduce it separately before serving.
Common mistakes
A common mistake is overcrowding the slow cooker, which prevents the ribs from cooking evenly and can lead to uneven texture. Avoid lifting the lid frequently during the cooking process, as this releases heat and moisture, significantly increasing the total time required.
Additionally, ensure you do not use too much jelly initially; wait until the ribs are in place so the glaze stays on the meat rather than sinking to the bottom immediately.
How to tell it’s done
The ribs are done when the meat is exceptionally tender and pulls away easily from the bone with a light tug. Use a digital meat thermometer inserted into the thickest part of the meat, avoiding the bone, to confirm they have reached a safe internal temperature of at least 145°F (63°C).
The sauce should be thick, glossy, and pourable, coating the ribs completely with a vibrant color from the pepper jelly.
- Steaks, chops and roasts: 145°F (63°C) in the thickest part, then a 3-minute rest
Up next · Part 3 of 3
2 variations · storage & make-ahead · 3 answers · printable card
Tips, FAQ & printable recipe (Part 3)← Back to the ingredients (Part 1)