Dinner · Part 2 of 3: Instructions
Slow Cooker Peach Cowboy Candy Ham Step-by-step instructions
- Prep
- Cook
- Total
- Serves
- 6
Before you start
Before beginning, ensure your slow cooker is placed on a stable, heat-resistant surface away from any overhanging cabinets. Prepare your ingredients by cutting the ham into uniform, bite-sized pieces to ensure they cook evenly.
Have your candied jalapeños and peaches ready in bowls for easy assembly. If your ham was refrigerated, take it out about 20 minutes before starting to take the chill off, which helps the meat heat through more efficiently during the initial stage of the cooking process.
Ingredients at a glance (4)
- 2 lb cooked ham chunks
- 1 cup peach slices
- 1/2 cup brown sugar
- 1/2 cup candied jalapeño rings in syrup
Instructions
Preparation and layering
- Layering the ingredientsPlace the chunks of cooked ham into the bottom of the slow cooker insert. Evenly layer the peach slices over the ham, then sprinkle the brown sugar over the top to ensure a sweet base for the glaze.Look for The ham should be arranged in a single layer if possible to ensure even heating throughout the cooking process.Tip Ensure the ham pieces are roughly uniform in size to help them heat through evenly without drying out the smaller pieces.
The ham, peaches, and sugar should be layered neatly in the slow cooker.
The aroma should be neutral at this stage, with the focus on ensuring the ingredients are evenly distributed to facilitate consistent heat transfer once the slow cooker is activated and the lid is secured in place.
Infusion phase
- Adding the spicy elementSpoon the candied jalapeño rings along with their syrup over the peaches and ham. This will infuse the meat with a balance of heat and sweetness as it cooks slowly.Look for The syrup should be distributed evenly to coat the top layer, which will melt down into the ham during the cooking cycle.Tip If more heat is desired, add an extra tablespoon of the jalapeño syrup to the mixture before closing the lid.
As the ingredients cook, the candied jalapeño syrup will begin to melt and combine with the brown sugar and peach juices. You will start to notice a sweet, slightly spicy aroma filling the kitchen, indicating that the flavors are beginning to meld and coat the ham pieces.
Final glaze development
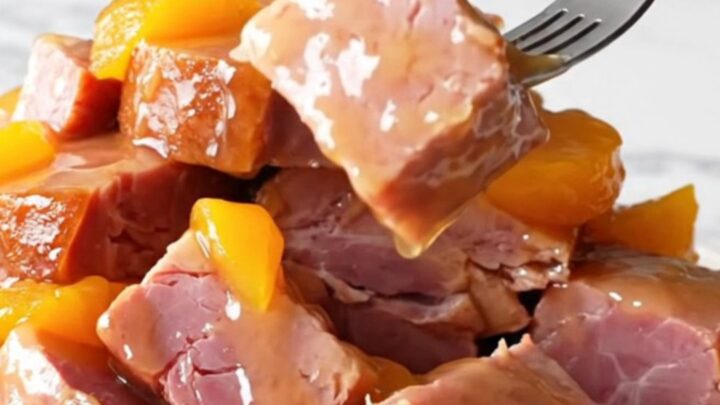
- Slow cooking and servingCover the slow cooker and cook on low for 4 hours until the ham is hot and the sauce is thickened. Serve warm on a plate, ensuring each serving includes plenty of the peach and jalapeño glaze.Look for The dish is ready when the ham is heated through to 145°F (63°C) and the glaze has a syrupy, glossy consistency.Safe temperature 145°F (63°C) internal temperature (steaks, chops and roasts)Tip Let the ham rest for 5 minutes after removing from the slow cooker to allow the glaze to set slightly for better adhesion to the meat.
At the end of the cycle, the sauce should appear thick, dark, and syrupy. The ham should be tender and thoroughly heated. Perform a final check to ensure the temperature is at least 145°F (63°C) before serving to ensure the dish is safe and ready to enjoy.
Common mistakes
A common mistake is overcrowding the slow cooker, which can prevent the glaze from forming properly and lead to uneven heating. Another issue is using ham that is cut into pieces that are too small, as they may disintegrate during the longer cook time.
Finally, avoid lifting the lid frequently during the cooking cycle, as this releases heat and moisture, significantly slowing down the process and potentially causing the sauce to break or fail to thicken as intended.
How to tell it’s done
The dish is considered done when the ham is piping hot throughout, reaching an internal temperature of 145°F (63°C). The sauce should be visibly reduced, glossy, and thick enough to coat the back of a spoon.
The peaches should be softened but still hold their shape, and the jalapeños should be tender. If the ham is not yet hot enough, continue cooking for another 30 minutes, checking the temperature again to ensure food safety and optimal texture.
Up next · Part 3 of 3
2 variations · storage & make-ahead · 3 answers · printable card
Tips, FAQ & printable recipe (Part 3)← Back to the ingredients (Part 1)