Dinner · Part 2 of 3: Instructions
Slow Cooker Parmesan Garlic Chicken Baked Ziti: Dump-and-Go Step-by-step instructions
- Prep
- Cook
- Total
- Serves
- 6
Before you start
Before starting, make sure the slow cooker is clean and dry. If you have time, let the chicken sit at room temperature for up to 30 minutes for more even cooking. Measure out the marinara, seasonings, and cheeses so they're ready to go.
You don't need to pre-cook the pasta or brown the chicken—everything goes in raw. Have a large spoon or spatula on hand for stirring, and an instant-read thermometer to check the chicken's doneness. This recipe is designed to be quick to assemble, so the prep time is minimal.
Ingredients at a glance (6)
- 2 lb chicken breast tenderloins
- 1 lb ziti pasta
- 4 cups marinara sauce
- 2 tsp Italian herb seasoning
- 2 cups shredded Italian four-cheese blend
- 1/2 cup freshly grated Parmigiano-Reggiano
Instructions
Layer and Top
- Layer the IngredientsPlace the chicken breast tenderloins in the bottom of the slow cooker in a single layer. Sprinkle the ziti pasta over the chicken, then pour the marinara sauce evenly over the pasta. Add the Italian herb seasoning and stir gently to combine, ensuring the pasta is mostly submerged in the sauce.Look for The chicken and pasta are coated with sauce; the mixture looks saucy and well combined.Tip Use a large spoon to gently fold the ingredients without breaking the chicken pieces.
- Add the CheesesSprinkle the shredded Italian four-cheese blend evenly over the top of the pasta mixture. Then sprinkle the freshly grated Parmigiano-Reggiano over the cheese layer. Do not stir after adding the cheeses; they will melt and form a golden crust during cooking.Look for The top is covered with a thick layer of shredded and grated cheese.Tip For extra browning, use a blend that includes mozzarella and provolone.
At the end of this phase, the slow cooker contains distinct layers: chicken on the bottom, pasta and sauce in the middle, and a thick blanket of cheese on top. The sauce should be evenly distributed, and the cheese should cover the surface completely.
The dish looks colorful and inviting, with the red sauce peeking through the white cheese. It's okay if the cheese isn't perfectly even; it will melt and spread during cooking.
Slow Cook
- Slow Cook Until Chicken Is DoneCover the slow cooker and cook on LOW for 3 to 4 hours, or on HIGH for 1 1/2 to 2 hours, until the chicken is cooked through and the pasta is tender. The chicken is done when it reaches an internal temperature of 165°F (74°C) in the thickest part. Stir gently once halfway through, if possible, to redistribute the sauce.Look for The sauce is bubbling around the edges, and the cheese is melted and starting to brown.Safe temperature 165°F (74°C) internal temperature (poultry)Tip Check the chicken temperature with an instant-read thermometer to ensure it's safe.
- Let It RestOnce the chicken is cooked through, turn off the slow cooker and let the dish rest for 5 to 10 minutes. This allows the sauce to thicken slightly and the flavors to meld. The cheese will set a bit, making serving easier.Look for The dish is no longer bubbling vigorously, and the cheese has settled.Tip Resting also helps the pasta absorb extra sauce, preventing a watery result.
After the cooking time, the sauce is bubbling, the cheese is melted and golden, and the kitchen smells like garlic and herbs. The chicken should be fork-tender and reach 165°F (74°C). The pasta is tender but not mushy, and the sauce has thickened slightly. The top is browned in spots, creating a crust that's both crispy and chewy. Let it rest before serving so the sauce settles.
Serve
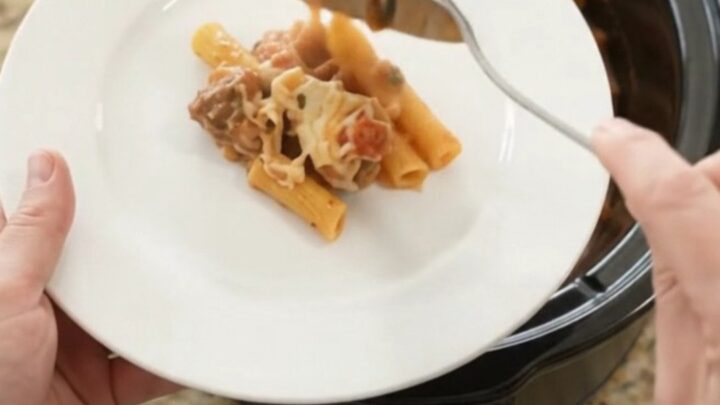
- Serve the Baked ZitiUsing a large serving spoon, scoop the chicken and ziti onto plates or into bowls. Make sure to get some of the cheesy top layer with each serving. Serve hot, with extra Parmesan on the side if desired.Look for The scoops are steaming, with melted cheese stretching from the spoon.Tip For a prettier presentation, use a wide spatula to lift portions without breaking the pasta.
When serving, the scoops should hold their shape, with the chicken and pasta clinging together in a saucy, cheesy mass. The cheese pulls into long, stretchy strands, and steam rises from the plate. The aroma is rich and savory, with a hint of basil and garlic. Each portion should have a good balance of chicken, pasta, and cheese, with the golden top as the star.
Common mistakes
One common mistake is adding too much liquid. The marinara provides enough moisture for the pasta to cook, so resist the urge to add water or broth. Another is stirring too often, which can break up the chicken and make the dish mushy.
Stir gently and only once or twice during cooking. Also, avoid using thin, watery marinara; a thicker sauce prevents the pasta from becoming soupy. Finally, don't lift the lid too frequently—each time you do, heat escapes and extends the cooking time.
How to tell it’s done
The dish is done when the chicken reaches an internal temperature of 165°F (74°C) in the thickest part. The pasta should be tender but still have a slight bite, and the sauce should be bubbling around the edges.
The cheese on top should be fully melted and starting to brown in spots. If the pasta is still hard after the recommended cooking time, continue cooking in 15-minute increments until it's tender. Be careful not to overcook, as the pasta can turn mushy.
- Poultry: 165°F (74°C) in the thickest part
Up next · Part 3 of 3
4 variations · storage & make-ahead · 5 answers · printable card
Tips, FAQ & printable recipe (Part 3)← Back to the ingredients (Part 1)