Dinner · Part 2 of 3: Instructions
Slow Cooker New Orleans Roast Beef Debris Step-by-step instructions
- Prep
- Cook
- Total
- Serves
- 6
Before you start
Before starting, ensure your slow cooker insert is clean and dry. Prepare the beef by trimming any excess large chunks of fat if desired, though some fat is beneficial for moisture. Peel the garlic cloves and slice the onion into uniform half-moons so they cook evenly.
Have your Creole seasoning measured out and your beef broth ready to pour. Since this dish relies on slow cooking, there is no need for searing the meat beforehand, which makes the prep work incredibly fast and efficient for any home cook.
Ingredients at a glance (5)
- 3 lb boneless beef chuck roast
- 6 cloves peeled garlic cloves
- 1 large yellow onion, sliced into half-moons
- 2 tbsp Creole seasoning
- 1 cup beef broth
Instructions
Initial Assembly
- Prep and AssemblePlace the beef chuck roast into the slow cooker insert. Scatter the peeled garlic cloves and the half-moon onion slices around the beef. Sprinkle the Creole seasoning evenly over the roast.Look for The beef should be centered in the slow cooker insert with the aromatics and spices evenly distributed around it.Tip Ensure the beef roast is patted dry with paper towels before placing it into the slow cooker for better seasoning adhesion.
The beef should be positioned securely in the slow cooker with the garlic and onions surrounding it. Everything is ready for the long, slow braising process that will tenderize the meat.
Slow Braising
- Slow CookingPour the beef broth over the roast, onions, and garlic. Cover the slow cooker with its lid and cook on low for 8 hours, or until the beef is very tender and shreds easily with a fork. Ensure the meat reaches an internal temperature of 145°F (63°C) and let it rest for at least 3 minutes.Look for The meat is done when it reaches an internal temperature of at least 145°F (63°C) and pulls apart easily with a fork.Safe temperature 145°F (63°C) internal temperature (steaks, chops and roasts)Tip Avoid lifting the lid during the first 6 hours to maintain a steady temperature inside the slow cooker.
The beef has finished its long cook time and is now incredibly soft. The kitchen should be filled with the savory aroma of the Creole spices and the rich beef juices.
Shredding and Resting
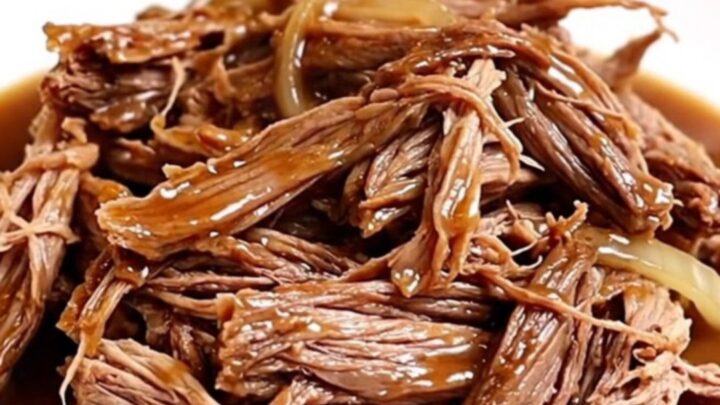
- Shred and FinishRemove the beef from the slow cooker and transfer it to a large plate or cutting board. Shred the beef into pieces using two forks. Return the shredded beef to the slow cooker and stir to coat it in the juices. Let it rest for 10 minutes before serving.Look for The beef should be soft and fully coated in the dark, flavorful pan juices.Tip If the gravy is too thin for your preference, you can remove the lid for the last 30 minutes of cooking to help it reduce slightly.
The meat is now fully shredded and coated in the thickened gravy. It is resting properly to ensure the juices are fully absorbed, making it ready for immediate serving and enjoyment.
Common mistakes
A common mistake is opening the lid too frequently, which releases the trapped heat and extends the cooking time significantly. Resist the urge to check the meat until the final hour.
Another mistake is not seasoning the beef thoroughly; ensure the Creole spices are distributed well across all sides of the roast.
Finally, do not rush the cooling process; let the meat rest after shredding so it absorbs the juices properly. Following these simple guidelines will prevent dry or bland results.
How to tell it’s done
The beef is perfectly done when it reaches an internal temperature of at least 145°F (63°C). You will know it is ready when the meat is extremely tender and pulls apart effortlessly with the pressure of a fork.
The liquid in the slow cooker should be dark, thickened, and highly aromatic. Always allow the meat to rest for at least 10 minutes after shredding so the juices redistribute, ensuring every bite is moist and flavorful before you serve it to your guests.
- Steaks, chops and roasts: 145°F (63°C) in the thickest part, then a 3-minute rest
Up next · Part 3 of 3
2 variations · storage & make-ahead · 3 answers · printable card
Tips, FAQ & printable recipe (Part 3)← Back to the ingredients (Part 1)