Dinner · Part 2 of 3: Instructions
Slow Cooker Mississippi Ground Turkey for an Easy Dinner Step-by-step instructions
- Prep
- Cook
- Total
- Serves
- 6
Before you start
Before starting, ensure your slow cooker insert is clean and dry. Have all your ingredients measured and ready to go. Because this is a dump-and-go recipe, preparation is minimal, but it is helpful to have your packets of seasoning open and your butter pre-sliced.
If you are using a slow cooker liner, now is the time to insert it for even easier cleanup later. Ensure your ground turkey is fully thawed if frozen, as cooking from frozen is not recommended for food safety reasons.
Ingredients at a glance (5)
- 2 lb ground turkey
- 1 cup whole pepperoncini
- 1 packet ranch dressing mix
- 1 packet au jus gravy mix
- 4 tbsp unsalted butter, sliced
Instructions
Layering the ingredients
- Assemble the slow cookerPlace the raw ground turkey into the base of the slow cooker, spreading it out into an even layer to ensure consistent cooking throughout the process.Look for The turkey should cover the bottom of the insert evenly.Tip Avoid over-packing the meat to allow heat to circulate properly.
The turkey should be spread in an even, flat layer across the bottom of the slow cooker. This ensures that the heat from the base of the unit cooks the meat uniformly. Check that the seasoning packets are evenly sprinkled over the surface and that the butter is distributed to allow for even melting across the entire batch.
Seasoning and melting
- Add seasonings and butterScatter the whole pepperoncini over the turkey. Sprinkle the ranch dressing mix and the au jus gravy mix evenly over the meat, then top with the sliced butter.Look for The seasonings should be evenly distributed across the surface of the turkey.Tip Ensure the butter slices are distributed to help coat the meat as they melt.
As the ingredients cook, the butter will melt and combine with the juices released by the turkey and the seasonings to form a rich, savory liquid. You should notice a pleasant, savory aroma filling the kitchen.
Ensure the lid remains tightly sealed to trap the steam, which is essential for keeping the turkey moist and tender throughout the cooking process.
Finalizing the texture
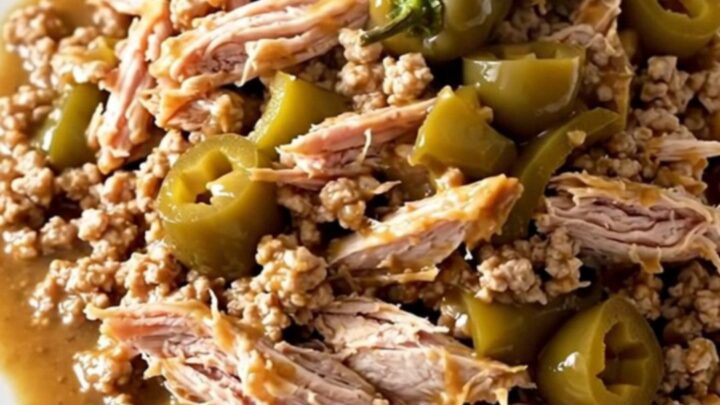
- Cook and serveCover and cook on low for 4 to 6 hours or high for 2 to 3 hours until the turkey reaches an internal temperature of 165°F (74°C). Break up the meat with a spoon before serving.Look for The turkey should be fully cooked, tender, and swimming in a savory, buttery sauce.Safe temperature 165°F (74°C) internal temperature (poultry)Tip Use a meat thermometer to ensure the turkey reaches the safe internal temperature.
At the end of the cooking phase, the turkey should be fully cooked and incorporated into the sauce. Give the mixture a thorough stir to ensure all the seasonings are well-distributed and the meat is broken into the desired consistency. The final product should be steaming, fragrant, and ready to be served immediately over your chosen side dish.
Common mistakes
A common mistake is failing to break up the turkey sufficiently before serving, which can lead to large, tough chunks of meat. Another error is neglecting to check the internal temperature, as cooking times can vary based on the specific heat output of your slow cooker.
Avoid opening the lid frequently during the cooking process, as this releases heat and moisture, which significantly extends the cooking time and can lead to uneven results.
How to tell it’s done
The turkey is ready when it is completely cooked through and has reached an internal temperature of 165°F (74°C). When you stir the mixture, the meat should easily break apart into small, tender crumbles.
The sauce should appear thickened and glossy from the melted butter, and the pepperoncini should be soft and translucent. If the meat appears pink or clumped together, continue cooking for another 20 minutes before checking the temperature again.
- Poultry: 165°F (74°C) in the thickest part
- Ground meat: 160°F (71°C) in the thickest part
Up next · Part 3 of 3
2 variations · storage & make-ahead · 3 answers · printable card
Tips, FAQ & printable recipe (Part 3)← Back to the ingredients (Part 1)