Dinner · Part 2 of 3: Instructions
Slow Cooker Maple Acorn Squash Pork Chops Step-by-step instructions
- Prep
- Cook
- Total
- Serves
- 4
Before you start
Before beginning, ensure that the acorn squash is thoroughly washed and scrubbed to remove any dirt from the skin. Carefully cut the squash into uniform wedges, removing the seeds and fibrous pulp from the center.
Pat the pork chops dry with paper towels to ensure they are clean. Having all your ingredients measured and ready to add to the slow cooker will make the assembly process seamless and efficient, allowing you to get the meal started in just a few minutes.
Ingredients at a glance (4)
- 4 boneless pork loin chops
- 1 medium acorn squash, cut into wedges
- 2 tbsp cinnamon sugar
- 1 cup maple broth
Instructions
Foundation
- Assemble the basePlace the boneless pork loin chops in an even layer at the bottom of the slow cooker insert. This ensures the meat stays moist and cooks evenly throughout the process.Look for The pork chops should cover the bottom of the slow cooker insert.Tip Avoid stacking the pork chops too high to ensure consistent cooking temperatures.
At this stage, the pork chops should be arranged in a single, even layer at the base of the slow cooker. Ensure the meat is not overlapping, as this helps the slow cooker distribute heat efficiently. Once the pork is in place, the foundation is set, and the focus moves to adding the aromatics and the squash to build the flavor profile of the dish.
Seasoning
- Add vegetables and seasoningsNestle the acorn squash wedges between and around the pork chops. Sprinkle the cinnamon sugar evenly over the top of the pork and squash, then pour the maple broth over the entire mixture.Look for The squash should be tucked in tightly so it remains submerged in the liquid.Tip Distribute the cinnamon sugar evenly to prevent clumping in one area.
The slow cooker will now contain the pork, the neatly tucked squash, and the maple broth drizzled over everything. The cinnamon sugar should be evenly distributed to ensure every piece of squash and pork gets a balanced coating. At this point, the ingredients are ready to begin the slow, steady process of melding together into a rich and aromatic meal.
Cooking
- Cook and serveCover and cook on low for 4 to 6 hours. Once the pork reaches an internal temperature of 145°F (63°C), remove the chops and let them rest for at least 5 minutes before serving with the tender squash.Look for The meat should be opaque and tender, and the squash should be soft when pierced with a fork.Safe temperature 145°F (63°C) internal temperature (steaks, chops and roasts)Tip Checking the internal temperature ensures the meat is perfectly safe and juicy.
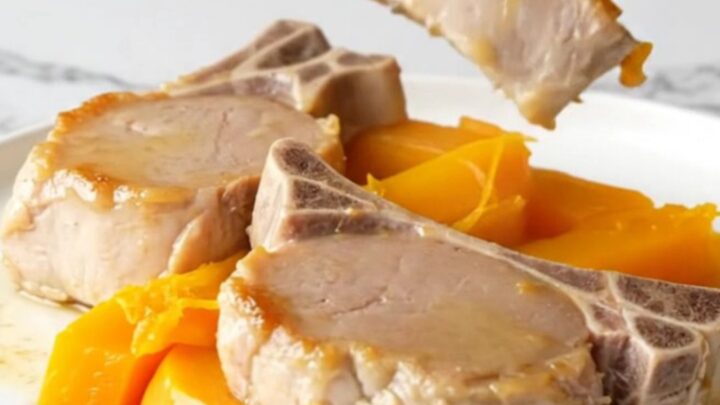
Once the cooking is complete, the kitchen should smell warm and sweet. The liquid will have transformed into a light, syrupy glaze, and the pork will be tender and opaque.
The squash should be soft and golden, having absorbed the maple broth. Before serving, verify the internal temperature of the pork to ensure it has reached the necessary 145°F (63°C) for safety and quality.
Common mistakes
A common mistake is overcrowding the slow cooker, which can prevent the heat from circulating properly and lead to uneven cooking. Additionally, failing to cut the acorn squash into uniform wedges can result in some pieces turning into mush while others remain undercooked.
Avoid lifting the lid too frequently during the cooking process, as this releases steam and significantly increases the total cooking time, which can dry out the pork.
How to tell it’s done
The pork is done when it is opaque throughout and reaches an internal temperature of 145°F (63°C) when measured with a meat thermometer in the thickest part of the chop. The acorn squash should be fork-tender, meaning a fork should slide through the flesh with zero resistance.
If the meat has not reached the target temperature, continue cooking for another 20 minutes before checking again. Always allow the meat to rest for 5 minutes to ensure maximum juiciness before plating.
- Steaks, chops and roasts: 145°F (63°C) in the thickest part, then a 3-minute rest
Up next · Part 3 of 3
2 variations · storage & make-ahead · 3 answers · printable card
Tips, FAQ & printable recipe (Part 3)← Back to the ingredients (Part 1)