Dinner · Part 1 of 3: Ingredients
Slow-Cooker Mango Habanero Beef Barbacoa
- Prep
- Cook
- Total
- Serves
- 6
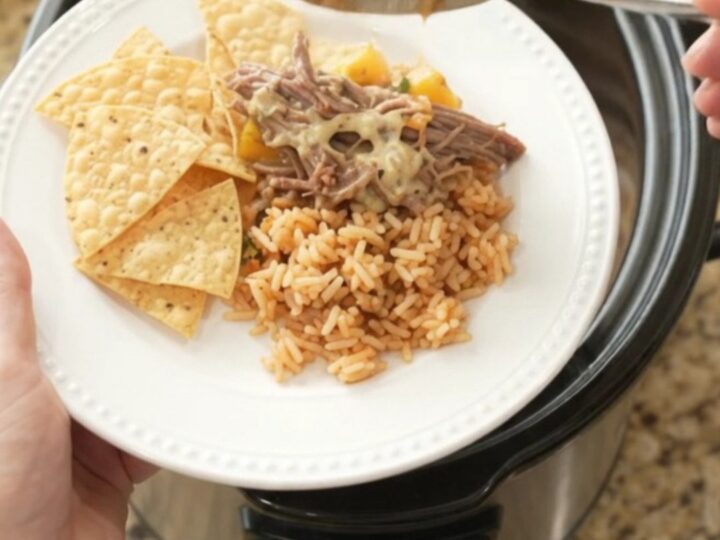
This slow-cooker mango habanero beef barbacoa is the ultimate dump-and-go dinner. Cubes of beef chuck simmer all day with ripe mango, tangy habanero salsa, and a rich blend of queso blanco and pepper jack cheese.
The result is fork-tender, sweet-heat shredded beef that’s perfect over chips, rice, or in tacos. With just a few minutes of prep and a long, hands-off cook, this recipe delivers big flavor with minimal effort. It’s the kind of meal that makes a busy day feel like a fiesta.
Set the slow cooker, walk away, and come back to a bubbling pot of tender, saucy beef. This recipe layers simple ingredients—beef chuck, mango, habanero salsa, cilantro, queso blanco, and pepper jack—into a rich, deeply flavored barbacoa.
The natural sweetness of mango balances the heat of habanero, while the melted cheeses create a creamy, stretchy sauce that clings to every shred of beef. Whether served over crispy tortilla chips or alongside Mexican rice, this dish is a crowd-pleasing dinner that feels special without demanding much attention.
Ingredients
- 2 1/2 lb beef chuck cubes
- 2 cups diced ripe mango
- 1 cup habanero lime salsa
- 1/2 cup chopped fresh cilantro
- 1 cup warm white queso blanco dip
- 1 1/2 cups shredded spicy pepper jack cheese
Why this recipe works
The slow cooker does all the heavy lifting here. Cooking beef chuck on LOW for 8 hours breaks down the collagen in the meat, turning tough cubes into fork-tender shreds. The long, gentle heat also allows the flavors of mango, habanero, and cheese to meld into a cohesive, rich sauce. Because everything goes into the pot at once, there’s no browning or layering required—just dump, cover, and let time work its magic.
The combination of fruit, chile, and cheese is a classic sweet-heat pairing. Mango provides natural sugars that caramelize slightly during cooking, while habanero salsa adds a bright, spicy kick.
Queso blanco and pepper jack melt into a creamy base that tempers the heat and gives the sauce body. The result is a balanced, crave-worthy dish that satisfies both spice lovers and those who prefer a milder, cheesy comfort meal.
Notes and substitutions
Beef chuck is the ideal cut here because it has enough marbling to stay moist during the long cook. Look for cubes that are about 1 to 2 inches; if they’re larger, they’ll still shred fine, just take a bit longer. The mango should be ripe but still firm enough to hold their shape during the first few hours. Frozen mango works too—just add it straight from the bag.
Habanero lime salsa can be found in the international aisle of most supermarkets, but any fruity, spicy salsa will work. Adjust the heat by choosing a milder salsa or adding more habanero for extra fire.
The queso blanco dip should be the warm, pourable kind, not the solid block. If using a block, melt it with a splash of milk before adding. Pepper jack adds a final layer of creamy heat; for less spice, use regular Monterey Jack.
- habanero lime salsa: Use regular salsa plus 1 minced habanero and 2 tablespoons lime juice for similar heat.
- white queso blanco dip: Use a block of white American cheese melted with 1/4 cup milk, or store-bought queso.
- spicy pepper jack cheese: Use Monterey Jack with 1 teaspoon crushed red pepper flakes.
- beef chuck cubes: Substitute beef brisket or round roast, cut into 2-inch cubes.
Equipment
- 6-quart slow cooker
- cutting board
- chef's knife
- measuring cups
- mixing spoon
- serving spoon
Up next · Part 2 of 3
5 steps · 8 h of cooking · what to look for at each stage
Step-by-step instructions (Part 2)