Dinner · Part 2 of 3: Instructions
Slow Cooker Lemon-Lime Soda Ham Step-by-step instructions
- Prep
- Cook
- Total
- Serves
- 8
Before you start
Before you begin, ensure your slow cooker is clean and the ceramic insert is properly seated. Take the ham out of the refrigerator about 20 minutes before cooking to take the chill off, which helps it cook more evenly.
Have your brown sugar, cinnamon, and soda measured and ready to go. Ensure you have a sturdy pair of tongs or a large fork to help transfer the ham safely after it has finished cooking, as it will be very tender and prone to falling apart.
Ingredients at a glance (4)
- 1 half spiral-sliced bone-in ham
- 1 cup brown sugar
- 1 tsp ground cinnamon
- 12 oz lemon-lime soda
Instructions
Preparation and Setup
- Prepare the hamPlace the spiral-sliced ham into the slow cooker, ensuring it fits comfortably in the basin. If the ham is too tall for the lid to close, you may need to trim the base slightly or use a larger vessel.Look for The ham is centered and stable in the cooker.Tip Ensure the spiral cut side faces up to allow the glaze to penetrate the slices.
At this stage, the ham is placed in the slow cooker. Ensure it is positioned securely so it does not tip. The focus here is on creating a stable base for the cooking process. Check that your slow cooker is plugged in and ready for the next phase of adding the sweet glaze ingredients.
Adding Aromatics
- Add flavoringsEvenly sprinkle the brown sugar and ground cinnamon over the surface of the ham, ensuring it gets between the slices. Pour the lemon-lime soda over the top, allowing it to pool at the bottom of the slow cooker.Look for The sugar begins to dissolve into the liquid.Tip Do not skip the cinnamon as it balances the sweetness of the soda.
The brown sugar, cinnamon, and soda are added to the cooker. You should see the sugar settling into the crevices of the spiral slices. The soda will create a light foam as it meets the sugar. This is the point where the base of your flavorful, caramelized glaze is established before the cooking begins.
Slow Cooking and Resting
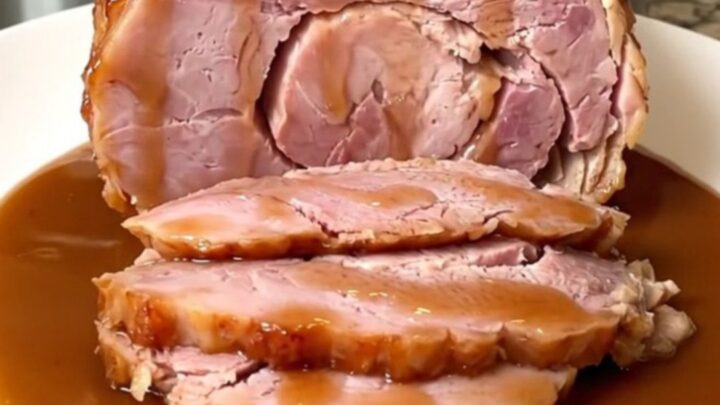
- Cook and serveCover and cook on low for 4 to 6 hours. Once the ham reaches an internal temperature of 145°F (63°C), remove it carefully. Let the meat rest for at least 10 minutes before slicing and serving with the reduced pan juices.Look for The ham is heated through and the glaze is thick and syrupy.Safe temperature 145°F (63°C) internal temperature (steaks, chops and roasts)Tip Baste the ham with the pan juices halfway through for extra flavor.
The ham has finished its time in the slow cooker. The meat should be tender and steaming, with a fragrant aroma of cinnamon and citrus. The glaze will have thickened into a rich, glossy coating. Ensure the ham rests on a cutting board for at least 10 minutes to allow the juices to redistribute.
Common mistakes
A common mistake is overcrowding the slow cooker. If the ham is too large, the lid will not seal properly, leading to moisture loss and uneven cooking.
Another error is checking the ham too frequently; every time you open the lid, you lose heat and steam, which significantly increases the total cooking time.
Avoid using high heat settings, as this can cause the sugar in the glaze to burn prematurely rather than melting into a smooth, delicious sauce that coats the meat perfectly.
How to tell it’s done
The ham is done when it is heated through and reaches an internal temperature of 145°F (63°C). Use a meat thermometer inserted into the thickest part of the meat, avoiding the bone, to verify the temperature.
The meat should look moist and have a slightly darkened, caramelized appearance from the brown sugar glaze. The slices should separate easily from the bone, and the sauce at the bottom of the slow cooker should be thick and syrupy, perfect for drizzling over the finished slices before serving.
- Steaks, chops and roasts: 145°F (63°C) in the thickest part, then a 3-minute rest
Up next · Part 3 of 3
2 variations · storage & make-ahead · 3 answers · printable card
Tips, FAQ & printable recipe (Part 3)← Back to the ingredients (Part 1)