Dinner · Part 2 of 3: Instructions
Slow Cooker Lamb Neck and Green Lentils Step-by-step instructions
- Prep
- Cook
- Total
- Serves
- 4
Before you start
Before beginning, ensure the slow cooker is placed on a stable, heat-resistant surface. Rinse the green lentils thoroughly under cold running water in a fine-mesh sieve to remove any debris. Peel the onion and stud it with whole cloves for better flavor infusion.
Dice the carrots into small, uniform cubes to ensure they soften correctly during the long braise. Have all ingredients measured and ready, as this recipe relies on a quick assembly process to get the slow cooker started without unnecessary delays.
Ingredients at a glance (6)
- 2 lbs lamb neck slices
- 1 1/2 cups green lentils, rinsed
- 2 cups diced carrots
- 1 whole onion with cloves
- 1 bay leaf
- 3 cups chicken broth
Instructions
Preparation and assembly
- Assemble the basePlace the lamb neck slices into the bottom of the slow cooker. Add the rinsed green lentils and the diced carrots on top of the meat, spreading them out evenly across the surface.Look for The lamb is arranged in a single layer at the bottom of the cooker.Tip Ensure the lamb is at the bottom to allow for proper braising throughout the long cooking process.
The lamb is layered at the bottom with the vegetables and lentils added. The ingredients should look neat and ready for the liquid. Check that the onion is properly studded with cloves and the bay leaf is positioned on top to impart its aroma during the long, slow cooking process.
Adding liquid and aromatics
- Add aromatics and liquidNestle the whole onion, which has been studded with cloves, into the center of the pot. Place the bay leaf on top, then pour the chicken broth over all the ingredients until everything is partially submerged.Look for The broth covers the ingredients sufficiently for a slow braise.Tip Adding the onion whole allows it to flavor the entire dish without needing to chop it finely.
The chicken broth should cover the ingredients just enough to facilitate a gentle braise. The pot should smell fresh and aromatic as the ingredients settle. Ensure the slow cooker is set to the low setting, which is critical for achieving the desired tenderness in the lamb.
Slow braising process
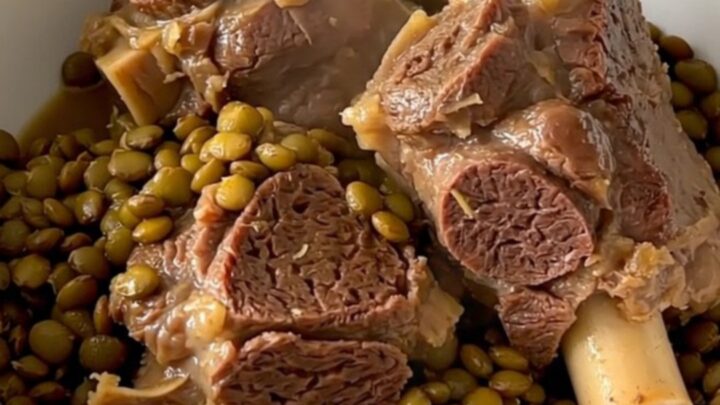
- Braise until tenderCover the slow cooker and cook on low for 8 hours. When finished, the lamb should reach an internal temperature of 145°F (63°C). Remove the lamb, let it rest for 5 minutes, then serve hot over the cooked lentils.Look for The lamb meat pulls away easily from the bone with a fork.Safe temperature 145°F (63°C) internal temperature (steaks, chops and roasts)Tip The resting period allows the juices to redistribute for maximum tenderness.
As the braising concludes, the kitchen should be filled with a rich, savory aroma. The liquid will have transformed into a glossy, thickened sauce.
Use a fork to test the meat's tenderness; it should feel soft and yield immediately when pressed. The lamb is ready once it reaches 145°F (63°C).
Common mistakes
A common mistake is using a cut of meat that is too lean, which can result in dry, stringy lamb after a long cooking time. Avoid over-salting the broth at the start, as the liquid will reduce and concentrate the flavors; it is better to season to taste just before serving.
Ensure the slow cooker lid is properly sealed throughout the process; lifting the lid frequently releases heat and moisture, which extends the cooking time and can affect the final texture of the lentils.
How to tell it’s done
The dish is considered done when the lamb neck is fork-tender, meaning the meat pulls away from the bone with minimal pressure. Use a digital meat thermometer to ensure the thickest part of the lamb has reached at least 145°F (63°C).
The lentils should be soft and tender but still hold their shape, and the cooking liquid should have reduced slightly to a rich, savory gravy consistency. Always allow the meat to rest for 5 minutes before serving to ensure it retains its juices.
- Steaks, chops and roasts: 145°F (63°C) in the thickest part, then a 3-minute rest
Up next · Part 3 of 3
2 variations · storage & make-ahead · 3 answers · printable card
Tips, FAQ & printable recipe (Part 3)← Back to the ingredients (Part 1)