Dinner · Part 2 of 3: Instructions
Slow Cooker Korean Ground Beef for an Easy Weeknight Dinner Step-by-step instructions
- Prep
- Cook
- Total
- Serves
- 4
Before you start
Before starting, ensure your slow cooker is clean and placed on a stable, heat-resistant surface. Have your ground beef, chopped green onions, garlic powder, and soy sauce mixture pre-measured and ready.
If you are serving this with rice and cucumber, prepare the rice according to your preferred method and slice the fresh cucumber into thin rounds, keeping them chilled in the refrigerator until it is time to assemble the final bowls.
Ingredients at a glance (4)
- 1 lb lean ground beef
- 1/4 cup chopped green onions
- 1 tsp garlic powder
- 3/4 cup sweet soy sauce mixture
Instructions
Layering the ingredients
- Prepare the slow cookerPlace the raw lean ground beef into the bottom of the slow cooker, ensuring it is spread out evenly to allow for consistent cooking throughout the process.Look for The beef should be placed directly onto the base of the slow cooker.Tip Using lean ground beef helps reduce excess grease in the final dish.
At this phase, the raw beef is neatly placed in the bottom of the slow cooker, topped with the green onions, garlic powder, and the soy sauce mixture. Ensure the ingredients are arranged evenly across the base of the vessel.
No cooking has occurred yet, so check that the beef is fully thawed if previously frozen and that all components are properly measured to ensure the correct flavor balance.
The slow cooking process
- Add aromatics and sauceScatter the chopped green onions over the beef. Sprinkle the garlic powder evenly across the mixture, then pour the sweet soy sauce mixture over the top to coat the ingredients thoroughly.Look for Ensure the sauce covers the beef and onions evenly.Tip Layering the ingredients helps the flavors meld during the slow cooking process.
During this phase, the slow cooker works to combine the ingredients into a cohesive dish. The aroma of garlic and soy sauce should begin to fill the kitchen as the beef cooks gently. Check that your slow cooker is set to the correct heat setting and the lid is securely in place to maintain the necessary temperature for safe and effective cooking throughout the duration.
Final assembly
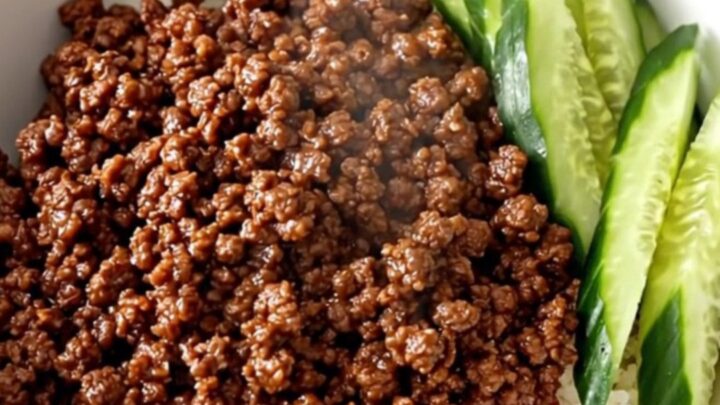
- Cook and serveCover and cook on low for 4 hours until the beef reaches an internal temperature of 160°F (71°C). Serve the glossy, steaming beef over white rice with fresh sliced cucumber.Look for The beef should be fully cooked, tender, and coated in a glossy sauce.Safe temperature 160°F (71°C) internal temperature (ground meat)Tip Check the temperature with a meat thermometer to ensure food safety.
The final phase involves confirming the beef is fully cooked and the sauce has reached a glossy, consistent texture. The beef should look dark and savory, perfectly complemented by the fresh green onions.
Once the safe internal temperature of 160°F (71°C) is confirmed, the dish is ready to be plated over warm white rice and garnished with the prepared cucumber slices for a refreshing contrast.
Common mistakes
Avoid over-crowding the slow cooker if you are doubling the recipe, as this can lead to uneven cooking. Do not skip the garlic powder, as it provides a crucial savory depth that balances the sweetness of the sauce.
Additionally, be careful not to lift the lid unnecessarily during the cooking time; every time the lid is opened, heat escapes, which can significantly increase the total time required to reach the safe internal temperature.
How to tell it’s done
To ensure the dish is perfectly cooked, use a digital meat thermometer to verify the internal temperature of the ground beef. The beef is finished when it reaches a safe internal temperature of 160°F (71°C). At this stage, the meat should be uniform in color, tender to the touch, and completely coated in the thickened, glossy soy-based sauce that has developed during the cooking process.
- Ground meat: 160°F (71°C) in the thickest part
Up next · Part 3 of 3
2 variations · storage & make-ahead · 3 answers · printable card
Tips, FAQ & printable recipe (Part 3)← Back to the ingredients (Part 1)