Dinner · Part 2 of 3: Instructions
Slow Cooker Kielbasa Tortellini with Mozzarella Step-by-step instructions
- Prep
- Cook
- Total
- Serves
- 6
Before you start
Before starting, slice the kielbasa into 1/2-inch rounds. Cut the cream cheese into cubes and set aside. Measure the marinara and mozzarella. No need to pre-cook anything; this recipe relies on the slow cooker to do all the work.
Ensure the slow cooker is clean and ready. Have a large spoon or spatula ready for stirring at the end. If you plan to serve immediately, set the table and have bowls or plates ready.
Ingredients at a glance (5)
- 2 lb smoked kielbasa sausage, sliced into 1/2-inch rounds
- 20 oz refrigerated three-cheese tortellini
- 24 oz crushed San Marzano marinara sauce
- 8 oz cream cheese, softened and cut into cubes
- 2 cups shredded whole-milk mozzarella cheese
Instructions
Layer and Load
- Layer the BasePlace the sliced kielbasa in the bottom of a 6-quart slow cooker. Spread the tortellini over the sausage. Pour the marinara sauce over the top, making sure the tortellini are mostly covered.Look for The sausage and tortellini should be evenly distributed in the slow cooker.Tip No need to stir yet; the layers will meld during cooking.
- Add the Cream CheesePlace the cubed cream cheese in the center of the slow cooker, pushing it gently into the sauce. Do not stir; it will melt and create a creamy sauce as it cooks.Look for The cream cheese sits on top of the sauce.Tip Cubing the cream cheese helps it melt more evenly.
- Top with MozzarellaSprinkle the shredded mozzarella evenly over the top of the slow cooker contents.Look for The mozzarella completely covers the top.Tip Use whole-milk mozzarella for the best melt and flavor.
You should see distinct layers: sausage on the bottom, tortellini in the middle, and marinara covering them. The cream cheese sits in the center, and mozzarella blankets the top. The ingredients look fresh and vibrant, with no browning yet. This phase is quick and mess-free.
Slow Simmer
- Slow CookCover the slow cooker and cook on LOW for 4 hours, or on HIGH for 2 hours, until the tortellini are tender and the sauce is bubbling around the edges.Look for The sauce is bubbling and the cheese is melted.Tip Avoid lifting the lid during cooking to keep the heat steady.
After a few hours, the slow cooker will be fragrant with garlic, herbs, and smoked sausage. The sauce will be bubbling gently around the edges, and the cheese will be melted and bubbly. The tortellini should be tender when pierced with a fork. The kitchen smells like a cozy Italian kitchen.
Finish and Serve
- Stir and ServeOnce the tortellini are cooked, gently stir everything together to combine the creamy sauce. Serve hot, spooning extra sauce over each portion.Look for The sauce is creamy and the tortellini are tender.Tip Stir gently to avoid breaking the tortellini.
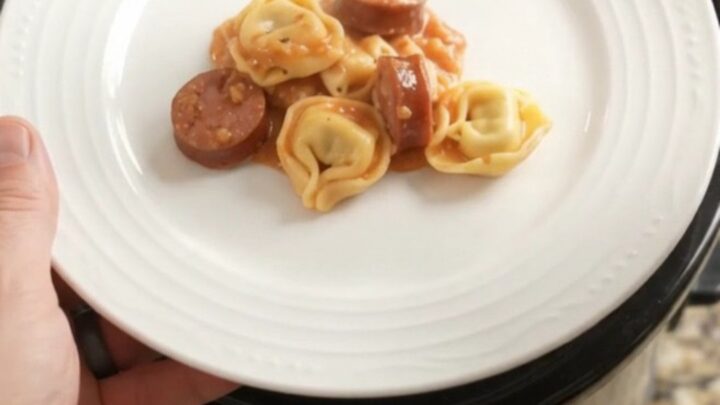
The sauce is creamy and pinkish-orange from the cream cheese, with melted mozzarella strings. The tortellini are plump and tender, and the kielbasa slices are slightly caramelized.
Stirring brings everything together into a cohesive, saucy dish. The aroma is rich and savory, perfect for serving.
Common mistakes
One common mistake is overcooking the tortellini, which can make them mushy. Stick to the recommended cook time and check for doneness early. Another issue is curdling of the cream cheese if the slow cooker is too hot or if the cream cheese is cold; softening it and using LOW heat prevents this.
Avoid lifting the lid frequently, as it releases heat and extends cooking time. Finally, don't skip stirring at the end; it ensures the sauce is evenly distributed.
How to tell it’s done
The dish is done when the tortellini are tender and have absorbed some of the sauce. The sauce should be bubbling around the edges and the cheese fully melted and incorporated. The kielbasa will be heated through and slightly caramelized at the edges.
A gentle stir should show a creamy, cohesive sauce. If using a food thermometer, the internal temperature of the dish should be at least 165°F (74°C) for food safety, even though the kielbasa is pre-cooked.
Up next · Part 3 of 3
4 variations · storage & make-ahead · 5 answers · printable card
Tips, FAQ & printable recipe (Part 3)← Back to the ingredients (Part 1)