Dinner · Part 2 of 3: Instructions
Slow Cooker Kielbasa and Brussels Sprouts for an Easy Dinner Step-by-step instructions
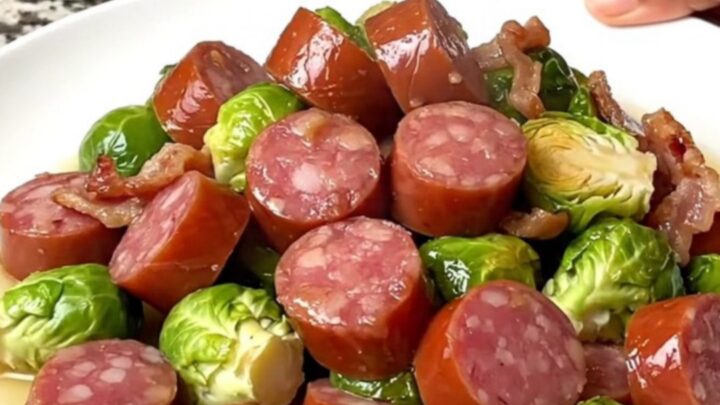
- Prep
- Cook
- Total
- Serves
- 4
Before you start
Before you begin, ensure your slow cooker is clean and positioned on a stable, heat-resistant surface near an electrical outlet. Prepare the ingredients by slicing the kielbasa into consistent half-inch rounds. Trim the ends of the Brussels sprouts and slice them in half vertically.
Chop the bacon into small, uniform pieces to ensure it distributes evenly throughout the dish. Having all ingredients prepped and ready to go before you start assembling will make the process smooth and efficient.
Ingredients at a glance (6)
- 1 lb kielbasa, sliced into rounds
- 1 lb Brussels sprouts, halved
- 6 oz bacon, chopped
- 1 tsp garlic powder
- 1/2 tsp black pepper
- 1/2 cup chicken broth
Instructions
Layering the ingredients
- Assemble the slow cookerPlace the sliced kielbasa rounds into the bottom of the slow cooker, arranging them in an even layer. Add the halved Brussels sprouts and chopped bacon on top of the sausage.Look for ensure the kielbasa covers the base of the insertTip Layering the heavier items at the bottom ensures even heat distribution.
The slow cooker should look neatly organized with the kielbasa forming a solid base. The bacon and sprouts should be evenly distributed on top.
Ensure that the ingredients are not piled too high above the fill line of the ceramic insert to allow for proper heat circulation throughout the cooking cycle.
Seasoning and liquid
- Season and add liquidSprinkle the garlic powder and black pepper evenly over the ingredients. Pour the chicken broth over the mixture, ensuring it reaches the bottom to provide moisture for steaming.Look for ensure the seasonings are distributed across all ingredientsTip Do not over-salt, as the kielbasa and bacon are already quite savory.
The garlic powder and pepper should be visible as a light dusting over the vegetables. The chicken broth should pool slightly at the bottom. Check that the liquid is not overflowing, as it will combine with the juices released by the vegetables and meat to create a savory sauce.
Final cooking phase
- Cook and serveCover the slow cooker and set it to cook on high for 4 hours. Once the time is up, ensure the sausage has reached an internal temperature of 160°F (71°C) before serving the dish hot.Look for the Brussels sprouts should be tender and the bacon fully renderedSafe temperature 160°F (71°C) internal temperature (ground meat)Tip If the sprouts are not tender enough, add 30 minutes of cooking time.
The kitchen should smell savory and smoky. The Brussels sprouts should appear tender and slightly wilted, and the bacon should be cooked through. Before serving, verify that the kielbasa is piping hot and that the juices have integrated with the spices to form a flavorful, cohesive sauce.
Common mistakes
Avoid overfilling the slow cooker, which can prevent the ingredients from cooking evenly and may lead to soggy vegetables. Another common mistake is using bacon that is too lean; the fat is necessary to provide flavor and moisture, so choose a standard-cut bacon rather than center-cut if possible.
Additionally, do not lift the lid during the cooking process unless absolutely necessary, as this releases heat and steam, significantly increasing the total time required to reach the desired tenderness for the sprouts.
How to tell it’s done
The dish is done when the Brussels sprouts are fork-tender and the bacon is fully rendered and soft. The kielbasa should be heated through to an internal temperature of 160°F (71°C).
The juices at the bottom of the slow cooker should be flavorful and slightly thickened by the rendered bacon fat. If the sprouts still feel firm, continue cooking for an additional 20 to 30 minutes, as cooking times can vary based on the specific heat output of your slow cooker model.
- Ground meat: 160°F (71°C) in the thickest part
Up next · Part 3 of 3
2 variations · storage & make-ahead · 3 answers · printable card
Tips, FAQ & printable recipe (Part 3)← Back to the ingredients (Part 1)