Dinner · Part 2 of 3: Instructions
Slow Cooker Jalapeno Butter Steak Bites Step-by-step instructions
- Prep
- Cook
- Total
- Serves
- 4
Before you start
Before beginning, ensure that your slow cooker is clean and placed on a stable, heat-resistant surface. Prepare the beef by trimming any excess gristle if necessary, then cut the sirloin into uniform 1-inch cubes to ensure even cooking.
Dice the fresh jalapenos carefully, remembering to wash your hands thoroughly afterward to avoid any irritation.
Measure out your butter and seasoning so that you are ready to assemble the ingredients quickly and efficiently, allowing the slow cooker to start the cooking cycle immediately once everything is combined.
Ingredients at a glance (4)
- 2 lb beef sirloin, cut into 1-inch cubes
- 3 whole fresh jalapenos, diced
- 1 packet fajita seasoning
- 1/2 cup unsalted butter, sliced
Instructions
Preparation and assembly
- Prepare the slow cookerPlace the cubed beef sirloin into the bottom of the slow cooker bowl. Ensure the meat is arranged in an even layer to promote consistent cooking throughout the process.Look for Meat is evenly distributed at the bottom.Tip Pat the beef dry with paper towels before cubing to help the seasoning adhere better.
The beef is carefully cubed into uniform pieces and placed into the slow cooker basin. It is important to ensure the meat is arranged in a single, even layer at the bottom of the vessel to guarantee that every single piece cooks at the same rate during the long, slow heat process.
Seasoning and buttering
- Add seasonings and butterScatter the diced jalapenos over the beef. Sprinkle the fajita seasoning packet evenly across the mixture, then arrange the slices of butter on top of the beef and peppers.Look for Butter slices are placed on top of the ingredients.Tip Ensure the seasoning covers all pieces of meat for uniform flavor.
The diced jalapenos are scattered evenly over the beef, followed by a thorough dusting of the fajita seasoning packet. Finally, the slices of butter are arranged across the top, which will slowly melt down to create the rich, flavorful glaze that defines this dish as the cooking progresses.
Slow cooking to perfection
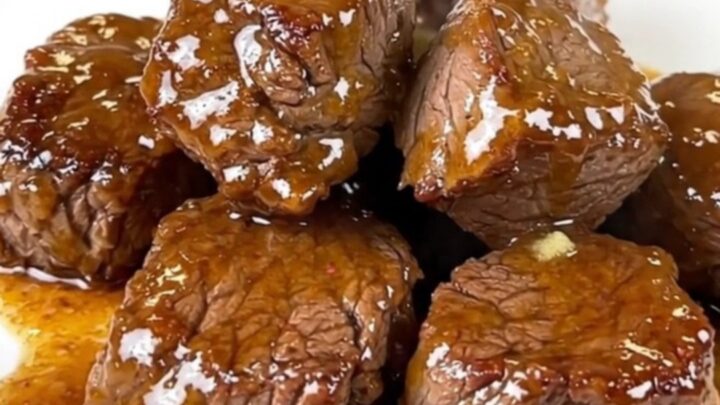
- Slow cook and serveCover the slow cooker and cook on low for 4 hours until the beef is tender and cooked through to 145°F (63°C). Once done, let the meat rest for 5 minutes before serving to ensure maximum juiciness.Look for Beef is tender and coated in a glossy, melted butter glaze.Safe temperature 145°F (63°C) internal temperature (steaks, chops and roasts)Tip Avoid lifting the lid during cooking to keep the temperature steady.
The meat is cooked until it reaches a tender, succulent state, fully coated in a rich, glossy, and slightly spicy butter glaze. The kitchen should smell savory and aromatic, indicating that the spices have fully infused the beef and the butter has emulsified into a perfect, thick sauce.
Common mistakes
A common mistake is cutting the beef into uneven sizes, which leads to some pieces being overcooked while others remain tough. Another error is checking the slow cooker too frequently; every time the lid is lifted, heat escapes, extending the cooking time and potentially affecting the tenderness of the meat.
Additionally, ensure you do not crowd the slow cooker beyond its capacity, as this can prevent the sauce from thickening properly and may lead to a watery result rather than the desired rich, buttery glaze that makes this dish so enjoyable.
How to tell it’s done
To ensure the steak is perfectly cooked, check that the internal temperature of the largest pieces has reached 145°F (63°C). The beef should be extremely tender when pierced with a fork and should easily pull apart.
The glaze should be glossy, thickened, and clinging to the meat, indicating that the butter and spices have successfully emulsified. Always allow the meat to rest for at least 5 minutes after removing it from the heat, which helps the juices redistribute throughout the cubes for the best possible texture and flavor.
- Steaks, chops and roasts: 145°F (63°C) in the thickest part, then a 3-minute rest
Up next · Part 3 of 3
2 variations · storage & make-ahead · 3 answers · printable card
Tips, FAQ & printable recipe (Part 3)← Back to the ingredients (Part 1)